Installing the New Optical Drive
NOTE: If you are installing an optical drive in a bay that did not previously have a drive in it, you
must remove the access panel and the bezel blank covering the opening of the bay before
proceeding. Follow the procedures in
Removing the Computer Access Panel on page 130 and
Removing a Bezel Blank on page 133.
1. Follow the instructions for removing the optical drive. Refer to Removing the Optical Drive
on page 140.
2. Attach the release latch to the new optical drive. Refer to
Preparing the New Optical Drive
on page 141.
3. With the back of the optical drive facing the computer and the release latch on the inner side of
the drive, align the drive with the opening in the front bezel.
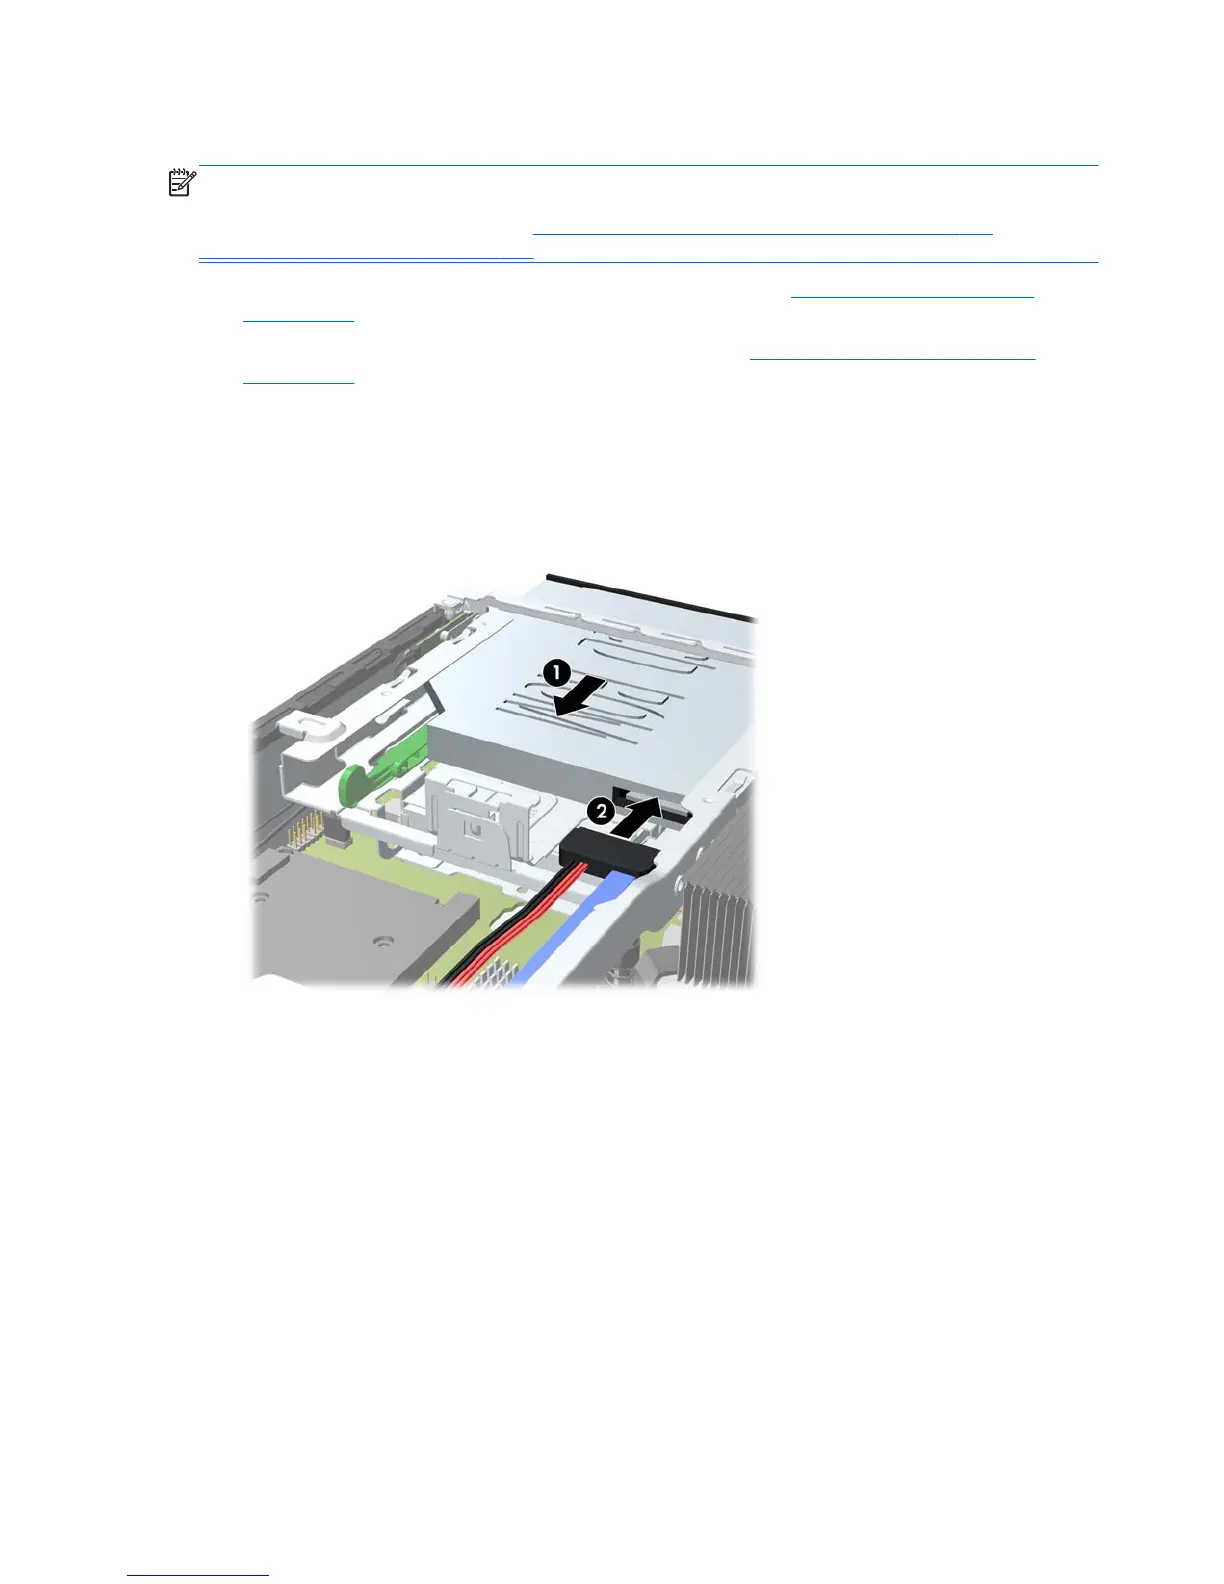
4. Slide the optical drive through the front bezel all the way into the bay so that it locks in place (1),
then connect the cable to the rear of the drive (2).
Figure 5-14 Installing the Optical Drive
5. Replace the front bezel and access panel.
6. If the computer was on a stand, replace the stand.
7. Reconnect the power cord and turn on the computer.
8. Lock any security devices that were disengaged when the computer cover or access panel was
removed.
142 Chapter 5 Ultra-Slim Desktop (USDT) Hardware Upgrades
 Loading...