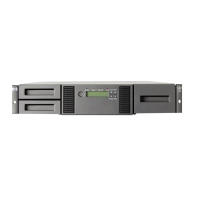
Figure 10 Removing the empty drive tray
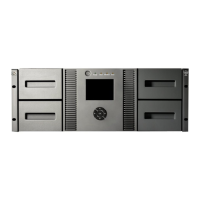
7. Loosen the two fasteners (1) clamping the top bracket on the drive tray. Then unscrew and
remove the drive blank(s).
Figure 11 Loosening the fasteners
8. To position and align the drive in the drive tray, use the holes labeled A1, A2, or B.
After the drive is aligned, secure the drive with retaining screws. With tape drives, always
use the screws provided with the tape drive.
CAUTION: When installing an LTO half-height tape drive, it is particularly important that
you use the 6 mm M3 screws provided with the drive. If the screws are too long, they may
damage the mechanism and void the warranty. Do not overtighten the screws; use the washers
provided in the screw pack.
9. If installing a second half-height drive, repeat Step 8.
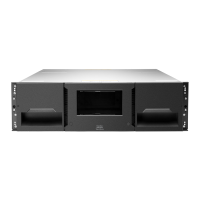
10. Re-tighten the two fasteners clamping the top bracket on the drive tray.
Figure 12 Tightening the fasteners
Drive Tray Removal and Installation 11
 Loading...