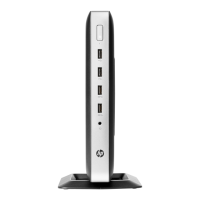
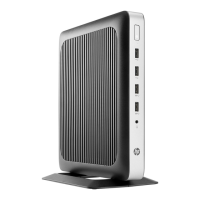
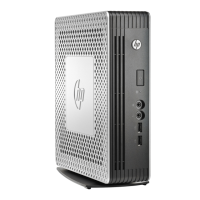
EasyManua.ls Logo

HP t630 Thin Client User Manual

HP t630 Thin Client
58 pages
To Next Page IconTo Next Page
To Previous Page IconTo Previous Page
Page #16 background image
3 Hardware changes
Warnings and cautions
Before performing upgrades be sure to carefully read all of the applicable instructions, cautions, and warnings in
this guide.
WARNING! To reduce the risk of personal injury or equipment damage from electric shock, hot surfaces, or re:
Energized and moving parts are inside. Disconnect power to the equipment before removing the enclosure.
Allow the internal system components to cool before you touch them.
Replace and secure the enclosure before re-energizing the equipment.
Do not plug telecommunications or telephone connectors into the network interface controller (NIC) receptacles.
Do not disable the AC power cord grounding plug. The grounding plug is an important safety feature.
Plug the AC power cord into a grounded (earthed) AC outlet that is easily accessible at all times.
To reduce the risk of serious injury, read the Safety & Comfort Guide. It describes proper workstation setup and
provides guidelines for posture and work habits that increase your comfort and decrease your risk of injury. It
also provides electrical and mechanical safety information. This guide is located on the web at
http://www.hp.com/ergo.
CAUTION: Static electricity can damage the electrical components of the thin client or optional equipment.
Before beginning the following procedures, be sure that you are discharged of static electricity by briey
touching a grounded metal object.
When the thin client is plugged into an AC power source, voltage is always applied to the system board. You must
disconnect the power cord from the power source before opening the thin client to prevent damage to internal
components.
Removing and replacing the access panel
Removing the access panel
WARNING! To reduce the risk of personal injury or equipment damage from electric shock, hot surfaces, or re,
ALWAYS operate the thin client with the access panel in place. In addition to enhancing safety, the access panel
may provide important instructions and identication information, which may be lost if the access panel is not
used. DO NOT use any access panel except the one that is provided by HP for use with this thin client.
Before removing the access panel, be sure that the thin client is turned o and the AC power cord is
disconnected from the AC outlet.
To remove the access panel:
1. Remove/disengage any security devices that prohibit opening the thin client.
2. Remove all removable media, such as USB ash drives, from the thin client.
3. Turn o the thin client properly through the operating system, and then turn o any external devices.
4. Disconnect the AC power cord from the AC outlet, and disconnect any external devices.
10 Chapter 3 Hardware changes

Table of Contents

Question and Answer IconNeed help?

Do you have a question about the HP t630 Thin Client and is the answer not in the manual?

HP t630 Thin Client Specifications

General IconGeneral
ProcessorAMD GX-420GI SOC
Power Supply65 W external power adapter
NetworkingRealtek GbE
Ports2 USB 2.0, 2 USB 3.0, 2 DisplayPort, 1 RJ-45, 1 Serial
Operating SystemHP ThinPro, Windows 10 IoT Enterprise, HP Smart Zero Core
Weight1.3 kg
Processor Speed2.0 GHz

Summary

About this book

Product features

Front panel components

Identifies and labels components on the front of the HP t630 Thin Client.

Rear panel components

Identifies and labels components on the rear of the HP t630 Thin Client.

Serial number location

Indicates where the serial number is located on the thin client for customer support.

Setup

Warnings and cautions

Provides critical safety instructions and warnings before performing setup procedures.

Attaching the stand

Instructions on how to attach and adjust the stand for the thin client.

Connecting the AC power cord

Steps to properly connect the AC power cord to the thin client and power source.

Securing the thin client

Instructions on how to secure the thin client using a security cable.

Routine thin client care

Guidelines for maintaining and cleaning the thin client to ensure longevity.

Hardware changes

Warnings and cautions

Provides critical safety instructions and warnings before performing hardware changes.

Removing and replacing the access panel

Detailed steps for removing and replacing the thin client's access panel for internal access.

Locating internal components

Diagram and list of key internal components within the thin client.

Replacing an M.2 storage module

Step-by-step guide for removing and installing M.2 storage modules.

Removing and replacing the battery

Instructions for safely removing and installing the internal system battery.

Installing an internal USB flash drive

Guide on how to install a USB 3.0 flash drive internally on the system board.

Upgrading system memory

Information and specifications for upgrading or replacing system memory modules.

Installing a memory module

Step-by-step instructions for installing a memory module into the thin client.

Computer Setup (F10) Utility, BIOS Settings

Computer Setup (F10) Utilities

Overview of the functionalities available within the Computer Setup (F10) Utility.

Using Computer Setup (F10) Utilities

Steps on how to access and navigate the Computer Setup Utilities menu.

Computer Setup-File

Details on the 'File' section within Computer Setup, including system information and exit options.

Computer Setup-Storage

Configuration options for storage devices, SATA emulation, and boot order within Computer Setup.

Computer Setup-Security

Security settings within Computer Setup, including passwords and device access control.

Computer Setup-Power

Power management settings available within the Computer Setup utility.

Computer Setup-Advanced

Advanced configuration options for power-on behavior, onboard devices, and bus options.

Changing BIOS Settings from the HP BIOS Configure Utility (HPBCU)

Instructions for changing BIOS settings using the HP BIOS Configure Utility (HPBCU).

Diagnostics and Troubleshooting

LEDs

Explanation of Power and IDE Flash Activity LEDs and their status indications.

Wake-on LAN

How to enable or disable Wake-on LAN (WOL) functionality through Computer Setup.

Power-On Sequence

Description of the hardware initialization and diagnostic tests performed during power-on.

Resetting the Setup and Power-on passwords

Procedure to reset forgotten Setup and Power-on passwords using a jumper.

Power-on diagnostic tests

Details on basic integrity tests performed by the system during power-on.

Interpreting POST diagnostic front panel LEDs and audible codes

Guide to understanding front panel LED and audible codes for POST errors.

POST numeric codes and text messages

Explanation of POST errors indicated by numeric codes and specific text messages.

Diskless (No-Flash) unit troubleshooting

Troubleshooting steps for diskless units regarding boot priority and network issues.

Configuring a PXE server

Information and steps for configuring a Preboot Execution Environment (PXE) server.

Using HP ThinUpdate to restore the image

HP ThinUpdate Image Downloads

Download images from HP to local storage or a USB flash drive for deployment.

HP ThinUpdate Image Capture

Capture an HP thin client image and save it to a USB flash drive.

HP ThinUpdate Add-on Downloads

Download add-ons from HP to local storage or a USB flash drive.

HP ThinUpdate USB Drive Management

Manage USB flash drives for creating bootable media and copying image files.

Device management

System BIOS

Updating or restoring a BIOS

Instructions on updating or restoring the system BIOS on the thin client.

Using HP PC Hardware Diagnostics (UEFI)

Starting HP PC Hardware Diagnostics (UEFI)

Steps to initiate hardware diagnostic tests using the UEFI tool.

Downloading HP PC Hardware Diagnostics (UEFI) to a USB device

Guide on how to download the diagnostic tool onto a USB drive.

Power cord set requirements

General requirements

General requirements for power cord sets applicable to all countries.

Japanese power cord requirements

Specific power cord requirements for use in Japan.

Country-specific requirements

Additional power cord requirements specific to various countries.

Statement of Volatility

Specifications

Related product manuals