114242 5-1 REV B
ENGINE MAINTENANCE
General Engine Maintenance
Detailed instructions and recommendations for break-in and
regular maintenance are specified in the Engine Owner’s Man-
ual. Please refer to this manual for engine servicing, lubricating
oil levels with quality and viscosity recommendations, bolt
torques, etc. The engine warranty is backed by the manufacturer.
Special attention should be paid to applicable data which will
not be duplicated here.
Engine Oil and Filter
Check engine oil daily and after every 4 hours of operation.
Machine must be setting level when checking oil. Refer to
engine manual and maintenance schedule for oil recommenda-
tion and capacities.
Change the engine oil and filter after the first 5 hours of oper-
ation and per the engine manufacturer’s recommendations after
that. If mower is being operated in extremely dirty conditions,
then it is recommended oil be changed more frequently.
IMPORTANT: When removing the oil filter take precautions to
minimize oil spillage on the exhaust system.
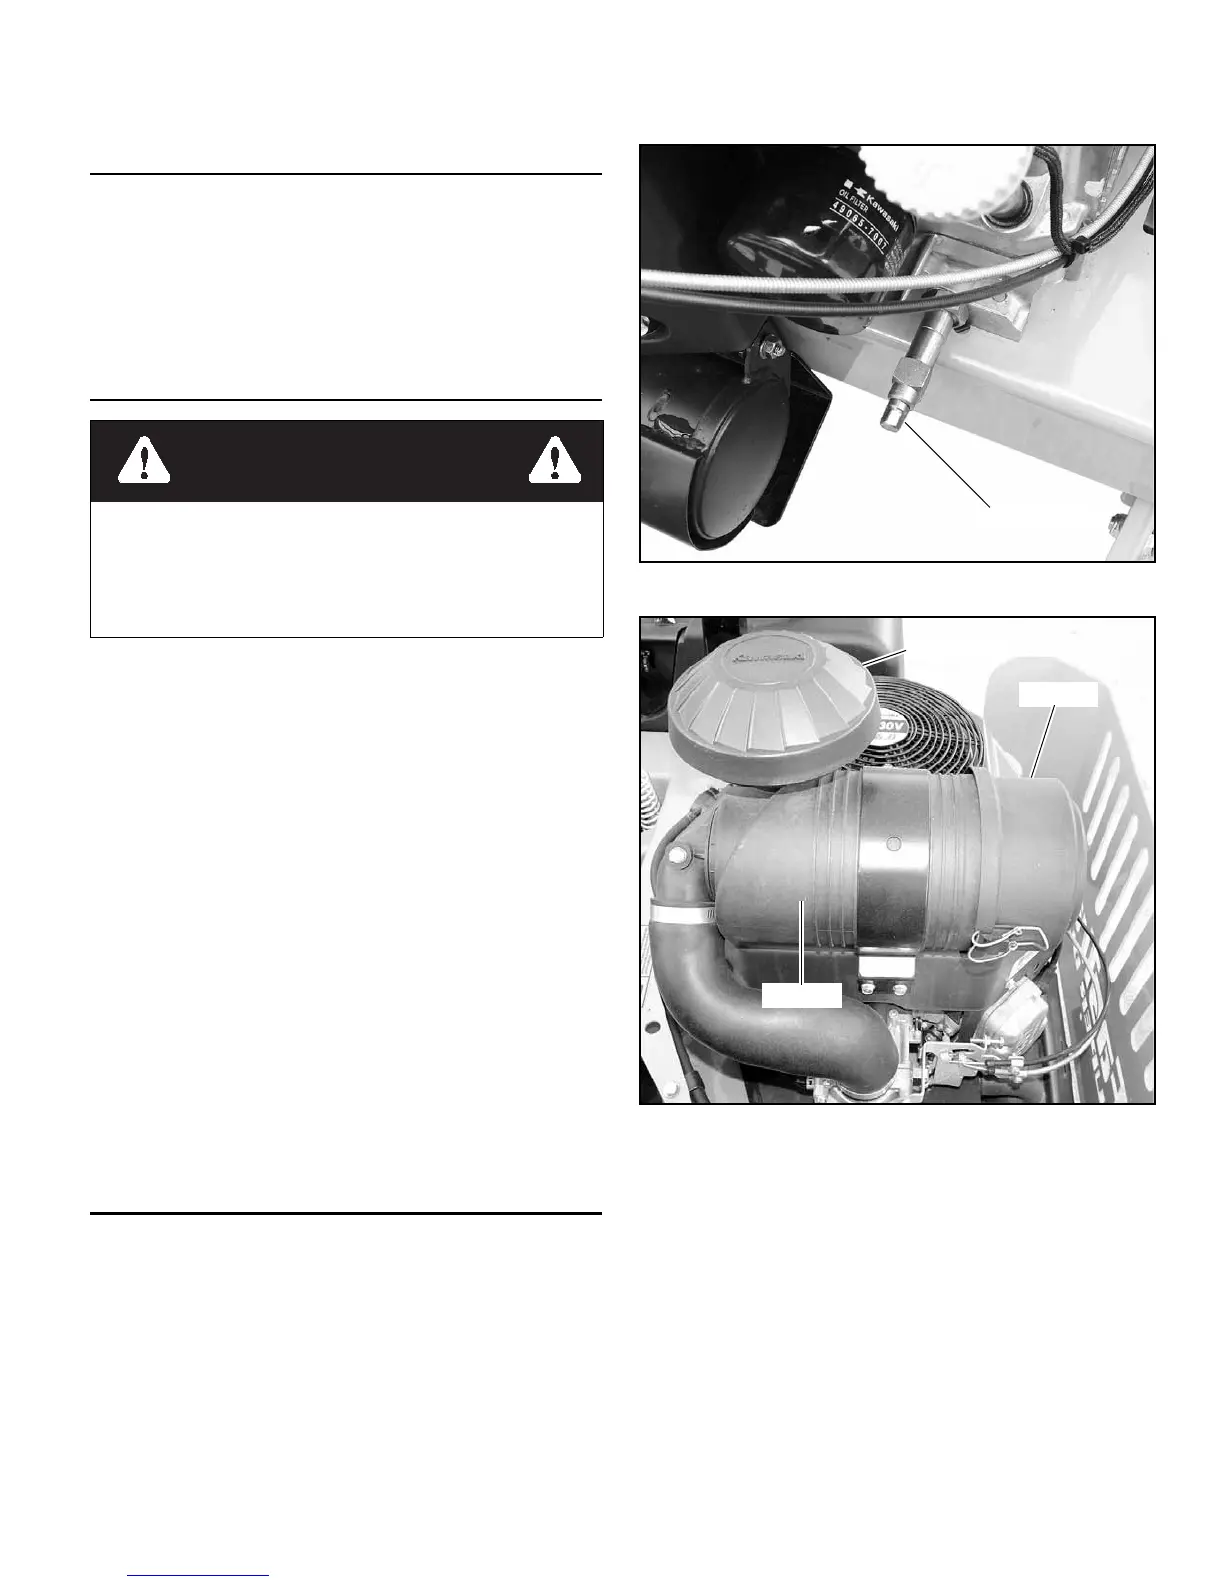
Draining the engine oil:
1. Locate the oil drain valve on the engine. Figure 5-1,
2. Position a suitable oil drain container under the machine
below the oil drain valve.
3. Twist the valve counterclockwise to open the valve.
Allow 10 minutes for engine oil to adequately drain.
4. After oil is drained, close the valve by twisting it
clockwise.
5. Once the valve is closed, clean up any spilled oil.
IMPORTANT: All oil drips or spills must be cleaned off
of the exhaust system before operating the machine.
Engine Air Filter
Perform engine air filter maintenance per the Maintenance
Schedule shown elsewhere in this manual.
A specially designed dry filter is standard equipment on these
mowers and supplies clean combustion air to the engine. Figure
5-2
These mowers are equipped with a safety filter. The filter ele-
ment slides over the safety filter. Figure 5-3
The safety filter does not require servicing unless it becomes
contaminated with dirt or moisture.
Recommended service procedure
1. Release clamps and remove element. Clean the canister
with a damp cloth.
2. Before installing a new element, inspect it by placing a
bright light inside and rotating the element slowly,
looking for any holes or tears in the paper. Also check
gaskets for cuts or tears. Do not attempt to use a damaged
element which will allow abrasive particles to enter the
engine.
3. Reinstall the dust cap. Make sure it seals all the way
around the air cleaner body, then tighten the clamps.
Figure 5-2
4. Check all fittings and clamps periodically for tightness
and inspect hoses for holes or cracks.
5. Periodically check the intake hose for signs of ingested
dust. Locate and repair the source of ingested dirt.
6. Never operate the machine without an air filter installed.
If the engine has been running and is up to operating tem-
perature, allow the engine to cool before changing the oil.
Engine and engine oil will be very hot, so be very careful
when changing oil and wear the appropriate protective
gear to avoid being burned or exposed to engine oil.
Figure 5-1
Figure 5-2
Pre-cleaner
Canister
Dust cap
 Loading...