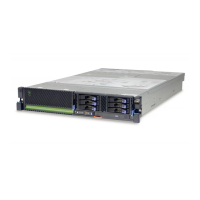
Resetting the tape drive
You might need to reset your tape drive. Use the procedure in this topic to perform this task.
Use this information to reset your tape drive, without affecting server operation. Allow up to 2 minutes
for the entire tape drive process to complete.
Attention: Resetting a tape drive before the current backup operation has completed can cause loss of
customer data.
To reset the tape drive, complete the following steps:
1. Press and hold the eject button for 20 seconds, and then release the button. The LEDs on the drive
flash while the reset function is in process.
2. After the LEDs stop flashing, wait approximately one minute for the drive to complete the reset
operation. The drive is then ready to use.
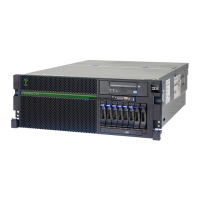
160/320 GB DAT320 SAS tape drive (FC 5661)
Learn about the features of this media device.
Table 47. 160/320 GB DAT320 SAS tape drive features
Feature Description
Description The 160/320 GB DAT320 SAS Tape Drive is a 5.25-inch, half-high, SAS drive, which provides
a high capacity for save/restore and achieve functions. To see an illustration of this drive, see
Figure 8 on page 64. This tape drive uses IBM DAT320, 4 mm data cartridges and is
compression capable, providing a capacity of up to 320 GB with 2:1 compression ratio.
Characteristics:
v Drive part number: 46C1932
v FRU part number: 46C1933
v Custom card identification number (CCIN): 63A0
v Media part numbers: see “Tape cartridges (FC 5661)” on page 66
v Capacity: 160 GB native mode, 320 GB (typical) compression mode
v Form factor: 5.25-inch half high
v Media: DAT320, DAT160
v Technology: helical scan, rotating head
v Operation: streaming
v Data transfer rate: 12 MBps native mode
v Microcode level: VS12
v Interface: integrated, internal SAS with right-angle connector.
v Compatibility: DAT160 (read/write) and DAT320 (read/write)
Note: DAT160 media is more abrasive than DAT320 media and can be used for occasional
use only.
v Attributes provided: DAT320 tape, test cartridge, and a cleaning cartridge
v Attributes required: One 1.6-inch (41 mm) half-high media bay and Feature Code 3657,
SAS cable with right angle connector.
Tools The following tools and documentation are needed to complete the installation:
v A flat-blade screwdriver (if this device is not an auto-docking feature on your system)
v Your system unit documentation, including any service documentation
v Your operating system documentation
Contact the place of purchase if an item is missing or damaged.
Note: If you are installing the auto-docking version of this device on your system, see your
system documentation for information about the auto-docking feature.
60 Managing devices
 Loading...