11. The ARE YOU SURE screen displays. Press Enter to verify the information.
Successful unconfigure is indicated by the OK message displayed next to the
Command field at the top of the screen.
12. Press F3 to return to the PCI Hot-Plug Manager menu.
13. Select Replace/Remove a PCI Hot-Plug Adapter and press Enter. The
Replace/Remove a PCI Hot-Plug Adapter menu displays.
14. Move the cursor to select the adapter that you are removing and press Enter.
15. Press the Tab key until the entry field displays the replace operation and then
Press the Enter key. Follow the instructions that display on the screen until you are
instructed to remove the adapter.
16. When you are instructed to remove the adapter from the adapter slot, disconnect
any cables that are connected to the adapter being removed.
17. Press the center of the handle of the PCI card cassette to release the latch, then
lower the handle completely.
18. When the handle is completely lowered, push the gray locking cross bar.
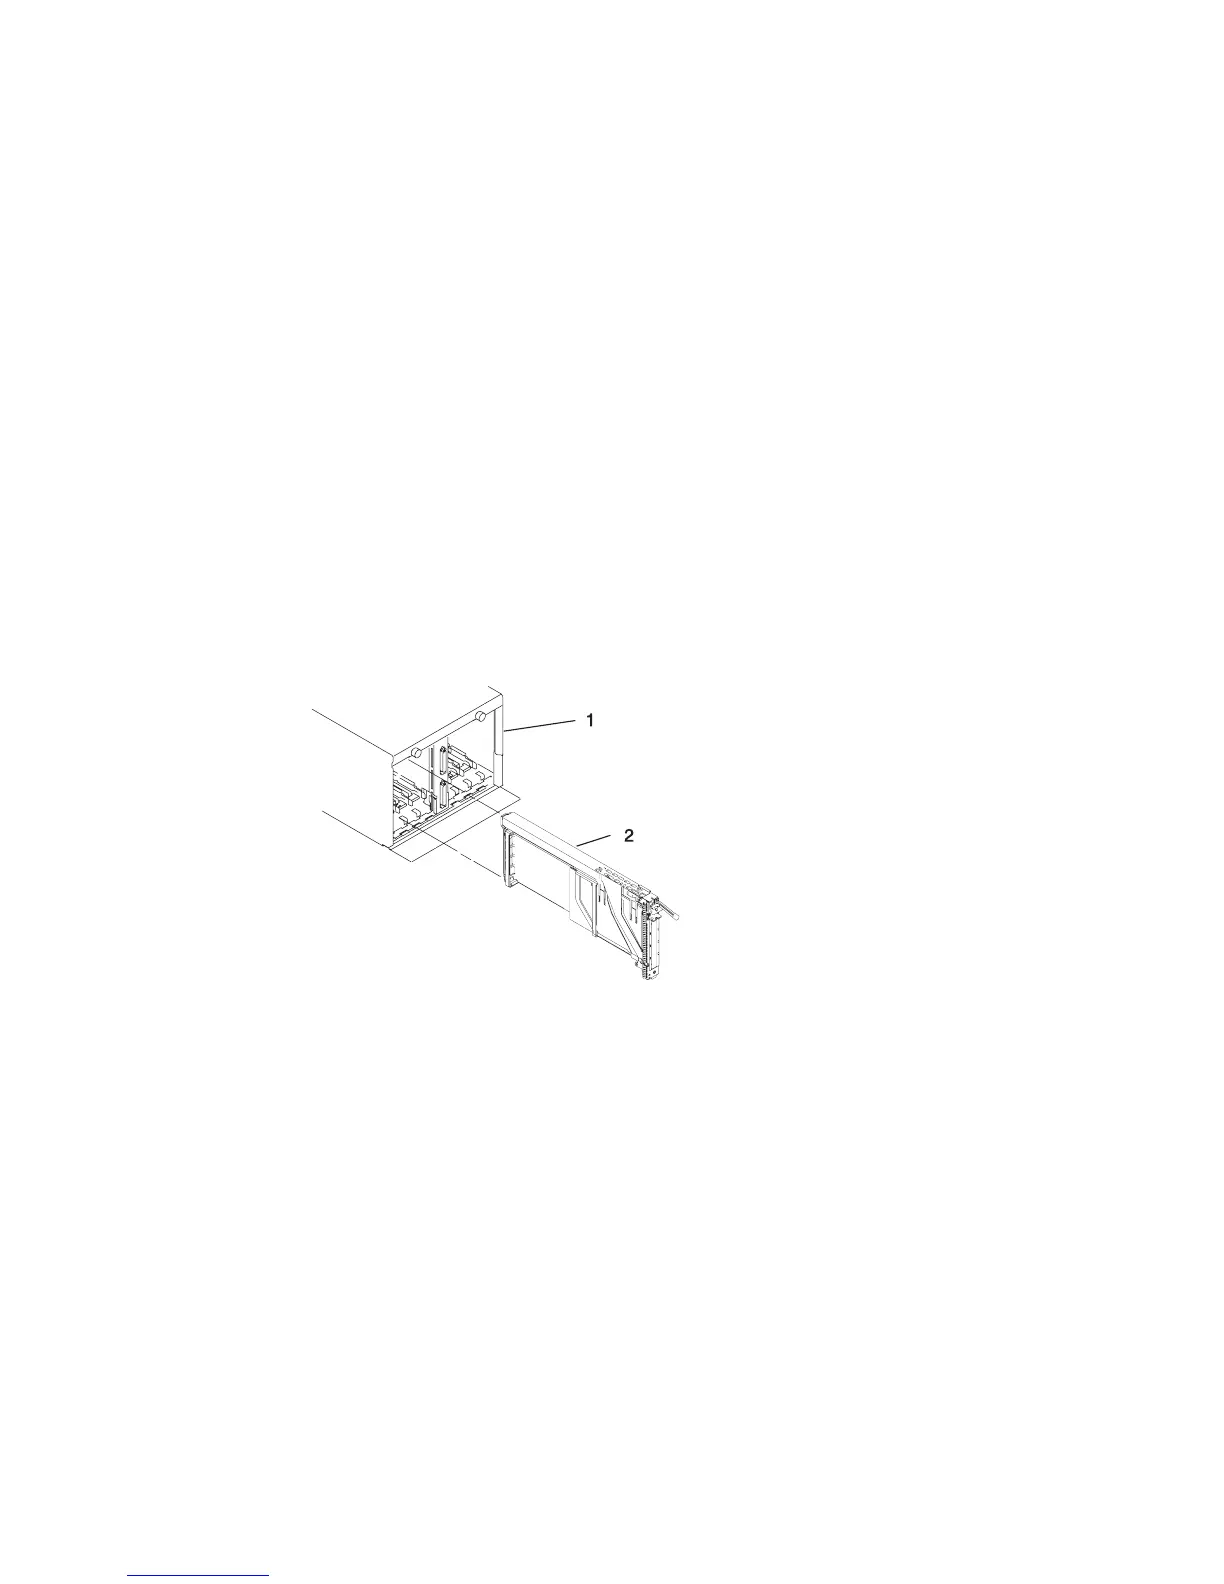
19. Carefully pull the PCI card cassette straight out from the rear of the subsystem.
Take care not to pull EMC gaskets from neighboring cassettes.
1 I/O Subsystem 2 PCI Adapter Cassette
20. Install the replacement adapter in the PCI adapter cassette, see “PCI Adapter or
Blank Filler Removal From a Cassette Assembly” on page 74.
21. When the adapter is installed in the PCI adapter cassette, install the adapter in the
adapter slot, as follows:
a. Lower the black handle completely.
b. Push the gray locking cross bar until you hear a clicking sound.
64 Eserver pSeries 7311 Model D10 and Model D20 Service Guide
 Loading...