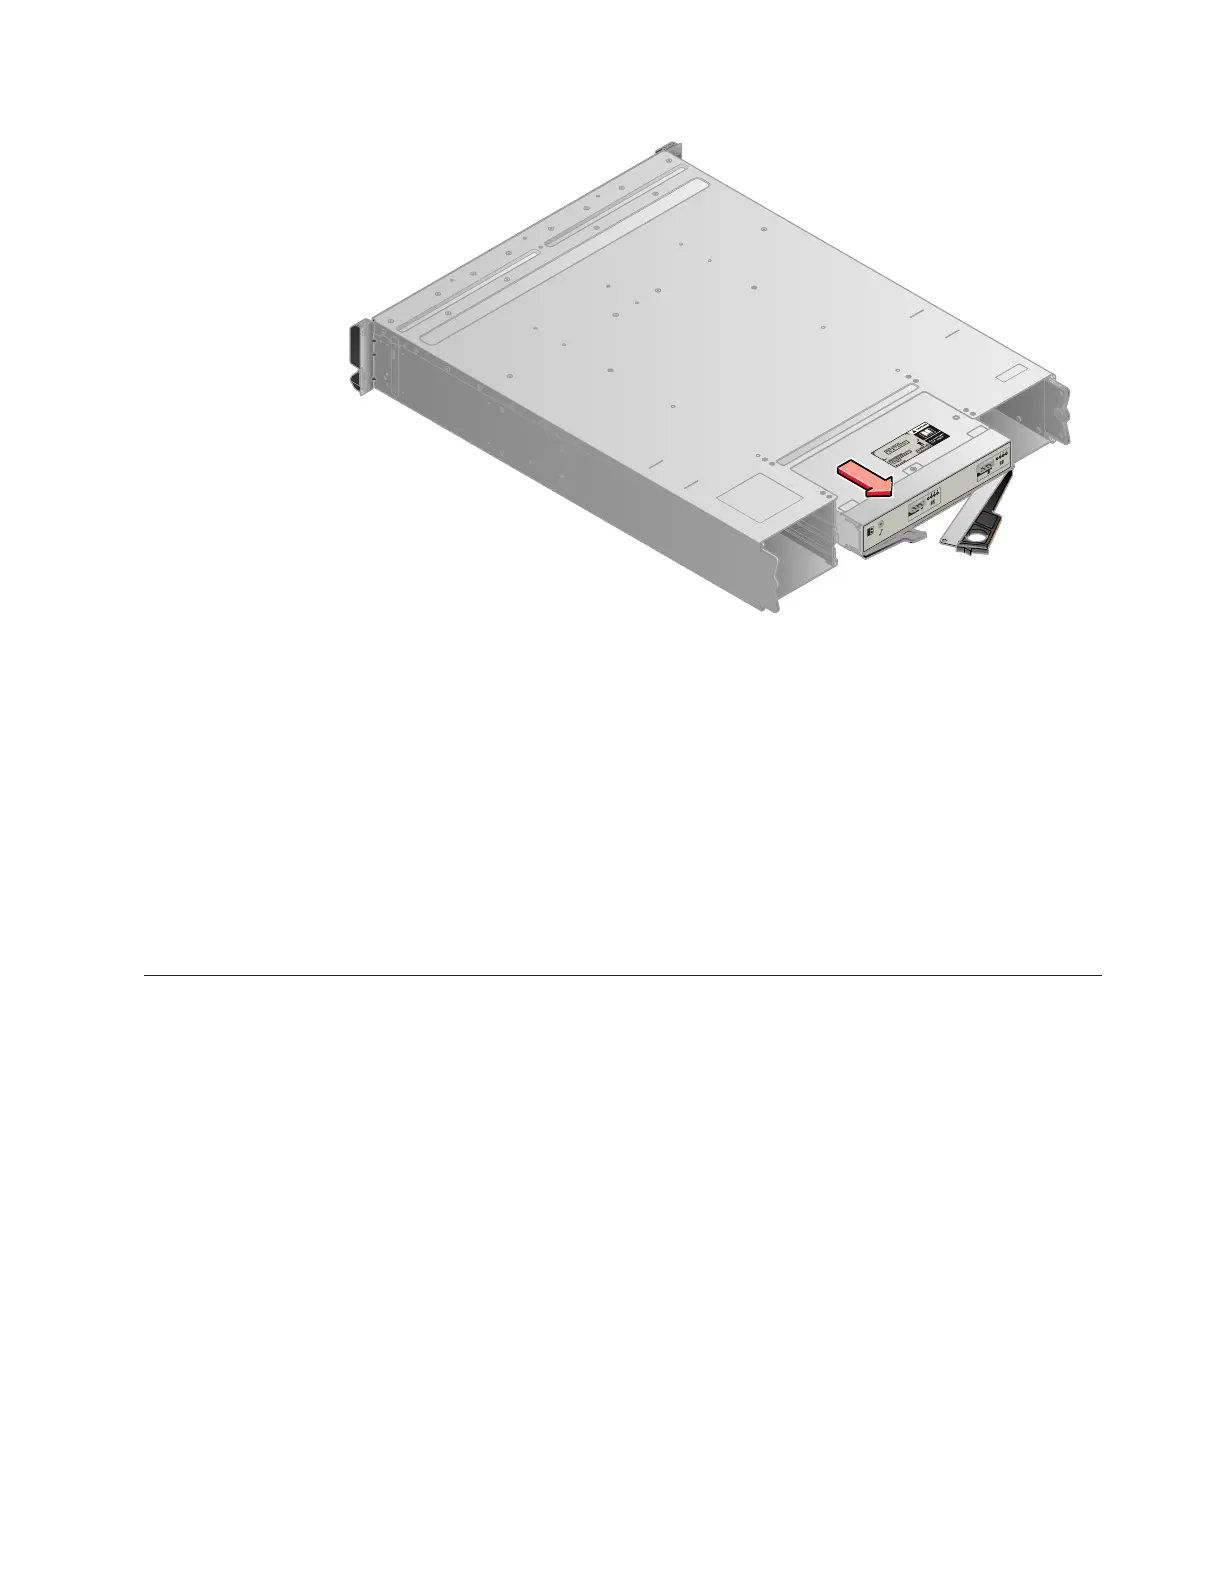
7. Pull out the handle to its full extension.
8. Grasp canister and pull it out.
9. Insert the new canister into the slot with the handle pointing towards the
center of the slot. Insert the unit in the same orientation as the one that you
removed.
10. Push the canister back into the slot until the handle starts to move.
11. Finish inserting the canister by closing the handle until the locking catch clicks
into place.
If the enclosure is powered on, the canister starts automatically.
12. Reattach the data cables.
Replacing an expansion canister
This topic describes how to replace an expansion canister.
About this task
Attention: If your system is powered on and performing I/O operations, go to
the management GUI and follow the fix procedures. Performing the replacement
actions without the assistance of the fix procedures can result in loss of data or loss
of access to data.
Even though many of these procedures are hot-swappable, they are intended to be
used only when your system is not up and running and performing I/O
operations. If your system is powered on and performing I/O operations, go to the
management GUI and follow the fix procedures. Performing the replacement
actions without the assistance of the fix procedures can result in loss of data or loss
of access to data.
svc00631
Figure 25. Removing the canister from the enclosure
Chapter 8. Replacing parts 87
 Loading...