2
7
4
10
15
18
2
8
13
5
11
16
3
9
14
6
12
17
2
1
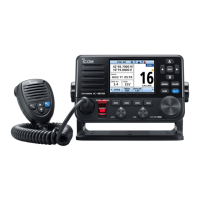
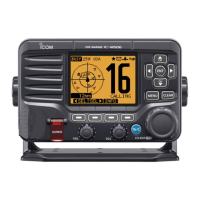
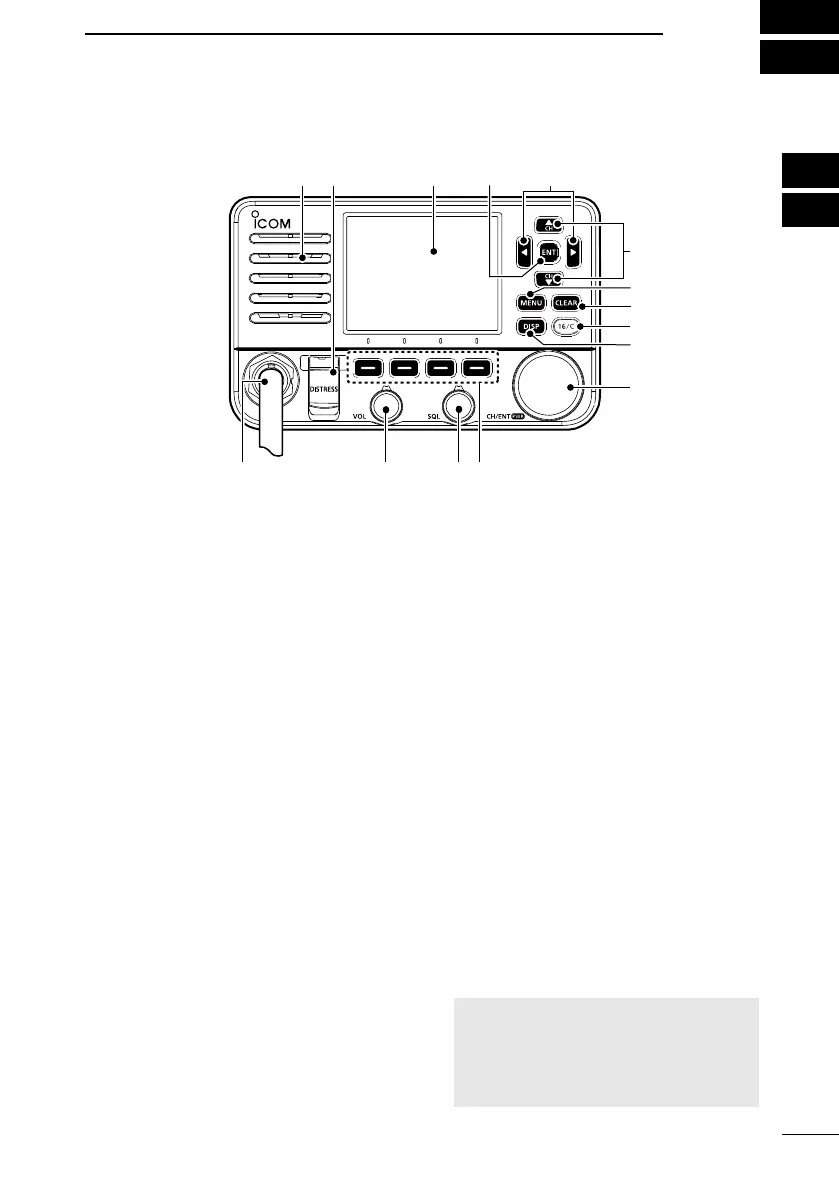
PANEL DESCRIPTION
P W R
Function
display (p. 4)
Speaker
■ Front panel
1DISTRESS KEY [DISTRESS]
Hold down for 3 seconds to transmit a
Distress call. (p. 21)
2ENTER KEY [ENT]
Push to set the entered data, selected
item, and so on.
3LEFT/RIGHT KEYS [◄]/[►]
• Push to scroll the Software Key
functions. (pp. 6 ~ 7)
• Push to select a character or number
in the entry mode.
(pp. 8, 14, 19~20)
4UP/DOWN KEYS [▲]/[▼]
• Push to select an operating channel,
Menu items, Menu settings, and so on.
(p. 10)
• Push to select a character or number
in the entry mode.
(pp. 14, 19~20)
5MENU KEY [MENU]
Push to display or close the Menu
screen.
6CLEAR KEY [CLEAR]
Push to cancel the entered data or to
return to the previous screen.
7CHANNEL 16/CALL CHANNEL KEY
[16/C]
• Push to select Channel 16. (p. 10)
• Hold down for 1 second to select the
Call channel. (p. 10)
8DISPLAY KEY [DISP]
Push to switch the main screen between
the INFO, the Plotter, and the Highway
screens.
9CHANNEL/ENTER/POWER DIAL
[CH/ENT]/[PWR]
• Hold down for 1 second to turn the
transceiver ON or OFF.
• Rotate to select the operating
channels, Menu items, Menu settings,
and so on.
• Push to set the entered data, selected
item, and so on.
SOFTWARE KEYS (pp. 6 ~ 7)
Scroll the key functions pushing [◄] or
[►], then push either of the 4 software
keys to select the function displayed at
the bottom of the display.
SQUELCH DIAL [SQL] (p. 12)
Rotate to adjust the squelch level.
VOLUME DIAL [VOL] (p. 12)
Rotate to adjust the volume level.
MICROPHONE CONNECTOR
CAUTION: Be sure that the
microphone connector is tightened
completely (rotate clockwise) to
maintain the transceiver’s waterproof
protection.
1 2 3
4
5
6
7
8
9
 Loading...