22 Mobile Intel
®
945GM Express Chipset
Development Kit User’s Manual
Getting Started
Caution: Standby voltage is constantly applied to the board. Therefore, do not insert or remove any
hardware unless the system is unplugged.
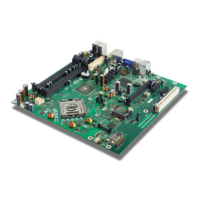
Note: The evaluation board is a standard ATX form factor. An ATX chassis may be used if a protected
environment is desired. If a chassis is not used, it is recommended that standoffs be used to elevate
the board off the working surface to protect the memory.
3. Check the jumper default position setting. Refer to Figure 4 for jumper location. Jumper J6H1
is used to clear the CMOS memory. Make sure this jumper is set for normal operation.
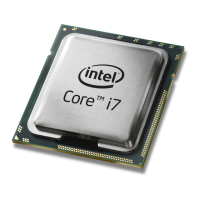
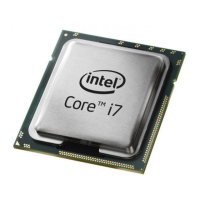
4. Be sure to populate the following hardware on your evaluation board:
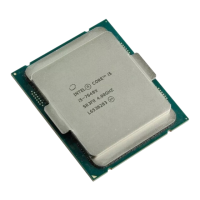
—One Intel
®
Core
TM
Duo processor
— One processor thermal solution
— One 256 MByte DDR2 667 SODIMM (200-pin)
Note: Ensure that the processor has been locked into the socket by turning the socket screw fully
clockwise.
Note: For proper installation of the CPU thermal solution, please refer to Appendix A, “Heat Sink
Installation Instructions”
5. Connect a SATA or IDE hard disk drive.
6. Connect any additional storage devices to the evaluation board.
7. Connect the keyboard and mouse.
Connect a PS/2-style or USB mouse and keyboard (see Figure 3 on page 42 for connector
locations).
Note: J1A1 (on the baseboard) is a stacked PS/2 connector. The bottom connector is for the keyboard and
the top is for the mouse.
8. Connect an Ethernet cable (optional).
9. Connect the monitor through the VGA connector.
10. Connect the power supply.
Connect an appropriate power supply to the evaluation board. Make sure the power supply is
not plugged into an electrical outlet (turned off). After connecting the power supply board
connectors, plug the power supply cord into an electrical outlet.
11. Power up the board.
Power and Reset are implemented on the evaluation board through buttons located on
SW1C1and SW1C2, respectively. Refer to Figure 5 on page 46 for switch locations.
Turn on the power to the monitor and evaluation board. Ensure that the fansink on the
processor is operating.
Note: Note that the power button may have to be pressed twice to turn the power on.
12. Install operating system and necessary drivers
Depending on the operating system chosen, all necessary drivers for components included in
this development kit can be found on the enclosed CD. Please see Section 2.3 for information
on obtaining updated drivers.
 Loading...