Parallel Function (Parallel)
5. After making the master-slave setting, the master unit will automatically
restart to ensure normal operation, the current range will expand, the slave
units display “Slave Mode Group-A” in screen.
To change Parallel Mode to Single Mode, follow the steps below:
1. Power off the instruments.
2. Remove System Bus among the instruments.
3. Power on the instruments.
4. Switch the instruments into single mode respectively.
a. Press [Shift]+[P-set] (System) composite keys to enter into the system
menu interface.
b. Use left and right keys or rotate the knob to select Parallel and press
[Enter] key to make the parameter in modification.
c. Rotate the knob to select Single and press [Enter] key to confirm.
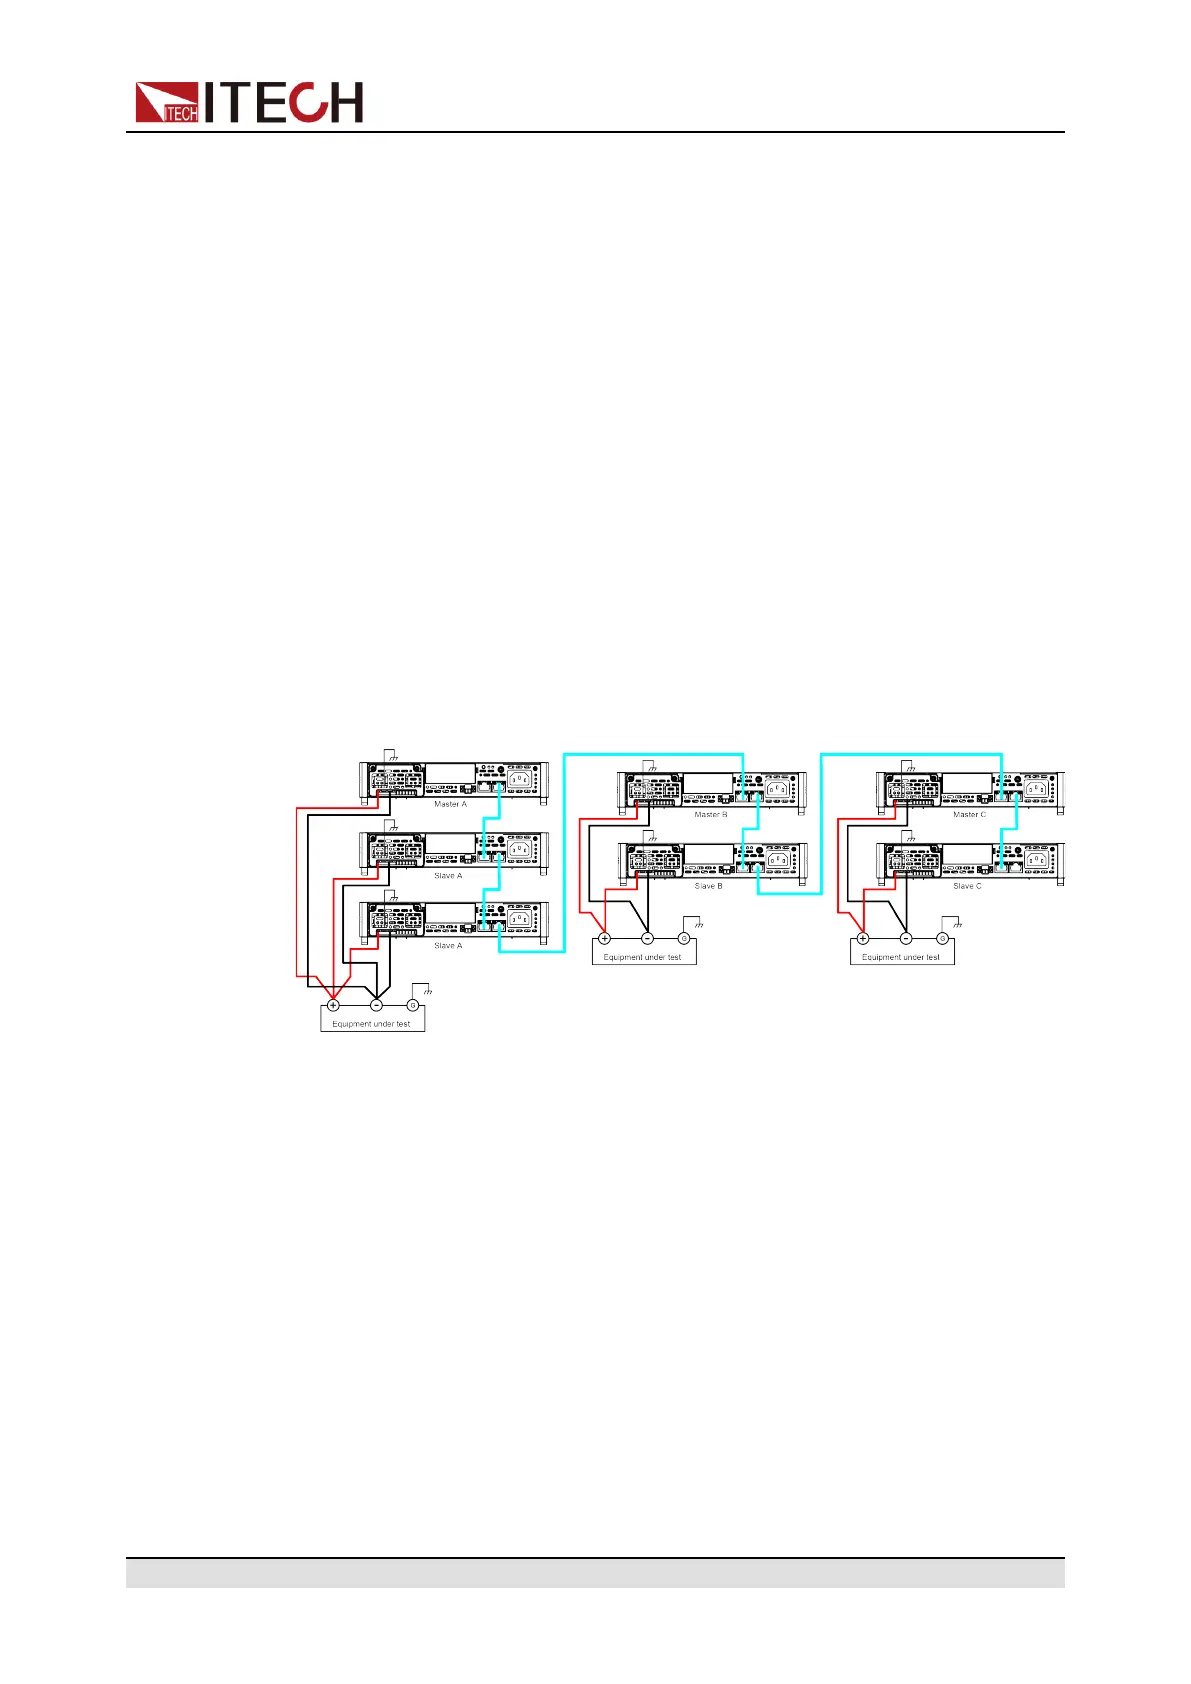
Configure Three Groups
Take seven power supplies for instance, set them to three groups. Group A:
one master unit and two slave units. Group B / C: one master unit and one slave
unit. The detailed connection method and procedures are as follows.
1. Configure the channel number of each instrument. Please refer to 8.1 Multi-
Channel Function for detailed introduction.
2. Connect the instruments according to the above diagram.
a. Connect system bus interfaces. Before connecting the system bus, be
sure that the instrument is single mode.
b. Connect the DUTs. Refer to 2.5 Connecting the Device Under Test
(DUT) for more information about connection methods.
3. After finishing connection, configure one power supply as a master unit.
a. Press [Shift]+[P-set] (System) composite keys to enter into the system
menu interface.
b. Use left and right keys or rotate the knob to select Parallel and press
[Enter] key to make the parameter in modification.
c. Rotate the knob to select Master and press [Enter] key to confirm.
d. Set Master group to A and press [Enter] key to confirm.
e. Set Master Total to 3 and press [Enter] key to confirm.
Copyright © Itech Electronic Co., Ltd.
101
 Loading...