Synchronization mode selection
(settable only in fiber slave mode).
Local: The slave parameters take effect in
real time.
Fiber: The slave is controlled by the
master fiber.
⚫ First instrument selection: Source -> External Lock-frequency control ->
Status -> Fiber-Phase-Master
⚫ Second instrument selection: Source -> External Lock-frequency control
-> Status -> Fiber-Phase-Slave。
And then select Sync select to Local or Fiber.
When local is selected, the slave's amplitude setting and modification will
take effect in real time, without waiting for the host's command.
When Fiber is selected, the slave's amplitude setting does not take effect
immediately and needs to wait for the host's command.
When the host changes the parameters or changes the on/off status, the
value set by the slave will take effect.
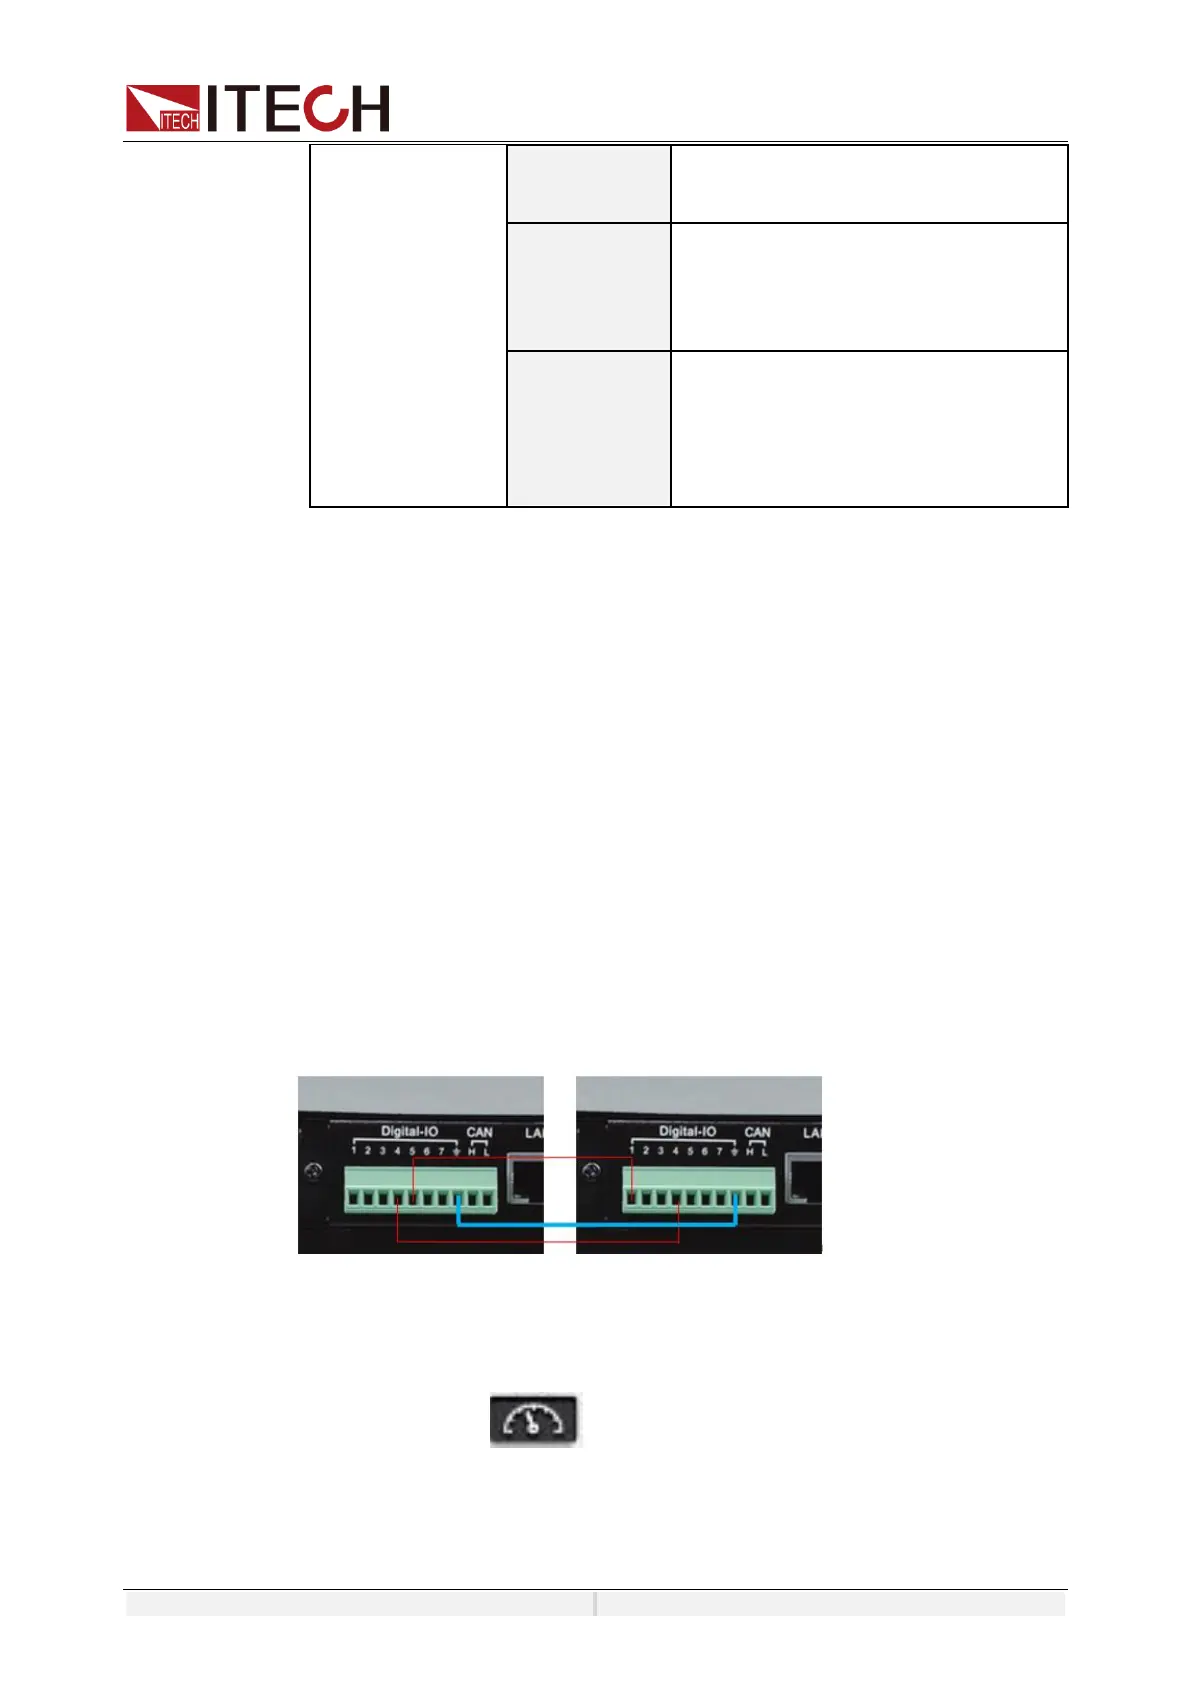
5.17.3 Connecting Digital I/O Method
Connect the IO-4 pins of two IT7900P power supplies. One IT7900P outputs
synchronization signals to the other IT7900P. The second power supply runs
synchronously with the frequency and phase of the first power supply to realize
the six-phase output function.The wiring diagram is as follows:
First Second
Power Supply Configuration
⚫ Defining the digital IO-4 Pin
User can define the IO function in IO configure menu.
3. Press [Shift] + (System) and enter to the system menu interface.
4. Select I/O -> Digital IO-4: SYNC.
Set one IT7900P power supply as a synchronization signal output to Sync-
out, and the others set to Sync-out.
 Loading...