English
8 MAINTENANCE
8.1 Daily, by a trained operator.
A. Check whether you need to empty the crumb tray.
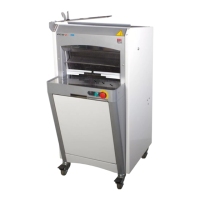
B. Clean the tables (fig.1, n°6, 3) using a brush.
C. Use a dry cloth to clean the inside.
D. Use a damp cloth to clean the outside.
8.2 Every 25,000 loaves and/or at least once a year, by an approved agent.
A. Remove the plug from the socket (fig.2, n°16).
B. Check the condition of the cutting blades (fig.1, n°4).
C. If you notice a deterioration in cutting quality, the cutting blades must be replaced (JAC part
number: 610001, 6110011 in the JAC Spare Parts catalogue).
D. If the blades need to be replaced, do so in accordance with the blade replacement procedure
(fig.8, 9).
NB: Do not overtighten the blades, as this risks distorting the frames.
E. Sweep and vacuum the inside of the machine.
F. Check bearing condition, then lubricate them.
G. Lubricate the actuator joints.
Check that your approved agent has recorded his work in your service booklet in order to maintain
your 5-year warranty cover.
8.3 Blade replacement.
(fig.8,9)
Always wear cut-resistant gloves (EN 388:2003 version B= 5) and safety footwear when replacing the
blade or when working in the vicinity of the blade.
Having ensured that the plug on your machine (fig.2, n°16) has been disconnected from the mains:
Open the front door (fig.1, n°5).
Remove the stainless steel table from the front of the machine.
A. Remove the bagging paddle.
B. Unscrew the JAC Fix slice holding system on both sides and remove it.
C. Unscrew the front table on the inner sides of the machine.
D. Pivot the front table towards you.
E. Remove the front table.
F. Unscrew the cover.
G. Open the cover that protects the blade holder frames.
H. On the left-hand inner side, pivot the frame screw cap so that you can insert the 8 mm Allen
key from the outside of the machine. Remove screw A securing the front frame link.
I. Lay the frame down forwards. Replace the blades on the rear frame (place something to
protect yourself on the front frame blades). Remove the locknuts on screws B (Misch
machines). Remove the blade-tightening Allen screws B. Replace the blades, checking that
they locate correctly in the swing arm pins. Retighten the blades by tightening screws B, using
the blades remaining on the frame as a reference. Then tighten the nuts (machine fitted with
lubrication option).
In order not to distort the frame and avoid the risk of dangerous breakages, only replace 1 to 3
blades at a time alternating from left to right.
Resume the procedure from point I for the front frame and refit the front frame and the cover sections.
 Loading...