25
MC450e
6.8 to 7.2 mm
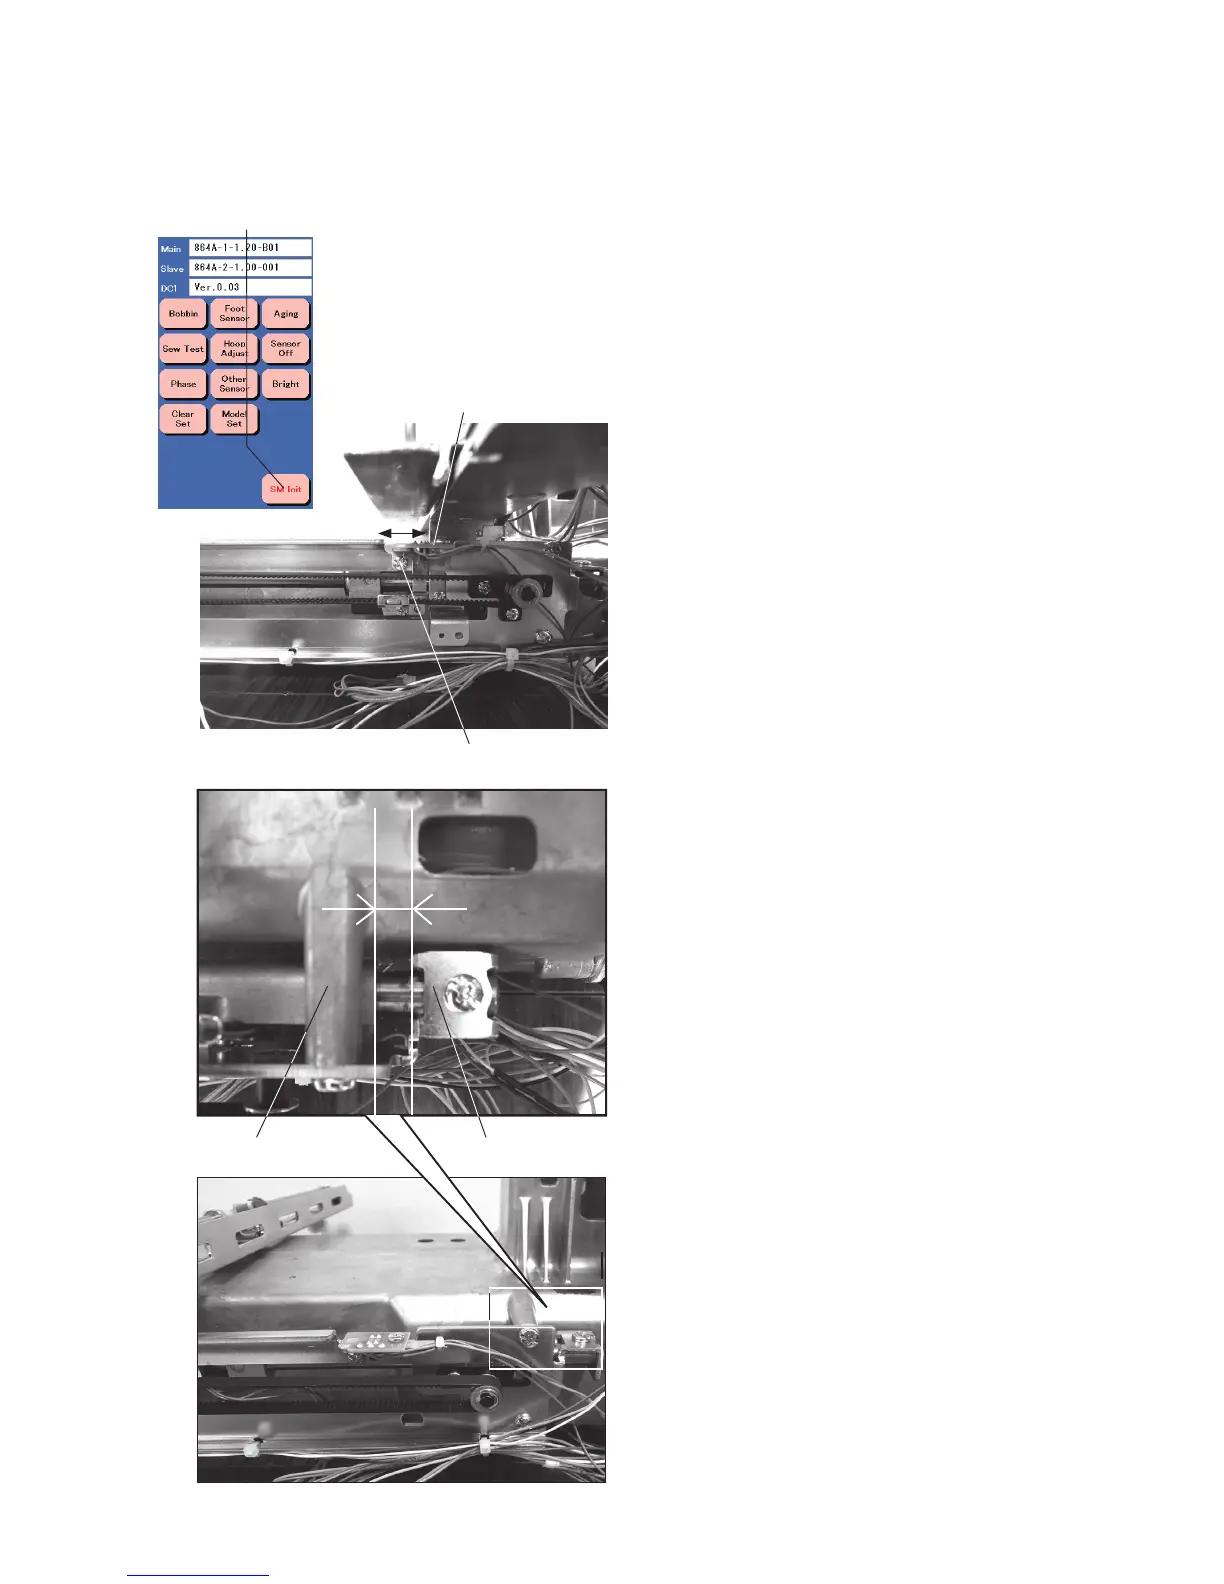
X-sensor Position Adjustment
Setscrew (A)
Stopper X-carriage guide
X-sensor
A B
Adjustment
1. Remove the face cover, bed cover and front cover (refer
to pages 1, 3 and 4).
2. Remove the printed circuit board F from the front
cover.
3. After disconnecting all of the connector, remove the
printed circuit board A from the front cover.
4. Reconnect the connectors to the printed circuit board
A except printed circuit board L2 and L3 connectors.
5. Remove the carriage cover (refer to page 6).
6. Turn the power switch ON while pressing the start/
stop button.
Press “SM Init” key.
7. Loosen the setscrew (A) and slide the X-sensor in
the direction of A or B to adjust the position of the
X-sensor.
8. Turn the power switch OFF and turn it ON again to
check if the gap is 7 mm.
9. Tighten the setscrew and turn the power switch OFF.
SM Init key
The gap between the stopper and X-carriage guide should be 7 mm.
 Loading...