possible when using speaker-level input signals.
EXAMPLE: If you have connected a tweeter (high-frequency response only) to input channel 1 and a midrange speaker
(midrange-frequency response only) to channel 2, you can sum the signals of each of these inputs, and assign the new, full-
range signal to a full-range speaker you have connected to output channel 1.
13. Save File. This allows you to save saving a preferred audio system configuration to a folder on your computer for use later. It
also allows you to retrieve a previous configuration
from your computer and apply it to your connected amplifier.
14. Settings. You can control the following options in the “Settings” menu:
a. Language selection for the software: choose from English, Spanish, French, Chinese, and Japanese
b. Power settings for delaying the amplifier turn-on/off should your vehicle require either option
c. Firmware upgrades and resetting the software to original factory settings
15. Reset EQ. This button lets you reset the type of speaker, and location in the vehicle, of each output channel.
16. EQ Mode. This lets you choose either a 31 band parametric or graphic EQ to adjust for each channel.
17. Parametric or graphic EQ. You can apply custom EQ curves to each channel you have connected. To increase the level of a
given frequency, drag the slider up. To lower it, drag the slider down.
18. EQ Setup. This EQ setup feature lets you click to select the channels to which you want to apply EQ curves.
NOTE: The FREQ, GAIN, and Q fields shows the values of the changes made by moving the EQ sliders. Only Gain is
adjustable when in Graphic EQ Mode. Frequency, Gain, and Q are all adjustable in Parametric EQ Mode. These adjustments
can be made using the sliders or entering specific values in the F, G, and Q fields.
19. Bypass EQ and Restore EQ. “Bypass EQ” allow you to return your EQ settings to flat so you can hear the differences made
during your tuning. “Restore EQ” returns all EQ
adjustments to the previous settings.
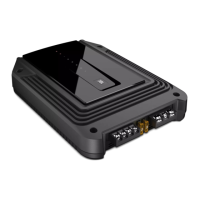
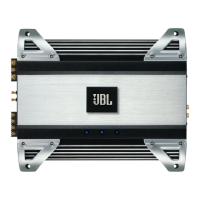
SPECIFICATIONS
RMS Power Output (Watts x Channel) @ 2-ohm: 60W x 8
RMS Power Output (Watts x Channel) @ 4-ohm: 40W x 8
Amplifier Class: Class D
Battery Voltage Range (Volts): 8V to 16V
Selectable Turn-on Modes: 12V, Audio Signal Sense, DC Offset, 12V remote output
LED Indicator: red/green
Frequency Response: 10Hz to 22kHz @ -3dB
Signal-to-Noise Ratio: 90dB
Signal-to-Noise Ratio (CEA-2006): 75dB
THD+N @ 4-ohm: <1%
Input Sensitivity, selectable: High-level or low-level
Input Sensitivity – Low Level: 680mV to 6V
Input Sensitivity – High Level: 1.6V to 15V
Variable Crossovers: All Channels: HPF, LPF, Band-pass w/ selectable 0 to 48dB slope
Gain, variable: All Channels with PC
Subwoofer level, variable : Channels 7 & 8 in PC software or using accessory remote control from -30dB to +6dB
Fuse Rating: 40A
Minimum Recommended Power/Ground Wire Gauge: 8awg
Speaker Level Inputs: Yes (RCA adapter)
Remote Bass Control: Included
Length : 9-3/8” (237.5mm)
Width: 5-11/16” (144mm)
Height: 1-15/16” (49.5mm)
Weight: Approx. 1000g
Protection: DC, OVP, UVP, OCP, OTP
TROUBLESHOOTING
No audio and POWER INDICATOR is off.
No voltage at BATT+ and/or REM terminals, or bad or no ground connection. Check voltages at amplifier terminals with VOM.
No audio and PROTECT INDICATOR flashes.
DC voltage on amplifier output. Amplifier may need service; see enclosed warranty card for service information. No audio and
PROTECT and POWER INDICATORS flash.
Voltage less than 9V on BATT+ connection. Check vehicle charging system. No audio and PROTECT INDICATOR is on.
Amplifier is overheated. Make sure amplifier cooling is not blocked at mounting location. Verify that speaker-system
impedance is within specified limits. Or, there may be voltage greater than 16V (or less than 8V) on BATT+ connection. Check
vehicle charging system. Amplifier fuse keeps blowing.
The wiring is connected incorrectly or there is a short circuit. Review installation precautions and procedures. Check wiring
connections. Distorted audio.
Gain is not set properly. Check Individual Channel Volume and/ or Mater Volume settings. Check speaker wires for shorts or
 Loading...