101
0 to 0.05 mm
2
WARNING :
To protect against possible personal injury due to abrupt start of the machine, be sure to start the
following work after turning the power off and ascertaining that the motor is at rest.
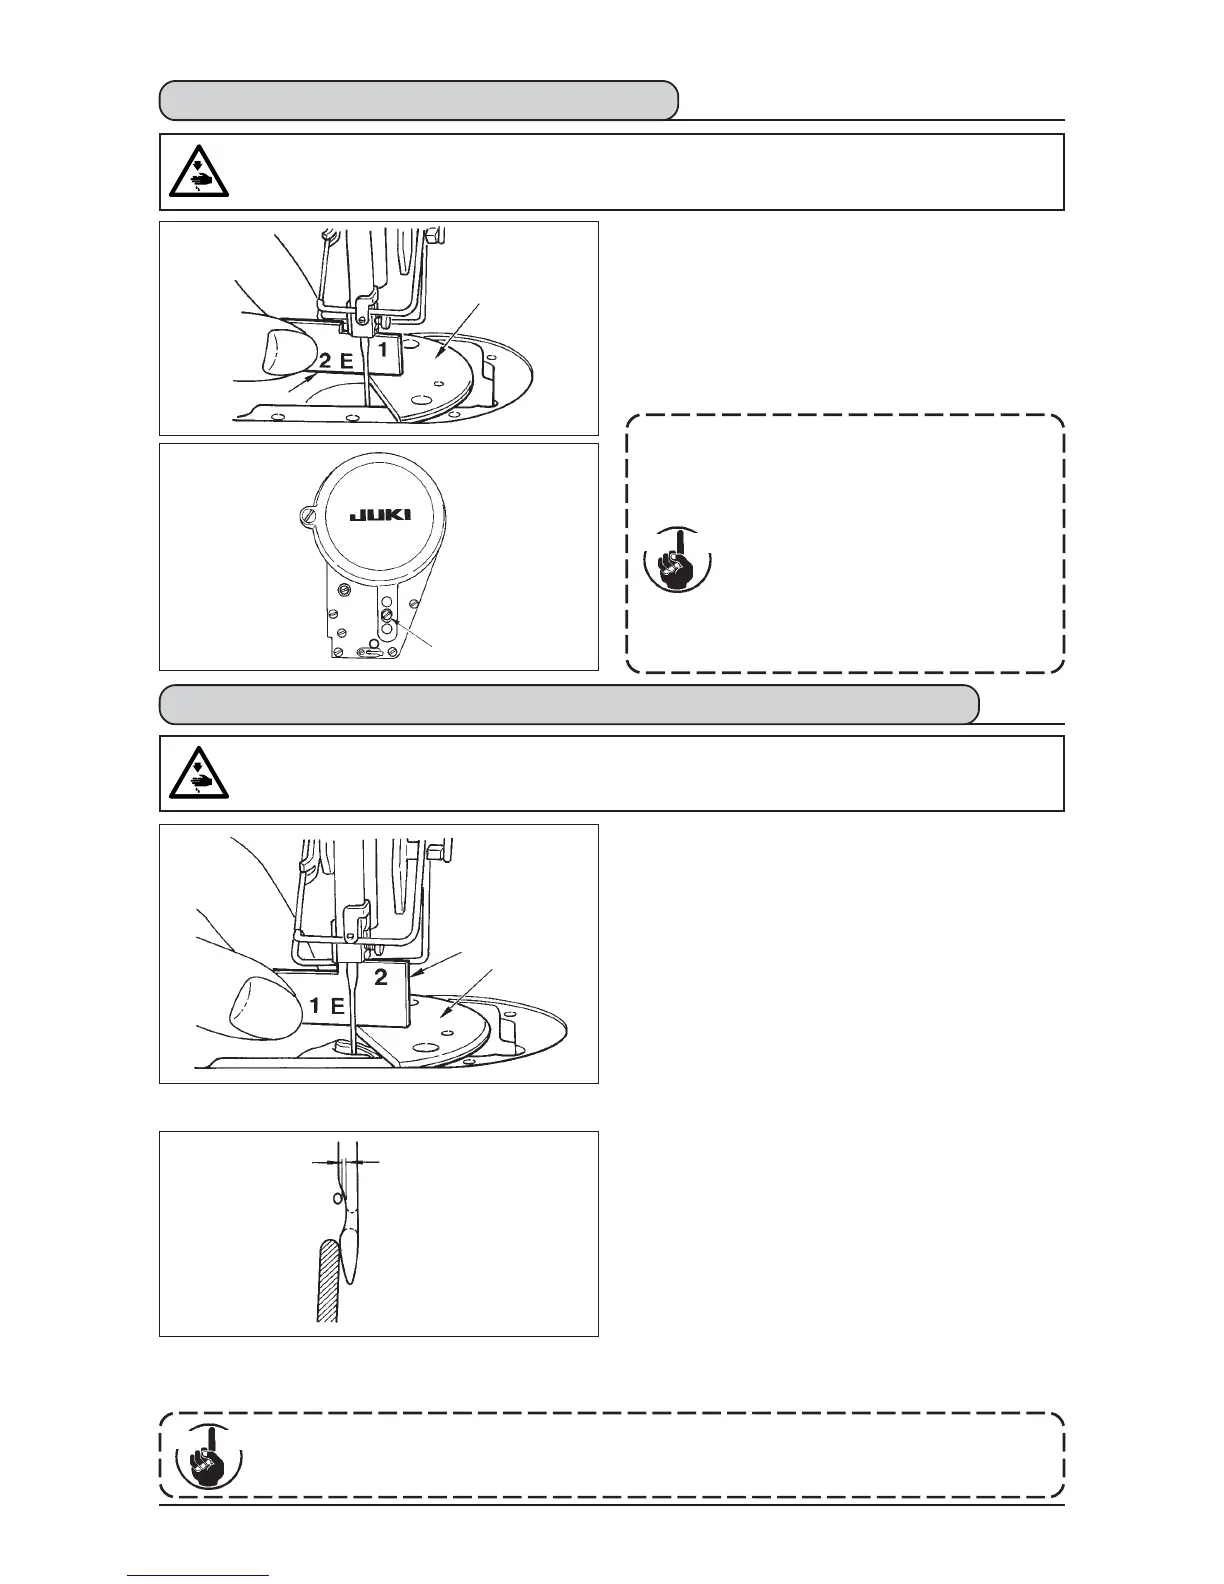
8-8. Adjusting height of the needle bar
1) Set the zigzag width to “0”. Bring the needle to the
center of the zigzag stroke.
2) Remove the presser foot, throat plate, semicircle
plate and feed dog.
3) Place a semicircle plate on the plane, to which the
throat plate is to be attached, of the bed. Loosen
setscrew 2, and adjust so that from the top surface
of semicircle plate A to the bottom end of the needle
bar is as high as “1” of timing gauge 1.
1. Thickness of the semicircle plate is
different from that of the throat plate. Be
sure to use the semicircle plate when
adjusting the height of the needle bar.
Be sure to perform the adjustment with
zigzag width set to zero and with the
needle positioned at the center of the
zigzag stroke.
2. Use the timing gauge on which the
indication “E” is engraved which has
been supplied as accessories. (Part No.
22536502)
WARNING :
To protect against possible personal injury due to abrupt start of the machine, be sure to start the
following work after turning the power off and ascertaining that the motor is at rest.
8-9. Adjusting the needle-to-hook timing and the needle guard
Cau
tion
(1) Positioning the hook
1) After the completion of the adjustment of the needle bar
height, adjust so that the blade point of the hook comes to
the center of the needle at the height of the “2” of timing
gauge 1 which has been supplied as accessories.
2) At this time, the blade point of the hook should slightly come
in contact with the needle when the needle guard does not
touch the needle.
(2) Confirmation
Maximize the zigzag width (LZ-2290A : 5 mm). Bring the
needle to the leftmost position of the zigzag stroke.
Now, confirm that the top end of the needle eyelet is spaced
0.2 to 0.5 mm away from the blade point of the hook.
If the zigzag width of 10 mm is used or the shape of indented
part of the needle is different from that of indented part of
the needle at the time of delivery, re-adjust the height of the
needle bar.
(3) Adjusting the needle guard
1) Maximize the zigzag width. Bend the needle guard to adjust
so that the needle does not come in contact with the blade
point of the both at the leftmost and rightmost positions of
the zigzag stroke. At this time, adjust the clearance provided
between the needle and the blade point of the hook to 0 to
0.05 mm.
2) The needle guard functions to keep the needle away from
the blade point of the hook, thereby preventing damage to
the blade point of the hook. Whenever you have replaced
the hook with a new one, be sure to adjust the position of
the needle guard.
A
1
A
1
Cau
tion
When thread breakage has occurred, there is a case where thread is caught in the hook.
Be sure to perform sewing after removing the thread caught in the hook.
 Loading...


