55
(2) Condensation custom edit
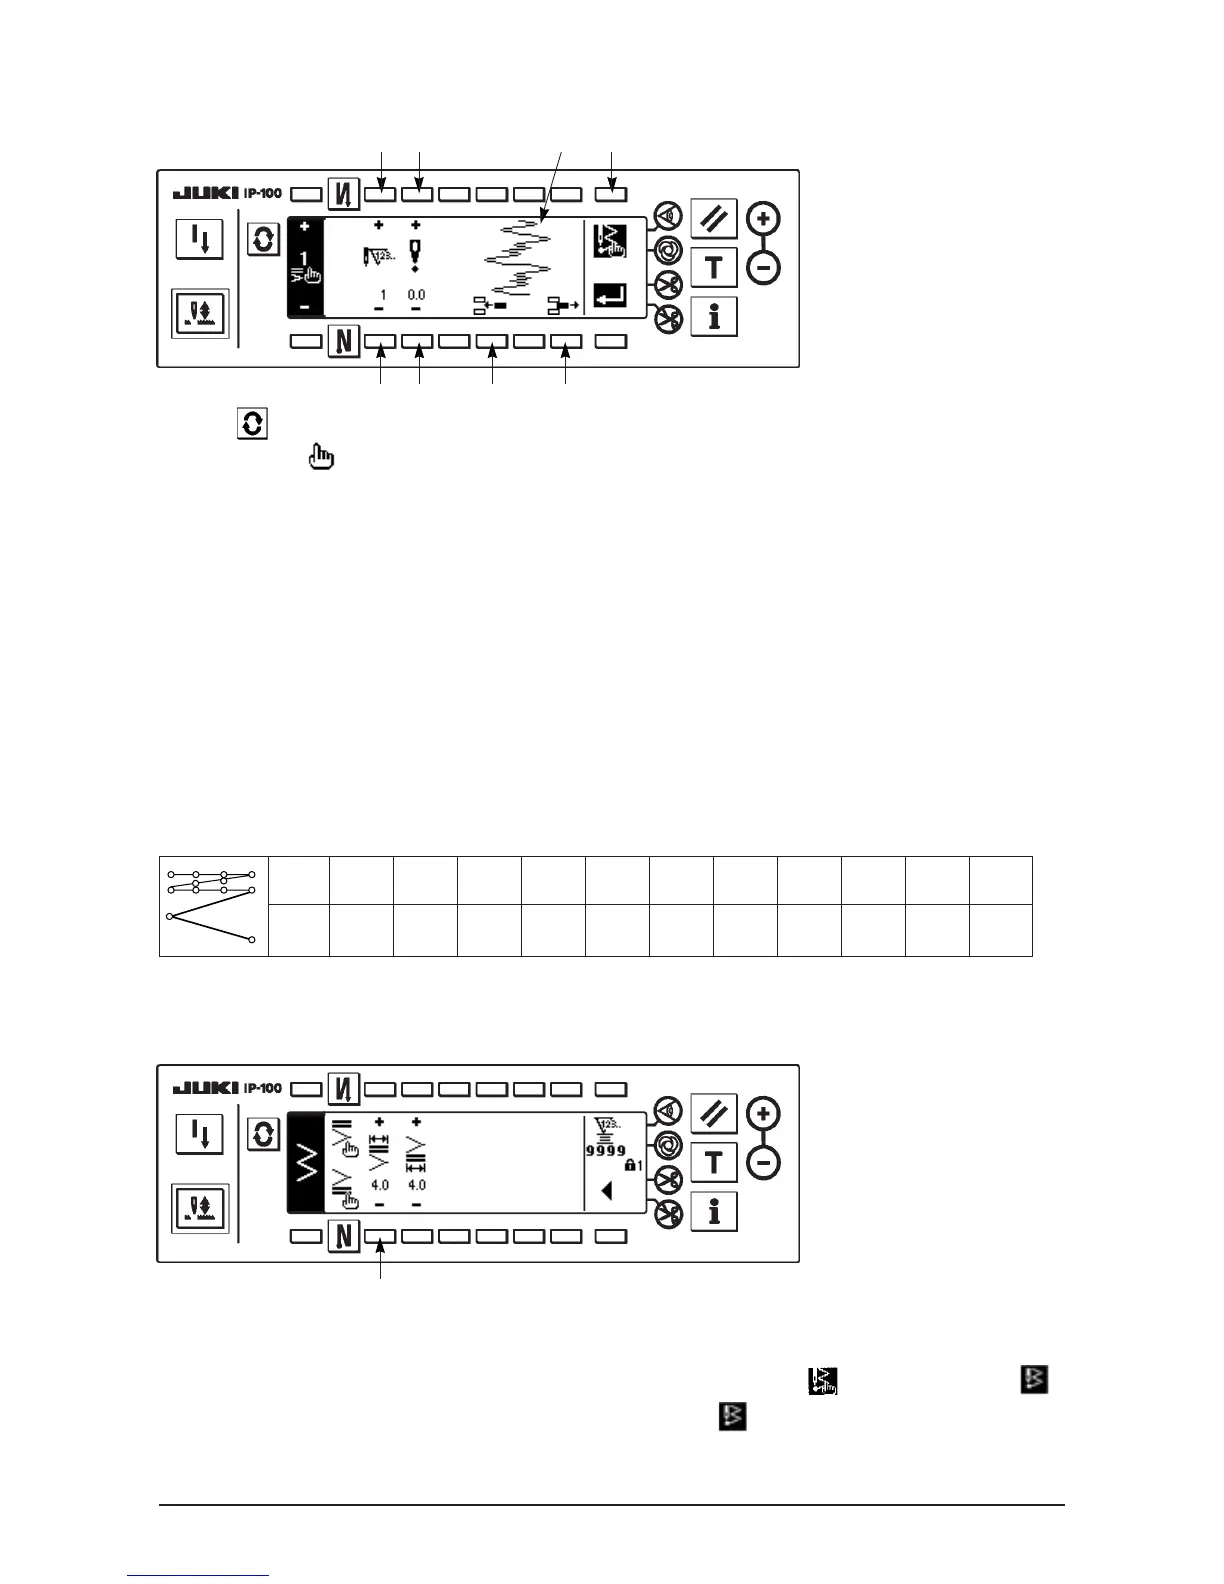
■Condensation custom edit screen
1) Press to display the reverse feed stitching setting screen.
2) Press 2 or 4 in the reverse feed stitching setting screen to move to the condensation custom edit screen.
3) Set the needle entry position for each step in the condensation custom edit screen.
1 : Set the step with “+” and “–” key.
2 : Set the value of needle entry point from the center of zigzag with “+” and “–”. “+” value comes on
the right side and “–” value on the left side.
3 : Needle entry position is displayed.
4 : Insert needle entry point 0. 0 for one stitch to the existing step. Then the stitches move backward
one stitch by one stitch.
* It is not possible to insert it when the number of total stitches is 64 stitches.
5 : Delete one stitch of the needle entry of the existing step. Then the stitches move forward one stitch by
one stitch.
* It is not possible to delete it when the number of total stitches is “1” stitch.
Example of condensation custom creation
Example) Condensation custom at sewing start Width 4 mm for standard zigzag stitch
1 2
1 2
63
■Reverse feed stitching setting screen
4 5
1Input the data in the list above to each step.
2Set to 4 mm at 1.
When 1 is changed, the inputted needle entry can be enlarged/reduced.
4) When setting up to the last step is completed, proceed to the next step, press 6 and put END mark .
* When the last step is 64, it is not necessary to set "END" mark .
1
1st
stitch
– 2.0 – 0.7 0.6 2.0 0.6 – 0.7 – 2.0 – 0.7 0.6 2.0 END
Input
value
Needle
entry
2nd
stitch
3rd
stitch
4th
stitch
5th
stitch
6th
stitch
7th
stitch
8th
stitch
9th
stitch
10th
stitch
11th
stitch
 Loading...


