49
4)
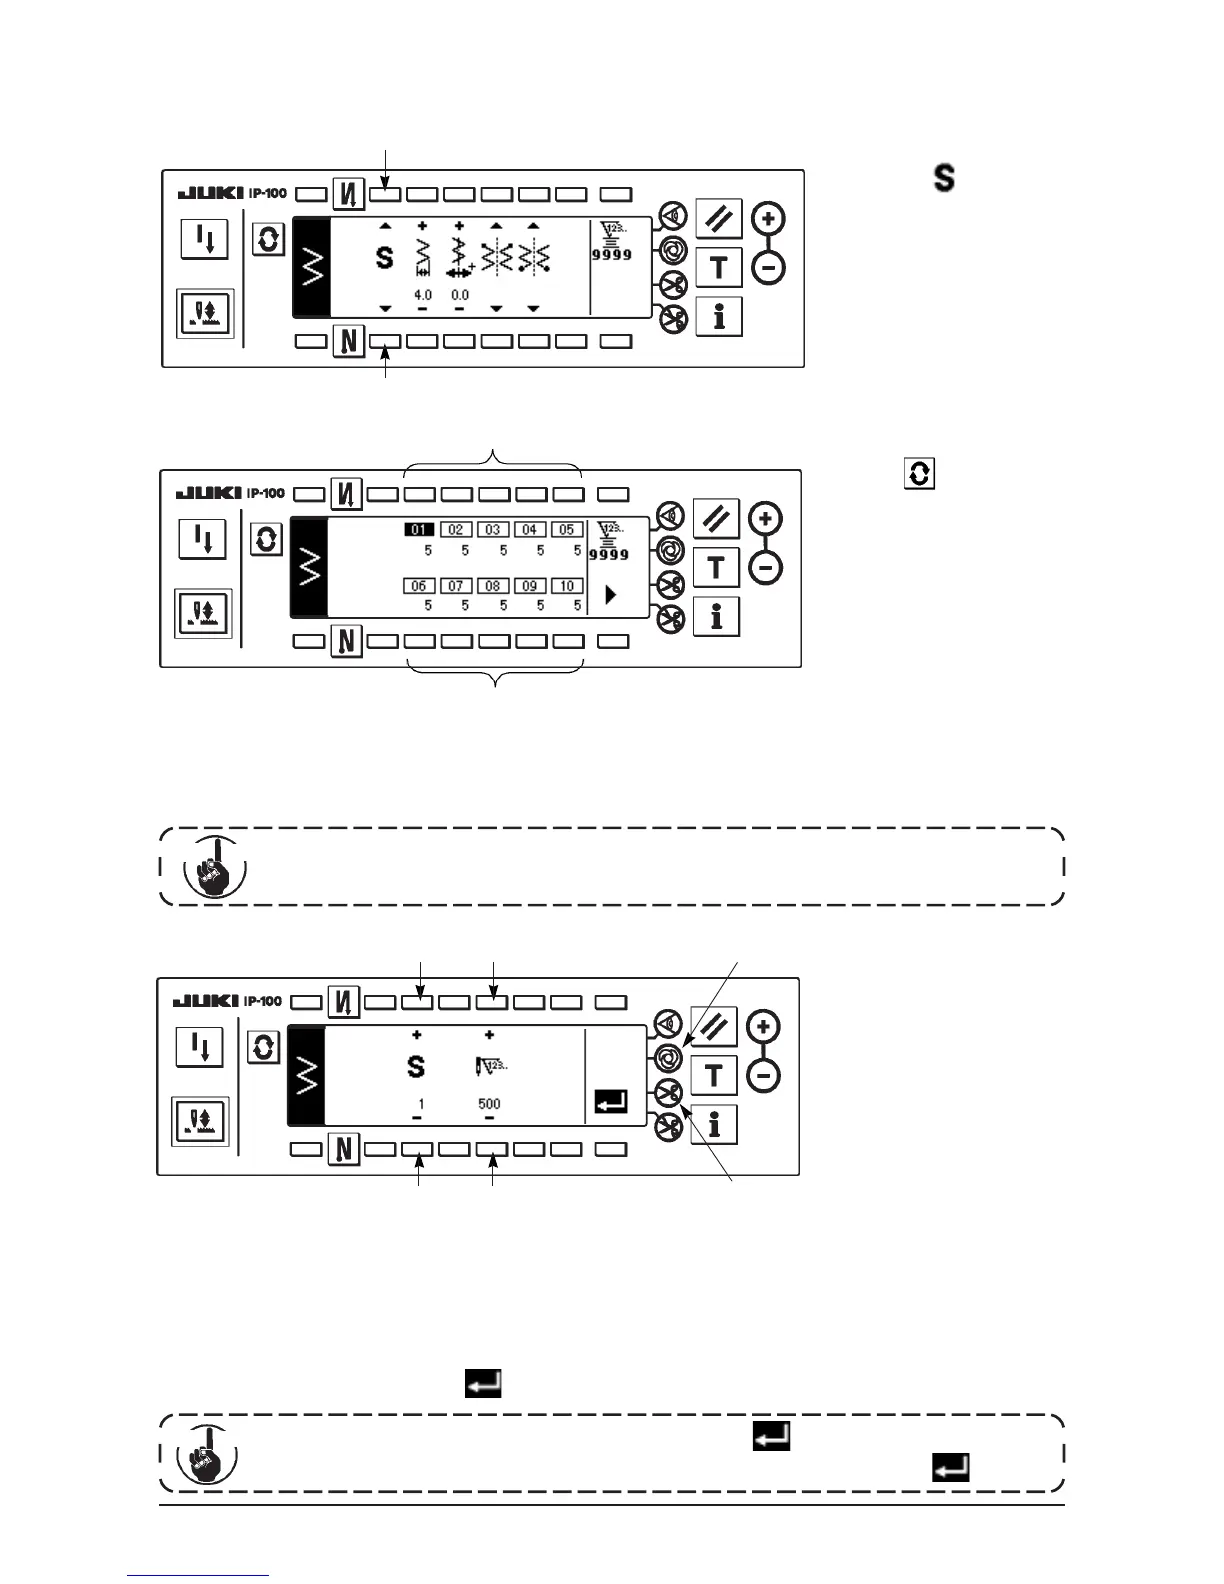
Set the number of stitches of each step in the programmed stitching edit screen.
3 : Set the step with “+” and “–”. As many as 20 steps can be set.
4 : Set the number of stitches with “+” and “–”. As many as 500 stitches can be set.
5) When setting of all steps has been completed, select automatic thread trimming 6 at the last step, or set “0”
stitch to the next step.
When the last step is “20”, it is not necessary to set “0” stitch at the next step.
6) When setting is completed, press key to determine the contents of setting.
■Programmed stitching selection screen
Example) Standard zigzag
■Sewing shape setting screen
■Programmed stitching edit screen
2
2
1
1
3 4
3 4
Press , in case of more than 10 steps, and programmed stitching selection
screen of “11” to “20” is displayed.
Press and the screen returns to programmed stitching selection screen of
“01” to “10”.
1) Select showing
programmed stitching with
1 of sewing shape setting
screen.
When automatic thread trimming is selected, “0” is not displayed in the last step.
When increasing the number of steps, proceed to the next step after releasing automatic thread
trimming.
▲
▲
2) Press to display the
programmed stitching
setting screen.
3) Number of stitches of each
step is displayed in the
programmed stitching
setting screen.
Press switch
2
corresponding
to each step and the screen
moves to the programmed
stitching edit screen.
When the power source is turned OFF without pressing key, the inputted data returns
to the former one. When you desire to determine the data, be sure to press key.
Impor
tant
Cau tion
5
6
 Loading...


