– 91 –
(5) Grease-up procedures for the specied position
When sewing operation is repeated for a certain time period, Error Code No. E220 is displayed at the op-
eration panel when the power supply is turned ON. This error code is used for the indication of the grease
replenishing time for the specied parts. When you see this error code, replenish the grease specied below,
without fail. After greasing, call the memory switch No. 245 and set up “0” with the reset key.
Even after the display of Error Code No. E220, this error code can be canceled by pressing the reset key
and the machine can be used continuously. Since then, however, this Error Code No. E220 is displayed each
time the power supply is turned on.
When the sewing machine is used further for the specied time period after the display of Error Code No.
E220, Error Code No. E221 is then displayed. In this case, this error code cannot be canceled even though
the reset key is pressed, and the sewing machine cannot work anymore.
Therefore, when this Error Code No. E221 is displayed, replenish the grease, without fail, to the parts speci-
ed below. Start the memory switch and set up the Memory switch No. 245 at “0” with the reset key.
(Caution) 1. If the memory switch No. 245 is not reset at “0” after the replenishment of grease, Er
-
ror No. E220 or No. E221 will be displayed again.
2. For the replenishment of grease to the parts specied below, use the attached Juki
Grease B (Part No. 40013640). If any grease other than the specied item is replen-
ished, this can be a cause of destruction of parts.
1
4
2
4
5
3
6
1. Open crank rod cover
1
.
2. Remove setscrew
3
from the grease inlet cover
located at periphery of crank rod
2
.
3. Fill coupling
4
with grease through JUKI
Grease B tube
5
.
4. Sink screw
6
supplied with the unit into the
coupling to add the grease.
5. After adding the grease, securely tighten set-
screw
3
which has been removed.
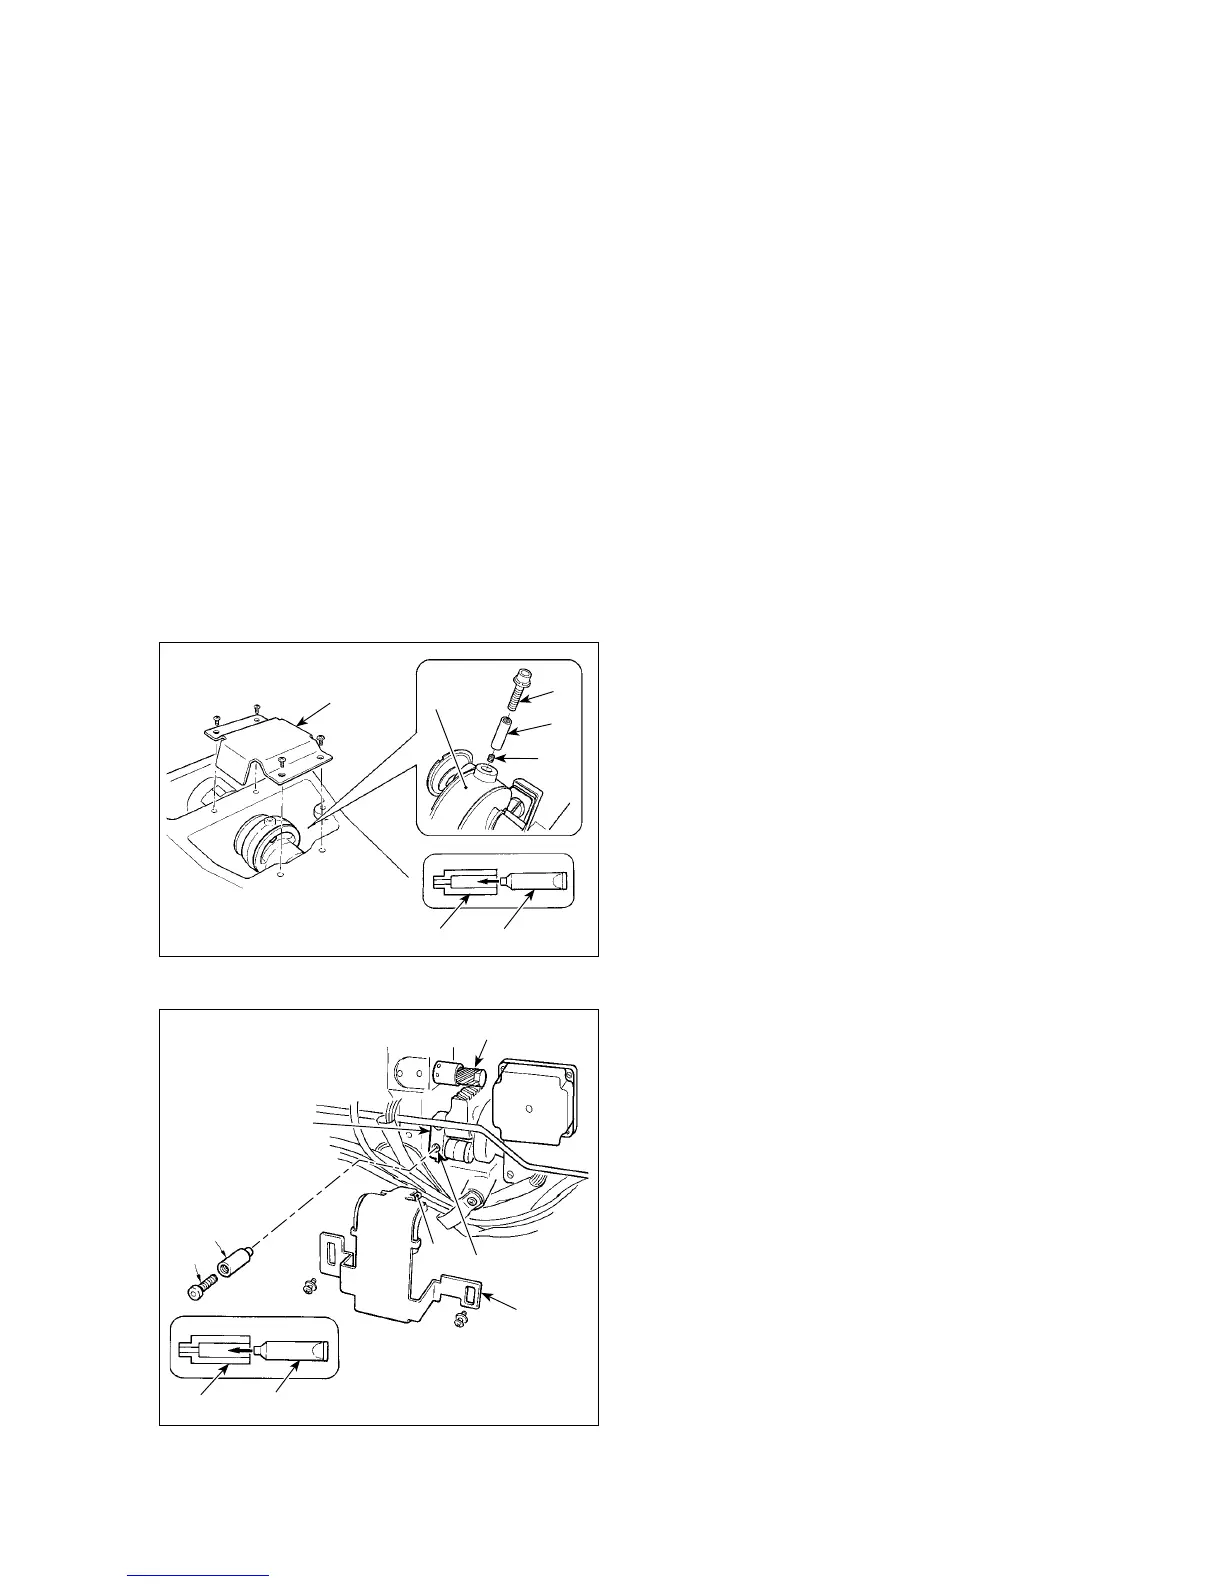
1) Replenishing the eccentric cam section with grease
1. Tilt the machine head and remove the grease
cover
1
.
2. Remove setscrew
3
in oscillator gear
2
.
3. Fill coupling
4
with grease through JUKI
Grease B tube
5
.
4. Sink screw
6
supplied with the unit into the
coupling to add the grease.
5. Securely tighten setscrew
3
which has been
removed after replenishing with the grease.
6. Install grease cover
1
at the location where felt
8
comes in contact with gear
7
.
(
Caution
)
1. Do not strongly press felt
8
against gear
7
. It can cause a
moving failure.
2. JUKI grease A is applied to felt
8
. Do not add JUKI grease B to
the felt
8
.
2) Replenishing the oscillator pin section with grease
4
6
4
5
2
3
1
8
7

 Loading...


