Adjusting the thread tension
CAUTION:
Turn OFF the power switch when replacing the needle.
■
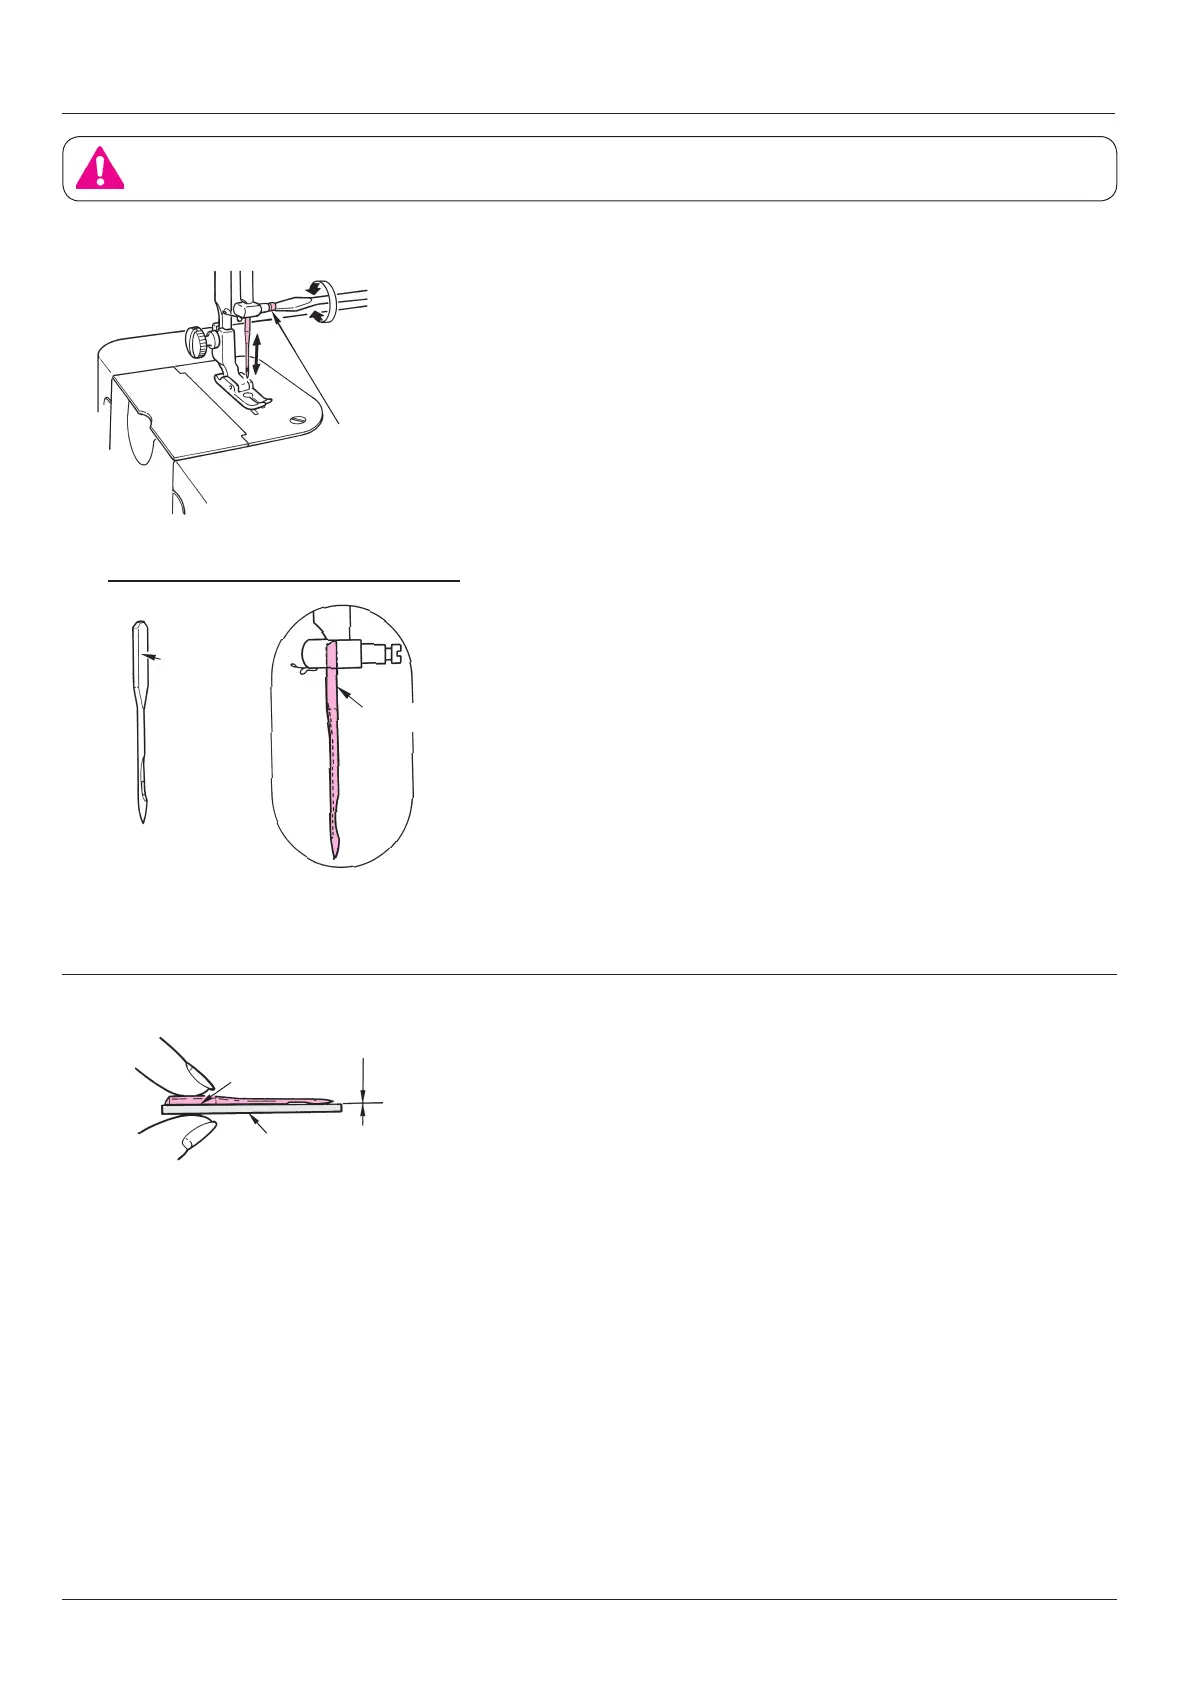
Attaching the needle
1. Turn off power.
2. Lower the presser foot.
3. Move the needle bar up to the highest position of its
stroke.
4. With the flat face of the new needle facing to the
right, insert the new needle into the needle bar until
it can go no further. Then tighten the needle clamp
screw.
Tightens
Loosens
Needle clamp screw
Figure as observed from the front
Flat face
* The needle to be used is HAx1.
■
Checking the needle
Check the needle for its straightness occasionally. Any
defective needle would cause needle breakage, stitch
skipping, thread breakage or damage to materials.
Flat face of
needle
Parallel
Flat plate
Flat face
22
 Loading...