EN
Rolled hemming
CAUTION:
Turn OFF the power switch when replacing the presser foot.
1
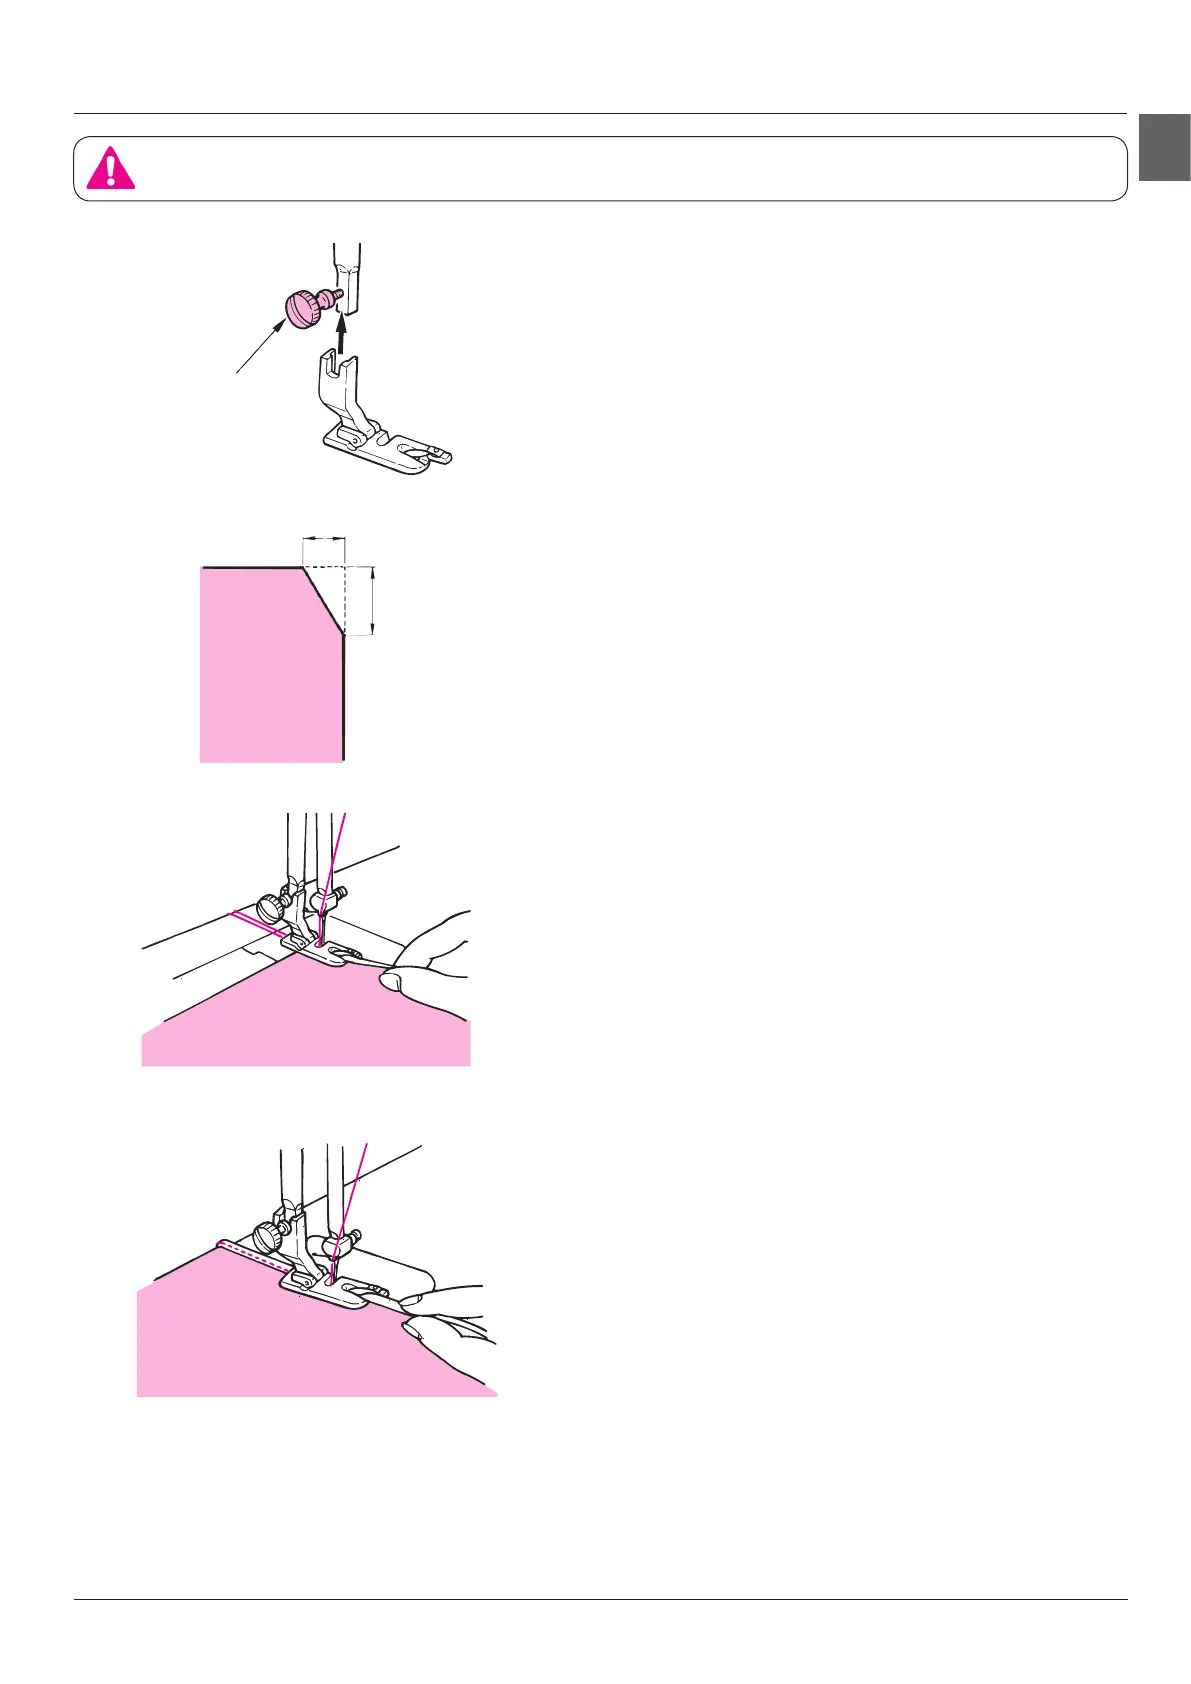
Install the hemming foot.
Turn OFF power. Loosen the screw in the presser bar,
and attach the hemming foot.
2
Cut the corner of the material.
Trim the corner part of the material to help make the
hemming foot hem the material edge.
3
Fit the trimmed material edge into the vortex
groove in the hemming foot.
Fit the material into the vortex groove in the hemming
foot until the descended needle reaches the material,
and lower the hemming holder.
4
Hem the material edge while helping the
material to go into the groove by hand.
Draw the needle and bobbin thread ends with your left
hand, turn the handwheel by 3 or 4 rotations until you
are sure that the material edge is rolled into the groove.
Then hem the material edge while pinching the materi-
al edge with your right-hand thumb and index nger to
make sure that the appropriate amount of material is fed
into the hemming foot with consistency.
Screw in the
presser foot
Material
5 mm
8
mm
23