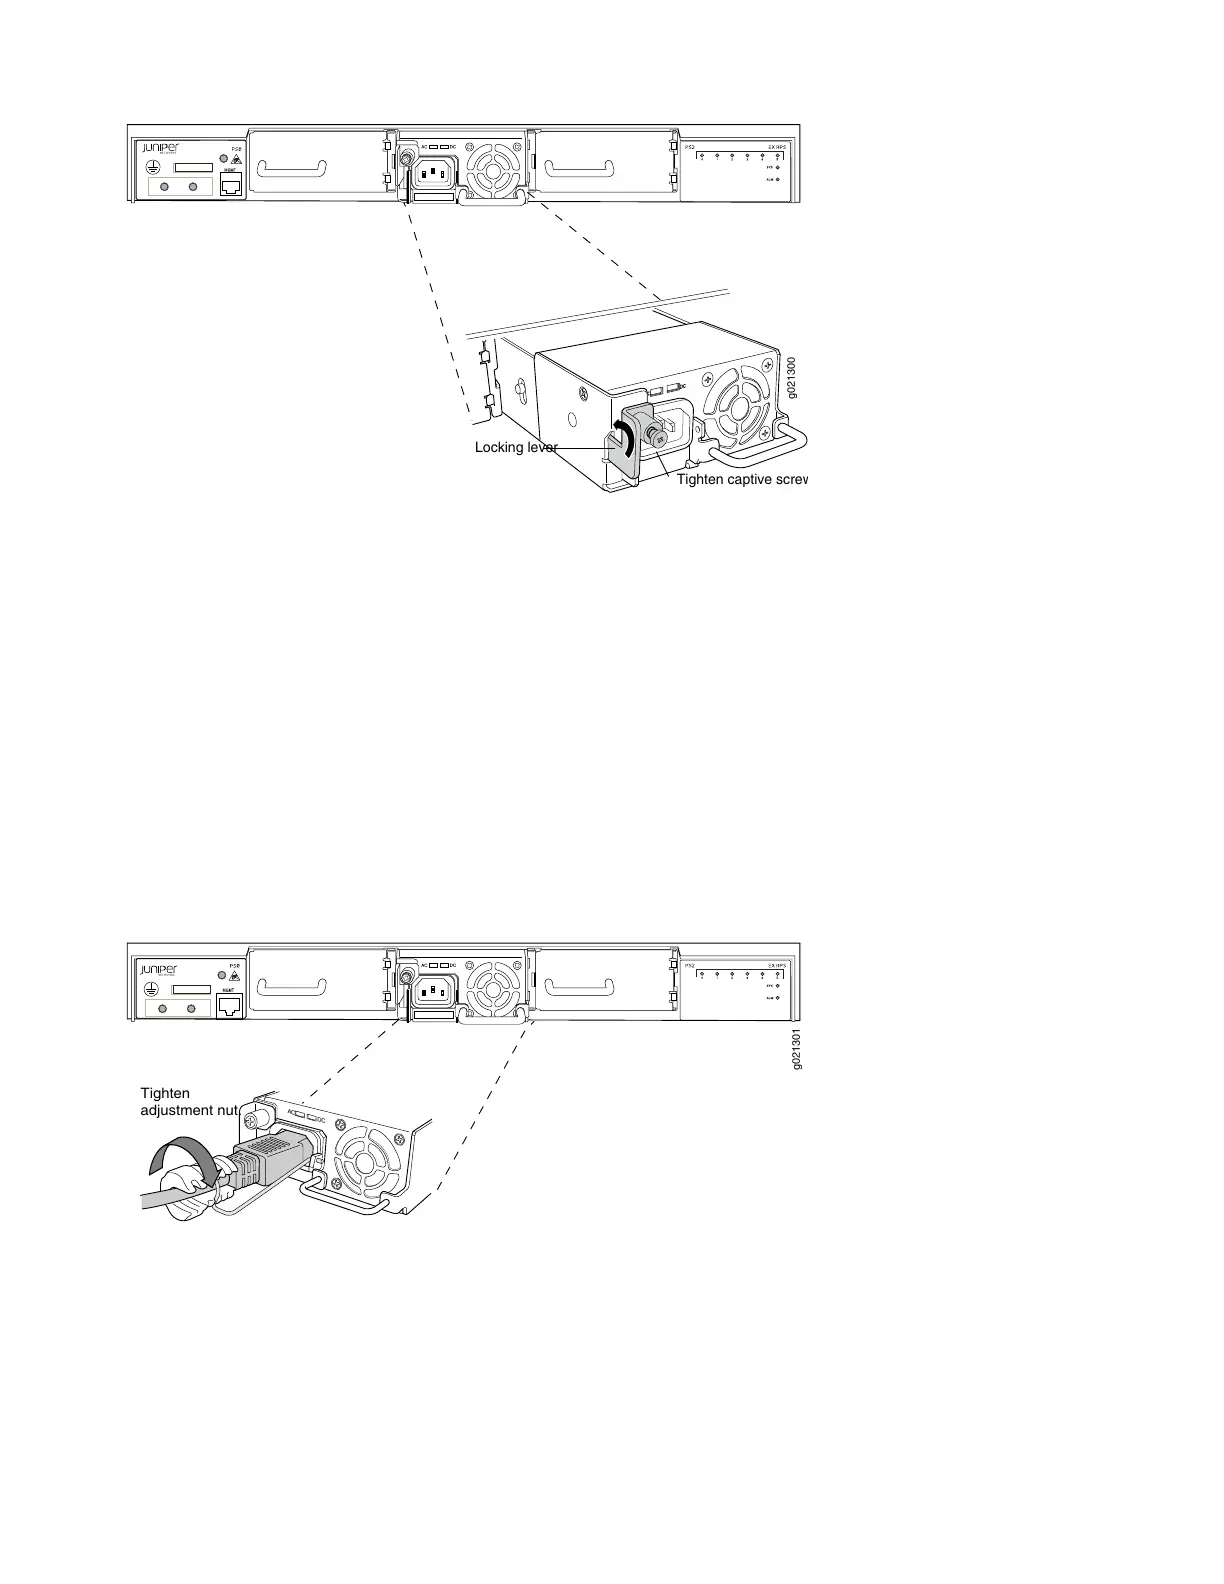
Locking lever
g021300
Tighten captive screw.
5. Push the locking lever up to its highest position.
6. Using the screwdriver, tighten the locking lever screw.
Each power supply can provide backup power for one switch, with a maximum of three switches concurrently supported
by three power supplies.
Connecting the RPS to AC power
1. Squeeze the two sides of the power cord retainer clip and insert the L-shaped ends of the wire clip into the holes in
the bracket on each side of the AC appliance inlet.
2. Insert the coupler end of the power cord into the AC appliance inlet.
Tighten
adjustment nut.
A
C
DC
g021301
3. Push the cord into the slot in the adjustment nut of the power cord retainer. Turn the nut until it is snug against the
base of the coupler and the slot in the nut is turned 90° from the top of the switch.
4. If the AC power source outlet has a power switch, set it to the OFF (0) position.
5. Plug the power cord into the power source outlet.
6. If the AC power source outlet has a power switch, set it to the ON (|) position.
3
 Loading...