Configure Root Authentication
To configure root authentication:
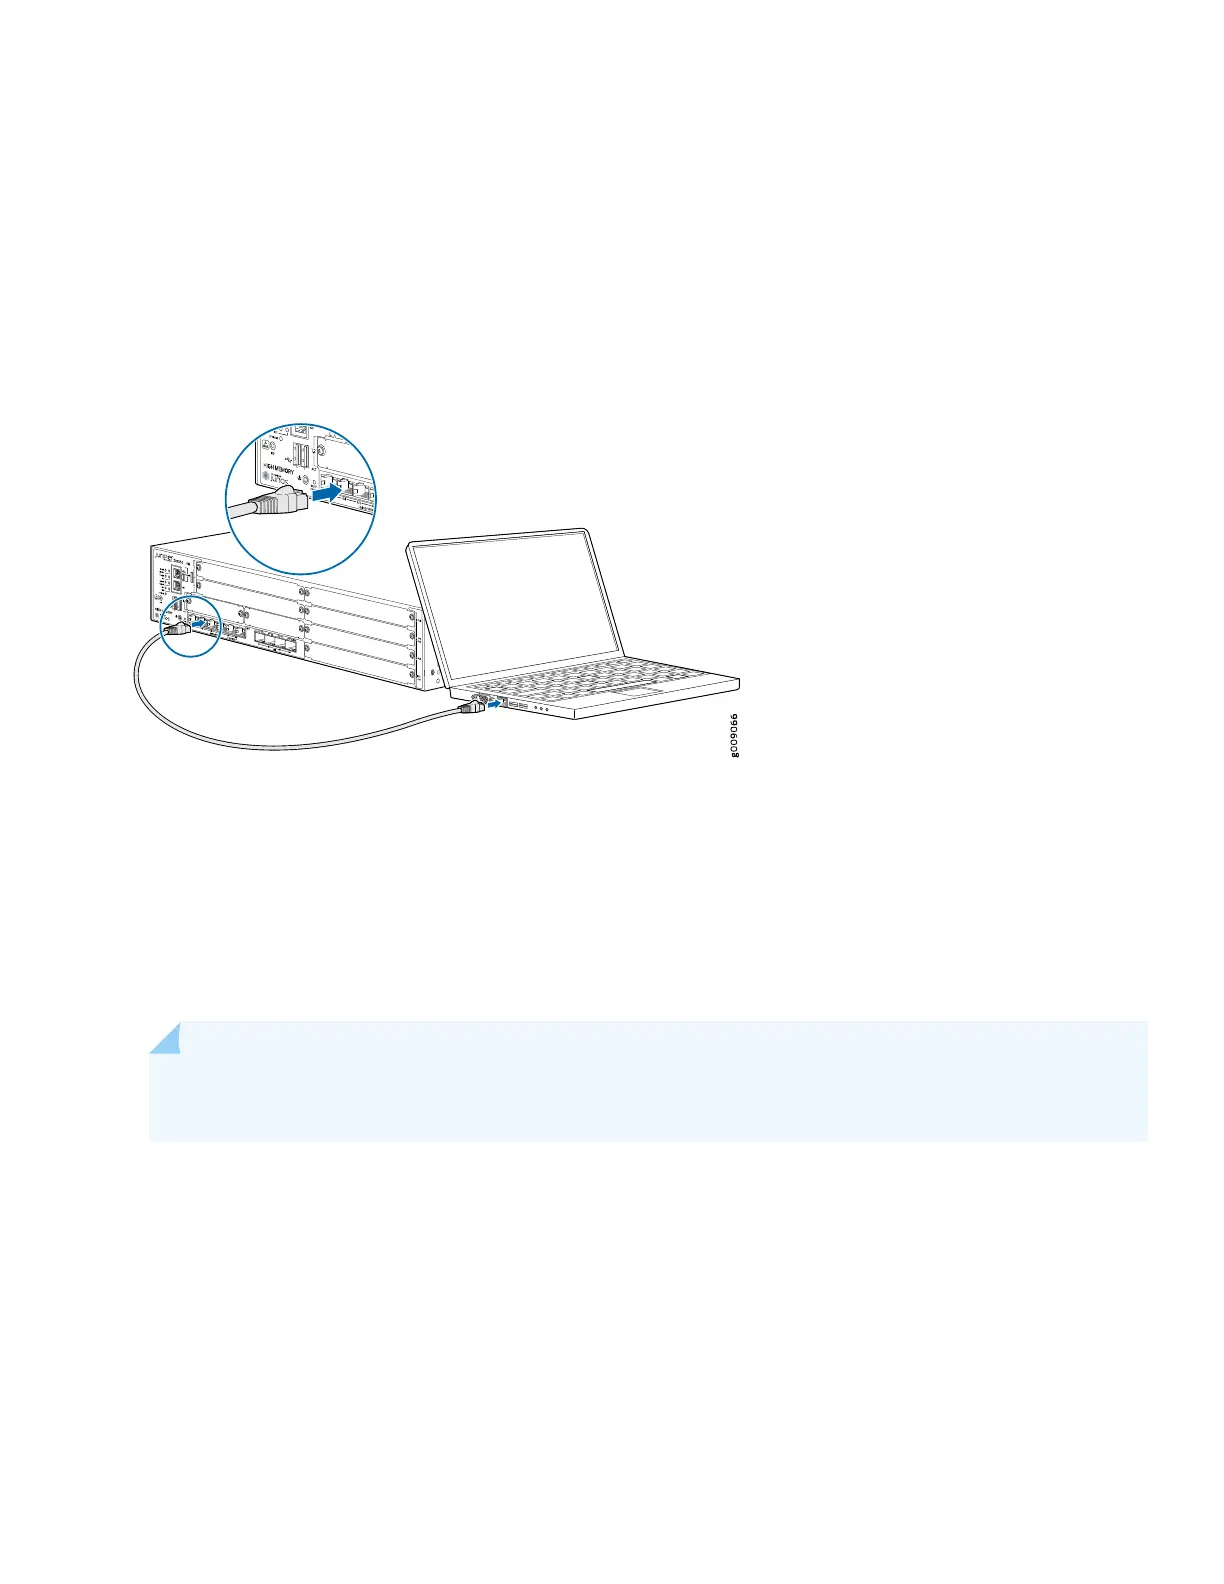
1. Connect any of the network ports numbered 0/1 through 0/5 on the services gateway to the Ethernet port on the
management device, using an RJ-45 cable.
Figure 8: Connecting the Management Device
2. Ensure that the management device acquires an IP address. The IP address should be on the corresponding IP subnet
for the interface you connected to in step 1. The device functions as a DHCP server and will assign an IP address to
the management device.
For example, if you are connected to port 0/1, then the IP address of the management device should be from the
192.168.1.x network. If an IP address is not assigned to the management device, manually configure an IP address.
You can use the ipconfig (or ifconfig for Macintosh or Linux users) command to verify the IP address.
NOTE: Do not assign the 192.168.1.1 IP address to the management device, as this IP address is assigned
to the device.
Refer to Table 3 for information on the subnet for each interface.
3. Open a browser and type https://192.168.1.1 (if connected to port 0/1). For ports other than 0/1, access the services
gateway using the URL https://192.168.x.1, where x is the port number. Refer to the Interfaces table on page 2.
The J-Web Setup wizard opens on your screen.
4. Click Skip in the upper-right corner of the Setup wizard.
5. Set a root authentication password and click OK.
10
 Loading...