EasyManua.ls Logo

JVC GR-D820EK User Manual

JVC GR-D820EK
56 pages
To Next Page IconTo Next Page
Page #1 background image
GR-D820EK
GR-D860EK
LYT1814-001
A
EN
ENGLISH
The camcorder illustrations appearing in this instruction
manual are of the GR-D860.
Dear Customer,
Thank you for purchasing this
digital video camera. Before use,
please read the safety information
and precautions contained in
pages 4 8 to ensure safe use of
this product.
INSTRUCTIONS
DIGITAL VIDEO CAMERA
GR-D820EK_GR-D860EK.book Page 1 Monday, November 19, 2007 10:15 AM

Table of Contents

Question and Answer IconNeed help?

Do you have a question about the JVC GR-D820EK and is the answer not in the manual?

JVC GR-D820EK Specifications

General IconGeneral
BrandJVC
ModelGR-D820EK
CategoryCamcorder
LanguageEnglish

Summary

Getting Started: Preparation

Getting Started: Video Recording

Set Power Switch to REC

Set the camcorder's power switch to the REC position to start recording.

Getting Started: Playing Back

Set Power Switch to PLAY

Set the camcorder's power switch to the PLAY position for playback.

Recording & Playback: Basic Operations

Load the Cassette

Load the video cassette into the camcorder, ensuring correct orientation.

Start/Stop Recording

Press the recording start/stop button to begin or end recording.

Start Playback

Select the playback button (►/II) to start playback of recorded content.

General Safety Precautions

UK Mains Connection and Fuse Safety

UK-specific mains connection, fuse replacement, and wiring guidance.

Protection from Fire, Shock, and Moisture

Do not expose unit to rain/moisture; do not open cabinet to avoid hazards.

Lithium Battery Handling and Safety

Precautions to prevent battery hazards like overheating, explosion, or fire.

General Cautions and Usage Guidelines

Physical Safety and Handling Precautions

Securely use strap, avoid dropping, keep away from children, manage cables safely.

Safe Equipment Usage: Do's and Don'ts

General Operational and Connection Guidelines

Read instructions, ensure proper connections, consult dealer, avoid operating damaged equipment.

Critical Safety Warnings

Never let children insert objects into openings; prioritize safety with electrical equipment.

Getting Started: Remote Control

Getting Started: Controls and Connections

Camcorder Controls and Buttons

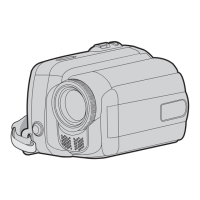
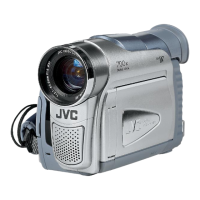
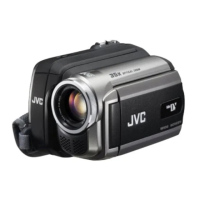
Details of camcorder controls, including levers, buttons, and switches.

Power and Mode Switch Operations

Explains the operation of the power switch and MEMORY/VIDEO switch.

Getting Started: LCD Monitor

LCD Monitor Indications

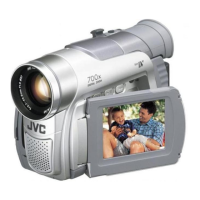
Explains the various indicators displayed on the camcorder's LCD monitor during recording and playback.

Getting Started: Power Management

Charging The Battery Pack

Step-by-step guide for charging the camcorder's battery pack.

Getting Started: Display and Cassette

Loading/Unloading A Cassette

Steps for loading and ejecting a video cassette.

Recording & Playback: Basic Recording

Basic Recording Procedure

Preparation steps and how to start basic video recording.

Recording & Playback: Modes and Time Code

Recording & Playback: Zoom and Playback

Normal Video Playback

How to play back recorded video tapes.

Recording & Playback: Playback Features

Playback Using Remote Control

Using the remote control for playback functions.

D.S.C. Recording & Playback: Basics

D.S.C. Snapshot Feature

How to take still photos using the camcorder.

Menus For Detailed Adjustment: Overview

Menus For Detailed Adjustment: Recording

Recording Menus Details

Details on adjustable recording settings like FUNCTION, CAMERA, and ZOOM.

Menus For Detailed Adjustment: Camera Settings

Menus For Detailed Adjustment: Display

Menus For Detailed Adjustment: Settings

Features For Recording: Focus and Exposure

Manual Focus Adjustment

How to manually adjust focus for optimal shooting conditions.

Manual Exposure Control

How to manually adjust exposure for different lighting situations.

Features For Recording: Iris and Backlight

Features For Recording: White Balance

Connections/Editing: TV and VCR

Connections/Editing: Digital Dubbing

Digital Dubbing via DV Connector

Copying video scenes to another unit via a DV connector using digital dubbing.

Connections/Editing: Computer Transfer

Connecting to a Personal Computer

Connecting the camcorder to a PC using USB or DV cable for data transfer.

Troubleshooting: Recording and Image Issues

Recording Cannot Be Performed

Solutions for issues preventing recording, like tape protection or open holder.

Image and Focus Problems

Addresses vertical lines, sunlight distortion, focus issues, and slow shutter appearance.

LCD Display and Power Issues

Resolving dark/whitish images, no LCD picture, aspect ratio, and no power supply problems.

Troubleshooting: Display and Remote Control

LCD Indications and Charging Lamp Issues

Troubleshooting blinking LCD indications and charging lamp not lighting.

Remote Control Not Working

How to fix issues with the remote control not working.

Troubleshooting: Warning Indications

Warning Indications and Meanings

Explains various warning indications and their remedies.

Cautions: Battery and Cassette Handling

Battery Pack Safety and Handling

Cautions for handling battery packs to avoid hazards and prolong service life.

Cautions: Unit and Component Care

Main Unit Safety and Usage Precautions

Do not open unit, avoid humidity, dust, shock, extreme temperatures, or direct sunlight.

Dirty Video Heads and Problems

Issues caused by dirty video heads and cleaning instructions.

Cautions: Condensation and Maintenance

Moisture Condensation Issues

Explains condensation issues and the related warning message.

Serious Malfunctioning and Interference

What to do in case of serious malfunctions and external interference.

User Maintenance: Cleaning the Camcorder

Instructions for cleaning the camcorder exterior, LCD monitor, and lens.

Specifications: Camcorder Details

Related product manuals