EN 11
Master Page: Right
GR-DVP7-5EG_09-17.fm Page 11
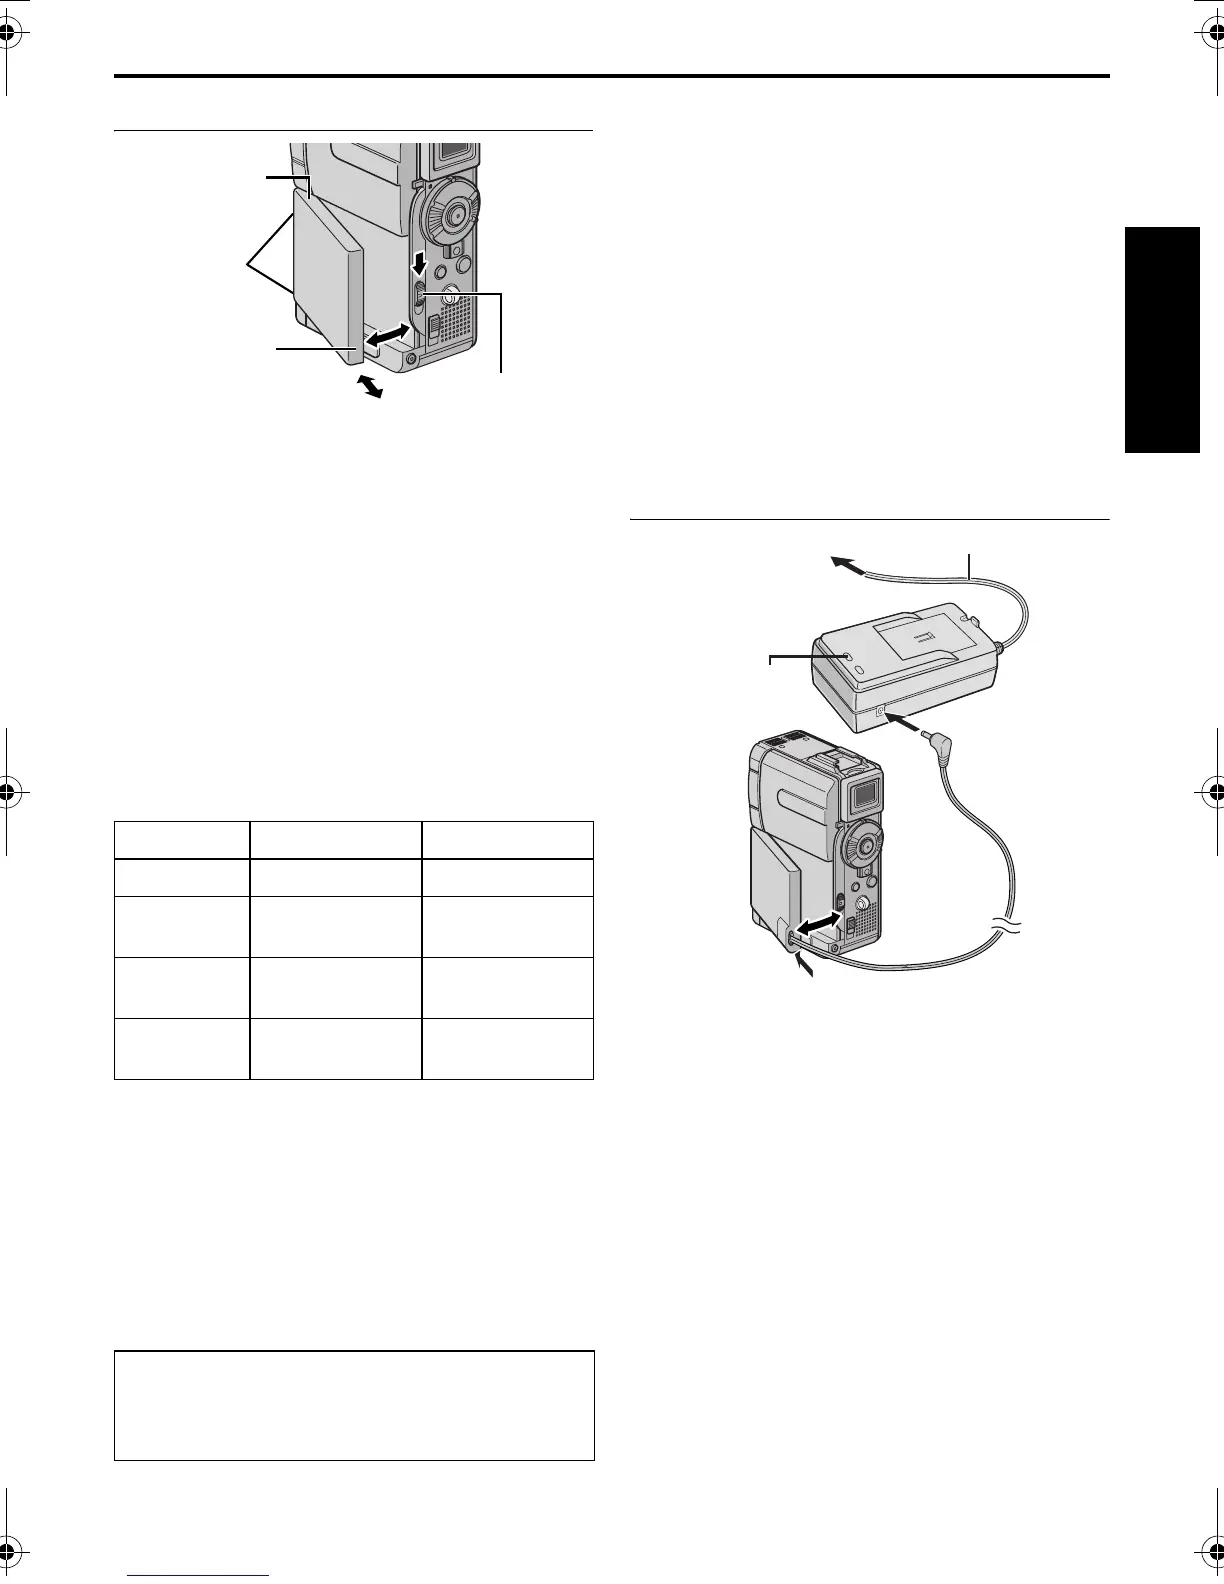
Using The Battery Pack
1
Align the battery pack’s two notches with the tabs
on the camcorder’s battery pack mount.
2 Insert the terminal end 1 of the battery pack into
the battery pack mount.
3 Firmly push the end 2 of the battery pack until it
locks into place.
To detach the battery pack...
While sliding down BATT. RELEASE, remove it.
NOTE:
When using the battery pack and the S/AV/Editing
cable, disconnect the S/AV/Editing cable first
(墌 pg. 25), and then detach the battery pack.
Approximate recording time
NOTES:
● Recording time is reduced significantly under the
following conditions:
• Zoom or Record-Standby mode is engaged
repeatedly.
• The LCD monitor is used repeatedly.
• The playback mode is engaged repeatedly.
● Before extended use, it is recommended that you
prepare enough battery packs to cover 3 times the
planned shooting time.
INFORMATION:
The optional extended-use battery pack kit is a set
composed of a battery pack and AC Power Adapter/
Charger:
VU-V840 KIT: BN-V840U battery pack & AA-
V15EG or AA-V15EK AC Power
Adapter/Charger
VU-V856 KIT: BN-V856U battery pack & AA-
V80EG or AA-V80EK AC Power
Adapter/Charger
Read the kit’s instruction manual before using.
Also, by using the optional JVC VC-VBN856U DC
Cord, it will be possible to connect BN-V840U or
BN-V856U battery packs to the camcorder and
supply power directly to the camcorder.
Using AC Power
1
Make sure you unplug the camcorder’s DC cord
from the AC Power Adapter/Charger.
2 Plug the AC Power Adapter/Charger’s power cord
into an AC outlet. The POWER indicator lights.
3 Attach the coupler part of the DC cord to the
camcorder’s battery pack mount.
4 Plug the DC cord to the DC OUT connector on
the AC Power Adapter/Charger.
NOTES:
● The provided AC Power Adapter/Charger features
automatic voltage selection in the AC range from
110 V to 240 V.
● For other notes, 墌 pg. 81.
Battery pack LCD monitor on Viewfinder on
BN-V107U 1 hr. 1 hr. 10 min.
BN-V114U
(optional)
2hr. 2hr. 20min.
BN-V840U
(optional)
5 hr. 10 min. 6 hr.
BN-V856U
(optional)
7 hr. 40 min. 9 hr. 10 min.
ATTENTION:
Before detaching the power source, make sure
that the camcorder’s power is turned off. Failure to
do so can result in a camcorder malfunction.
A
B
Notches
BATT. RELEASE
Switch
To AC outlet
To D C OUT
connector
Power cord
AC Power Adapter/
Charger
To battery pack mount
DC cord
POWER indicator
(red)
GR-DVP7-5EG_09-17.fm Page 11 Friday, March 1, 2002 9:51 AM
 Loading...