1.
Set the POWER switch to ON.
The unit turns on in Camera mode.
■ The operation differs according to whether the unit is in the Camera mode or in the VTR mode.
When the MODE switch is pressed upward, the mode is changed.
The Camera indicator or VTR indicator comes on in accordance with the selected mode.
Mode
Camera mode
VTR mode
Operation
The GY-DV5000 enters the record mode. The camera image is displayed in the viewfinder or
on the LCD monitor. When a recordable videocassette is loaded, the GY-DV5000 enters the
record-standby mode automatically. “STBY” is displayed in the VTR operation mode indication
area of the LCD monitor or in the viewfinder. In this condition, press the VTR trigger button to
start recording.
* Playback is also possible in the Camera mode.
Playback operation becomes possible when the STOP button is pressed to set the VTR
operation mode indicator to indicate STOP.
The GY-DV5000 enters the VTR playback mode. The camera image will not be displayed in
the viewfinder or on the LCD monitor. When a videocassette is loaded, the GY-DV5000 enters
the stop mode.
“STOP” is displayed in the VTR operation mode indication area of the LCD monitor or in the
viewfinder.
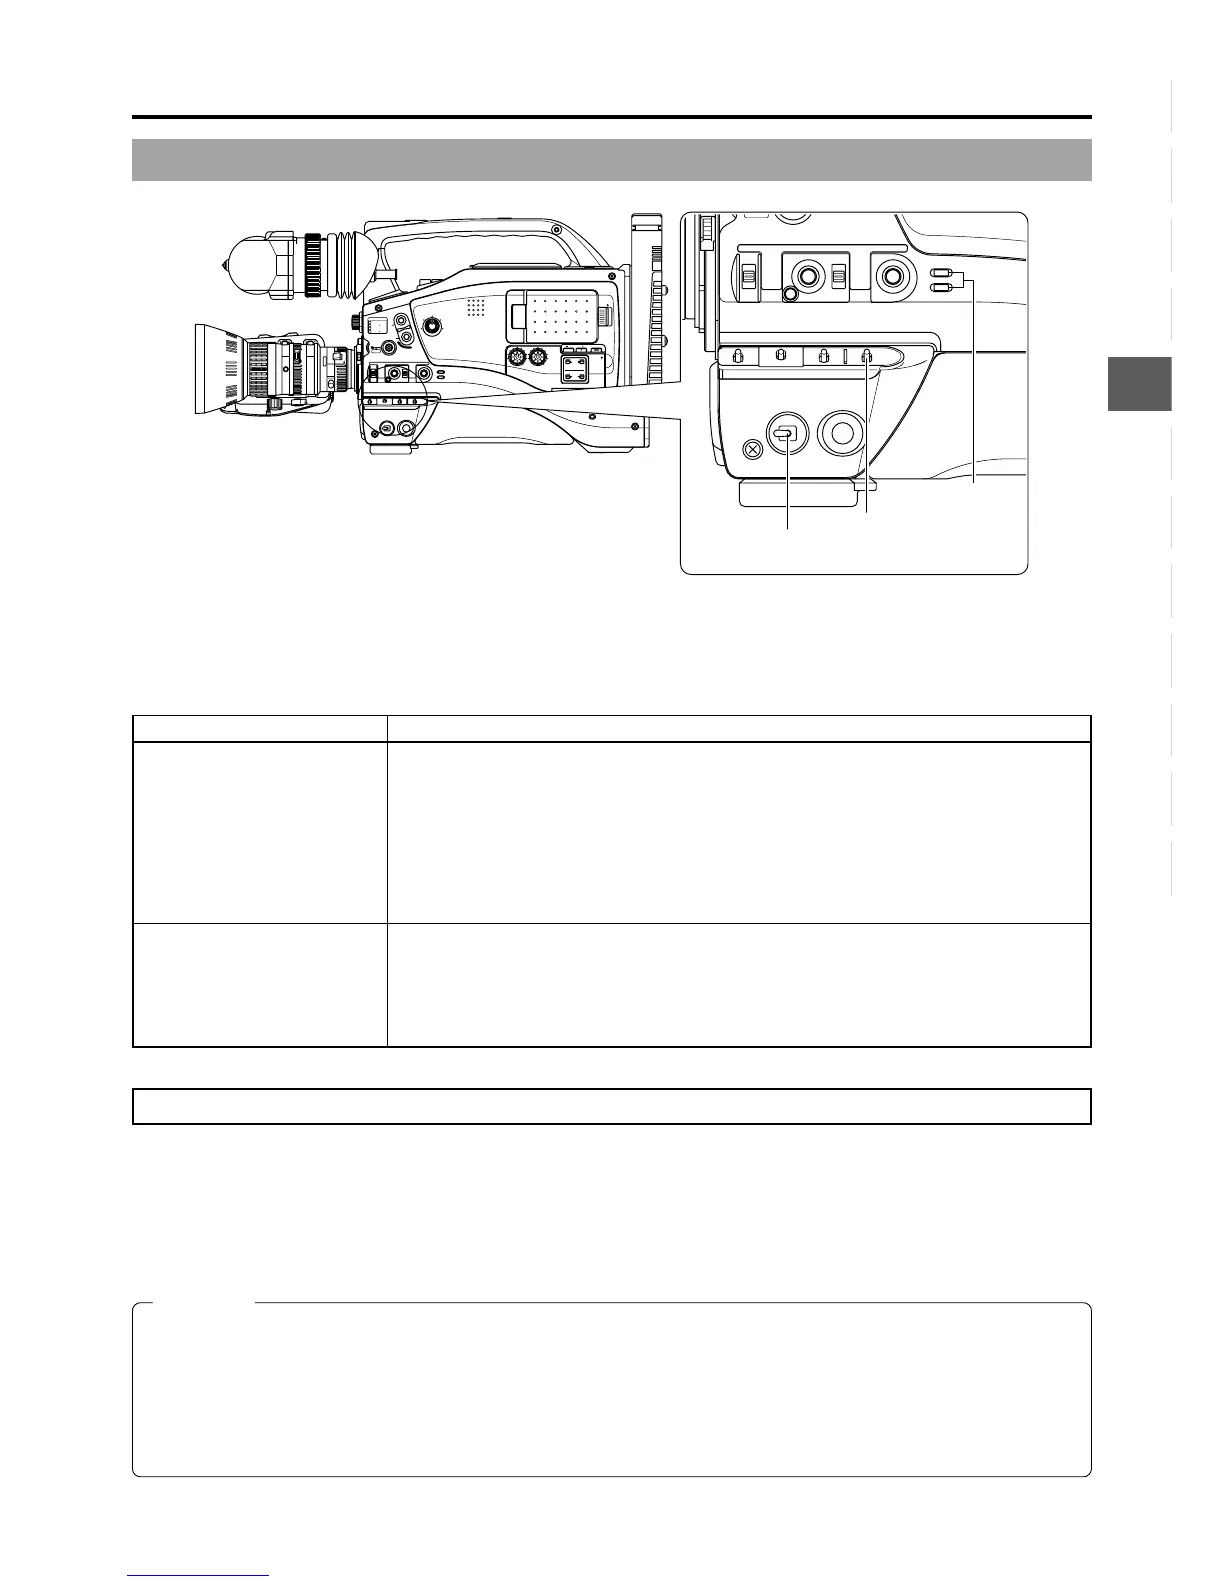
5-1 Turning the Power ON
MODE
indicator
POWER
switch
MODE
switch
Turning the Power OFF
1.
Place the GY-DV5000 in the record-standby or STOP mode.
2.
Set the POWER switch to OFF.
3.
Remove the battery pack or the power supply to the DC IN connector. (When the camera is not going to be used for a longer
period.)
CAUTION:
● Do not set the POWER switch to OFF while recording is taking place.
Confirm that the STBY or STOP indication is shown in the VTR operation mode indication area before the power is turned
off.
Should the POWER switch accidentally be set to OFF during a recording, wait at least 5 seconds before turning the power
on again.
● Always set the POWER switch to OFF before disconnecting the power supply
Do not turn the battery pack or AC power supply OFF while the POWER switch on the camera is still set to ON.
 Loading...