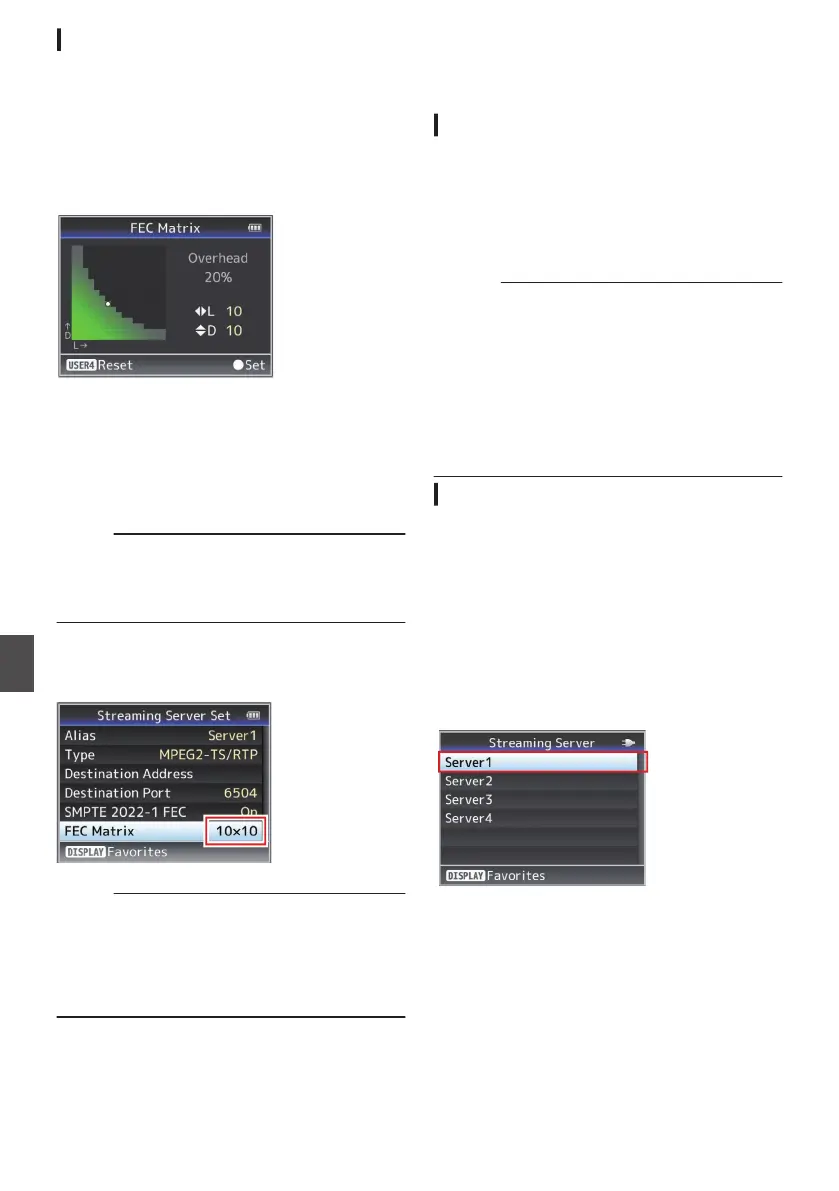
Setting the FEC Matrix
Set the amount of FEC (Forward Error Correction)
overhead for configuring SMPTE2022-1.
1
Select [System] B [Network]/[Settings]
B
[Live Streaming Set] B [Streaming Server]
B [Server1] to [Server4] B [FEC Matrix] and
press the Set button.
The FEC adjustment screen appears.
.
2
Adjust the L and D values.
Use the H/I buttons to adjust the L value, and
the J/K buttons to adjust the D value.
The amount of FEC overhead changes when
the L and D values are changed.
To restore the L and D values to their default
values, press the [C.REVIEW/4] button.
Memo :
0
Setting range
0
4 ≦ L ≦ 20 (Default value: L = 10)
0
4 ≦ D ≦ 20 (Default value: D = 10)
0
L × D ≦ 100 (Default value: L×D = 10×10)
3
Press the Set button (R).
The screen returns to the streaming server
setting screen.
.
Memo :
0
Increasing the amount of FEC overhead
increases the packet loss resilience but more
network bandwidth is used.
0
Even with the same amount of overhead,
increasing the L value will increase the packet
loss (continuous packet loss) resilience.
Logging in to Facebook
n
Preliminary Configuration
Configure the date/time of this unit correctly as the
correct date/time information is needed for login
authentication.
Do not turn off the power while operating the
Facebook Live settings screen.
Check to ensure that the camera is connected to
the network.
Caution :
0
Read through the Facebook Terms of Service
before using.
0
When sharing a live video on Facebook, do not
include any third-party
ads in the video content.
Also, make sure that recorded contents can be
clearly differentiated from the live contents.
0
Changes to and restrictions on the settings and
connection may be introduced, or services may
be discontinued following changes in the
specifications of the service provider.
Connection Setup
1
Set [System] to “HD” or “SD”.
Set [System] B [Record Set] B [
Record
Format]
B [System] to “HD” or “SD”.
2
Select [Streaming Server].
0
Open the
[System] B
[Network]/[Settings] B
[Live Streaming] B [Streaming Server]
screen.
0
Select a server using the cross-shaped
button (JK), and press the Set button (R).
(A P128
[ Streaming Server ] )
.
186
Performing Live Streaming n
Connecting to the Network n
 Loading...