Model 2400 Service Manual 2-18
Calibration
2400-902-01 (G - Feb 2006)
Remote calibration procedure
Step 1. Prepare the Model 2400 for calibration
1. Connect the Model 2400 to the controller IEEE-488 interface or RS-232 port using a
shielded interface cable.
2. Turn on the Model 2400 and the test equipment, and allow them to warm up for at least
one hour before performing calibration.
3. If you are using the IEEE-488 interface, make sure the primary address of the
Model
2400 is the same as the address specified in the program you will be using to
send commands. (Use the MENU key and the COMMUNICATION menu to access the
IEEE-488 address.)
Step 2. Voltage Calibration
1. Connect the Model 2400 to the digital multimeter (see Figure 2-1), and select the multi-
meter DC volts function.
2. Send the commands summarized in Table 2-8 in the order listed to initialize voltage cal-
ibration. (When the :CAL:PROT:CODE command is sent, the instrument will assume
the operating states listed in
Table 2-2.)
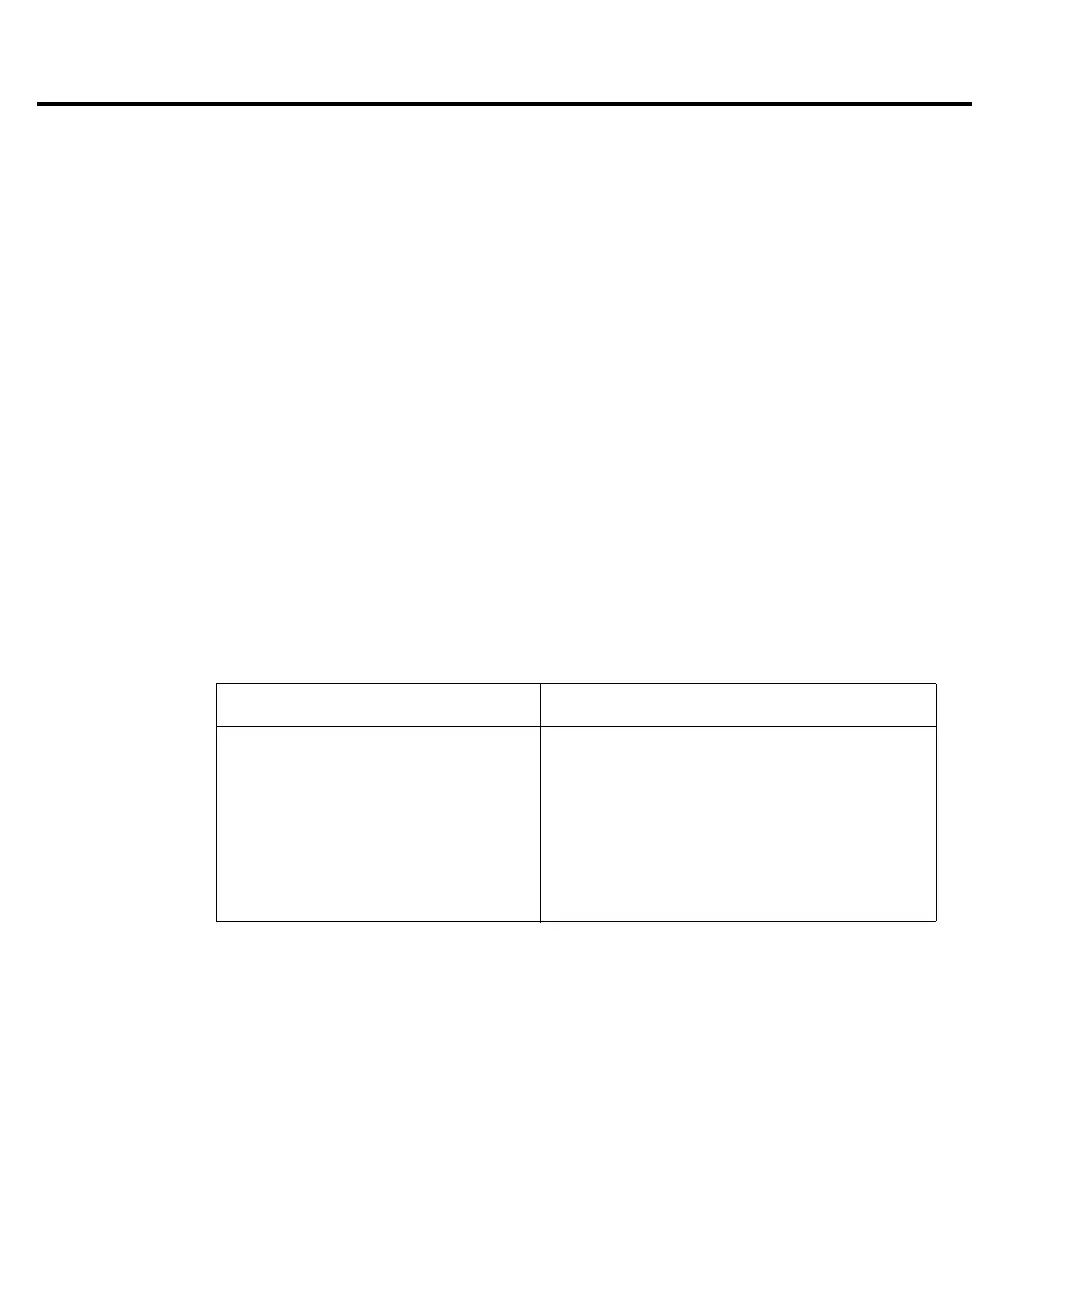
Table 2-8
Voltage calibration initialization commands
Command Description
*RST
:SOUR:FUNC VOLT
:SENS:CURR:PROT 0.1
:SENS:CURR:RANG 0.1
:SOUR:VOLT:PROT:LEV MAX
:SYST:RSEN OFF
:CAL:PROT:CODE ‘KI002400’
:OUTP:STAT ON
Restore GPIB defaults.
Activate voltage source.
Current limit when voltage source is active.
Make sure 1A range is not active.
Maximum allowable source voltage.
Disable remote sensing.*
Unlock cal.
Turn source on.
*Remote sensing may be used if desired, but is not essential when using recommended digital multimeter.
3. Perform the range calibration steps listed in Table 2-9 for each range. For each range:
• Send the :SOUR:VOLT:RANG command to select the source and sense range
being calibrated. For example, for the 2V range, the following command would be
sent:
:SOUR:VOLT:RANG 2
• Program the source to output the negative full-range value using the :SOUR:VOLT
command. For example:
:SOUR:VOLT -2
• Note and record the multimeter reading.

 Loading...