Disassembly
5162 690 01 Rev. C KohlerEngines.com
Lapping Valves
Reground or new valves must be lapped in, to provide
proper fi t. Use a hand valve grinder with a suction cup
for fi nal lapping. Lightly coat valve face with a fi ne grade
of grinding compound, then rotate valve on its seat with
grinder. Continue grinding until a smooth surface is
obtained on seat and on valve face. Thoroughly clean
cylinder head in soap and hot water to remove all traces
of grinding compound. After drying cylinder head, apply
a light coating of SAE 10 oil to prevent rusting.
Valve Stem Seals
These engines use valve stem seals on intake and
exhaust valves. Always use new seals when valves
are removed from cylinder head. Seals should also be
replaced if deteriorated or damaged in any way. Never
reuse an old seal.
Remove Breather Assembly
1. Remove four fasteners securing breather assembly,
breather adapter (style based on spec), and gaskets
to crankcase.
2. Carefully break gasket seals and remove all parts.
Do not pry on sealing surfaces as it could cause
damage resulting in leaks. Note assembly and
orientation of parts.
Remove Oil Reservoir and Pickup Screen
1. Remove eight screws securing oil reservoir and
gasket to engine.
2. Remove mounting screw and carefully work pickup
screen off end of pickup tube.
Remove Closure Plate Assembly
1. Remove fourteen hex fl ange screws securing
closure plate to crankcase.
2. Locate two protruding tabs on closure plate.
Carefully tap to break gasket seal. Do not pry on
sealing surfaces as this could cause leaks. Separate
closure plate from crankcase. Remove old gasket.
Inspection
Inspect oil seal in closure plate and remove it if it is worn
or damaged.
Inspect main bearing surface for wear or damage.
Replace bearing or closure plate assembly if required.
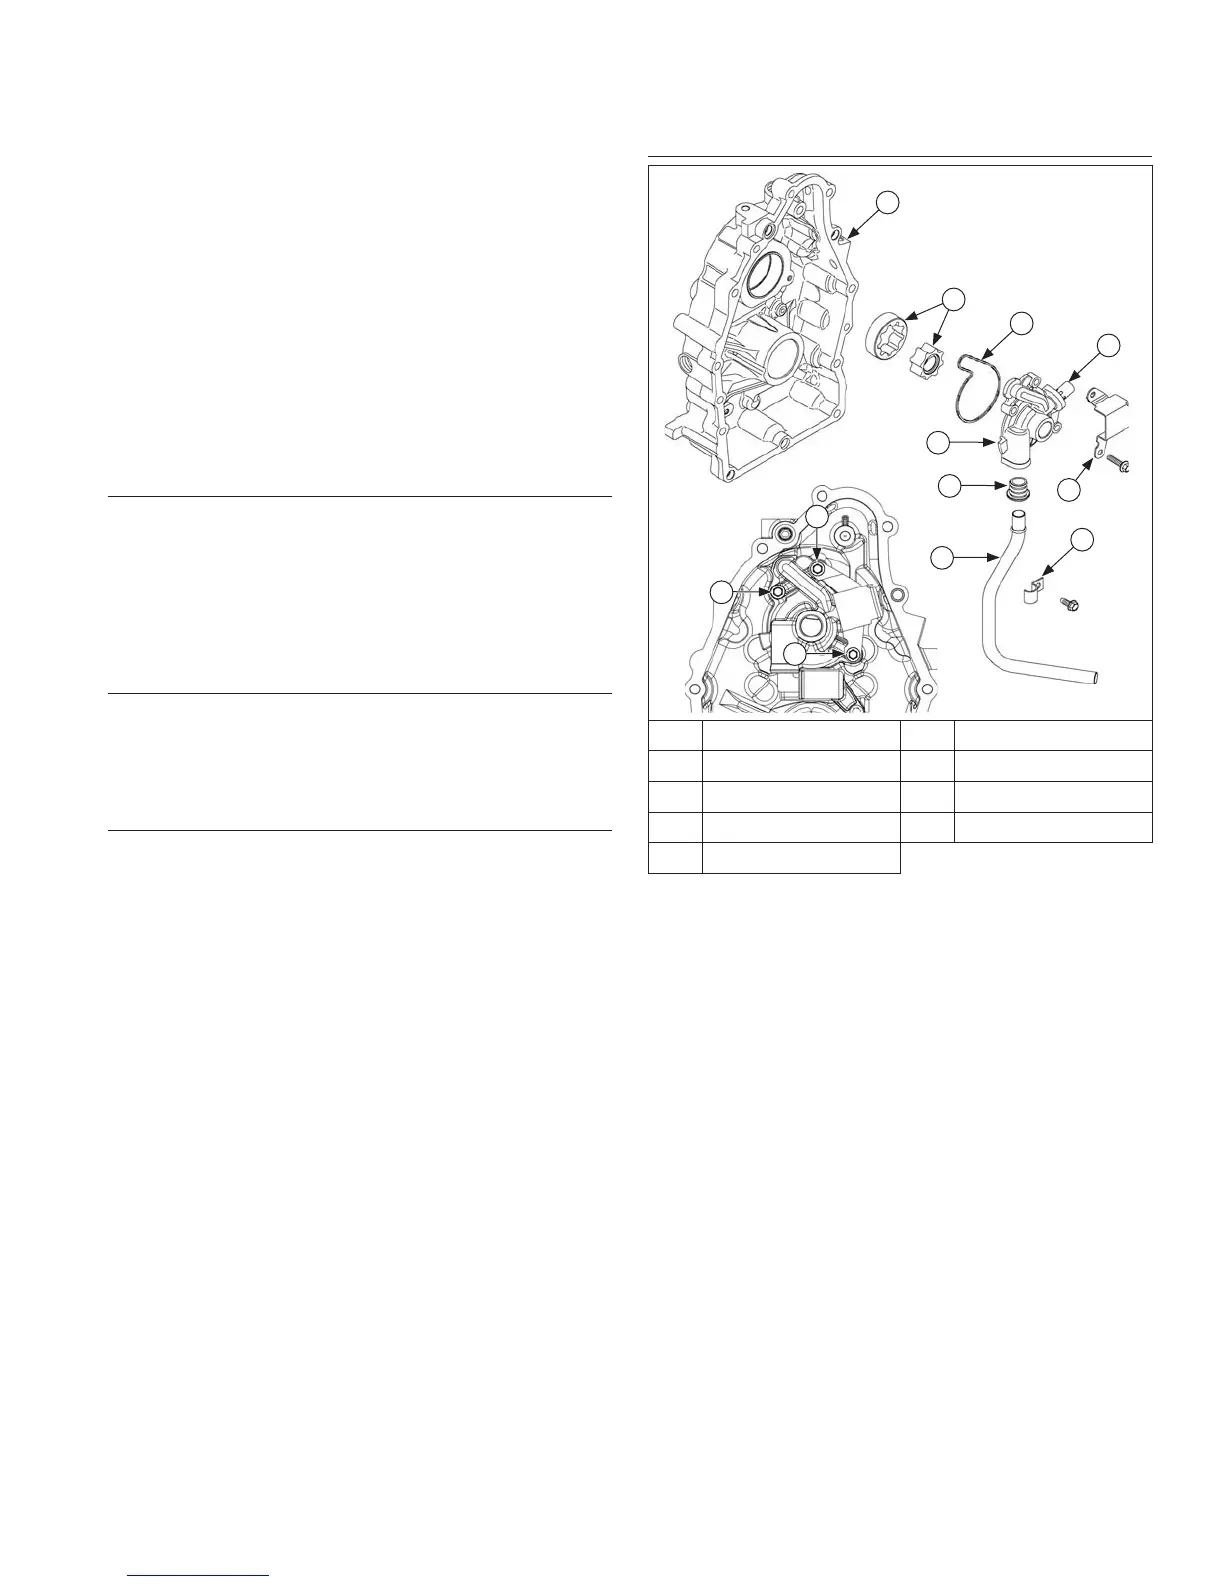
Oil Pump Assembly
A
B
C
D
F
E
H
G
3
2
1
I
A Closure Plate B Gerotor Gears
C Oil Ring D Relief Valve
E Oil Pump F Inlet Seal
G Relief Valve Baffl e H Clamp
I Pickup Tube
Disassembly
1. Remove three hex fl ange screws securing oil pump
housing including relief valve baffl e, and single
screw with clamp for pickup tube.
2. Remove oil pump housing and pickup tube from
closure plate.
3. Remove oil pump gerotor gears from closure plate
recess.
4. Remove oil pickup by pulling it free from oil pump
body.
5. Relief valve is a one-piece style, staked to oil pump
housing; removal should not be attempted, nor is
internal servicing possible. If a problem with relief
valve is encountered, oil pump should be replaced.
Inspection
Inspect oil pump housing, gerotor gears, and closure
plate recess for nicks, burrs, wear, or any visible
damage. Inspect inlet seal for pickup tube in housing. If
any parts are worn or damaged, replace seal, oil pump
or closure plate as required.
 Loading...