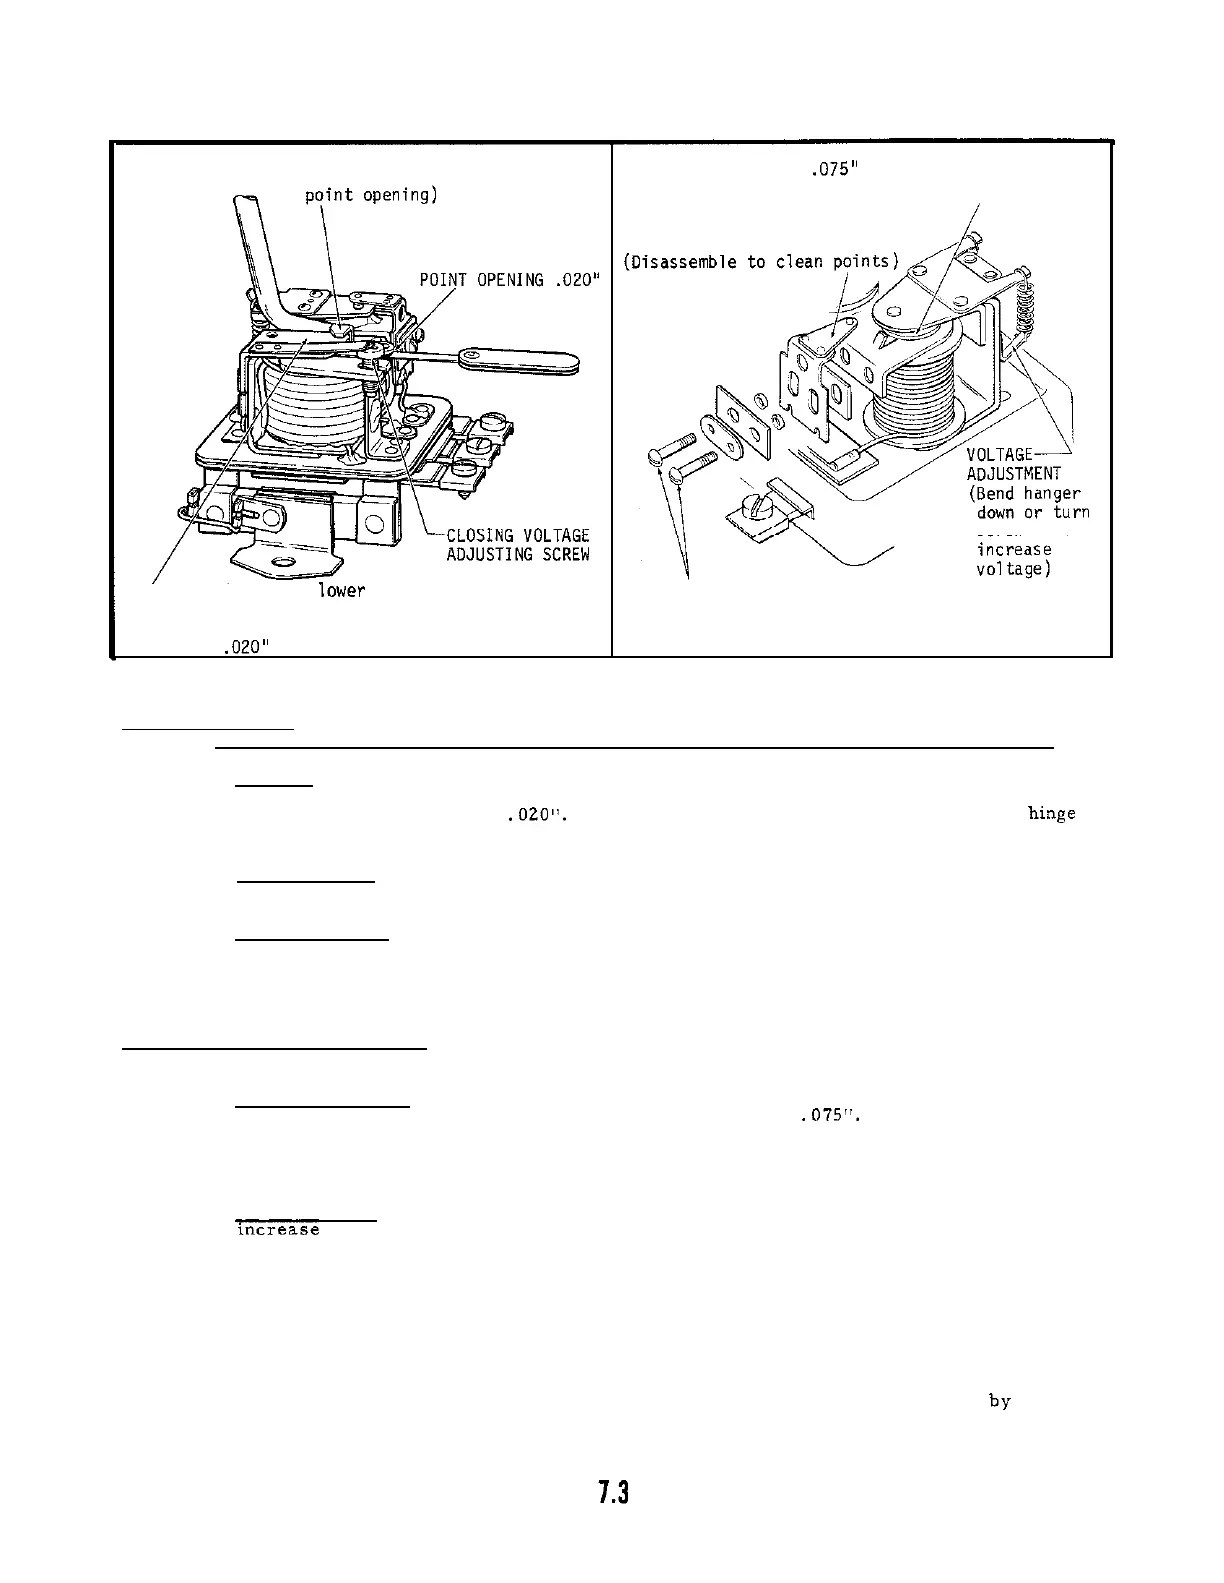
Cutout Relay Unit:
This requires three checks and adjustments: air gap, point opening and closing
voltage.
The air gap and point opening adjustments must be made with the battery disconnected!
ARMATURE STOP
(Bend to adjust
ARMATURE (Raise or
lower
to adjust air gap)
AIR GAP (Armature
to core)
.020"
FIGURE 7
-
2
--
CUTOUT RELAY ADJUSTMENTS
1.
Air Gap: Place fingers on the armature directly above the core and press armature down
until the points just close, then measure the air gap between the armature and the center
of the core.
Gap should be
.020".
Adjust by raising or lowering armature at its hlnge
mounting. Retighten screws after adjustment.
AIR GAP .075" (Measured between
Armature and Core with points touching)
UPPER CONTACT SUPPORT
screw in to
ADJUSTING SCREWS
(Loosen and shift support
to adjust air gap)
FIGURE 7
-
3
--
CURRENT
-
VOLTAGE ADJUSTMENTS
2.
Point Opening: Adjust point opening by bending the armature stop. Opening should be
,020
"
.
3.
Closing Voltage:
Adjust closing voltage by turning screw clockwise to increase spring
tension and voltage, counterclockwise to decrease spring tension and closing voltage.
Be
sure that closing voltage adjustment is at least 0. 5 volt less than the current voltage regu
-
lator unit setting.
This should be 12.8 volts.
Current
-
Voltage Regulator Unit:
This requires two inspections and adjustments:
The armature air
gap and the voltage setting.
Disconnect battery before making these adjustments.
1.
Armature Air Gap:
To check air gap, push the armature down until contact points are
still just touching, then measure air gap. This should be
,075".
Adjust by loosening con
-
tact mounting screws and raising or lowering the contact bracket as required.
Be sure
points are lined up and screws are retightened after adjustment and before resetting voltage
setting.
2.
Voltage Setting:
Adjust the voltage setting by turning adjusting screw
--
clockwise to
7ncrease the voltage setting and counterclockwise to decrease the voltage setting.
After
each adjustment,
replace cover and allow ample running time to again stabilize voltage and
temperature before rechecking the voltage setting.
CAUTION:
If adjusting screw is turned down (clockwise) beyond normal range required for adjustment,
the spring support may fail to return when pressure is relieved.
If this happens, turn screw counter
-
clockwise until enough clearance develops between the screw head and spring support.
Then bend
spring support upward carefully with a small pliers until contact is made with the screw head.
The
final setting should always be approached by increasing spring tension.
In other words, if setting is
too high, unit should be adjusted below the required value then raised to the exact setting
by increasing
spring tension.
Be
sure screw is exerting force on hanger.
 Loading...