43
Disassembly/Inspection and Service
14 690 01 Rev. G KohlerEngines.com
Some important points to remember when servicing
piston rings:
1. Cylinder bore must be de-glazed before service ring
sets are used.
2. If cylinder bore does not need re-boring and if old
piston is within wear limits and free of score or scuff
marks, old piston may be reused.
3. Remove old rings and clean up grooves. Never
reuse old rings.
4. Before installing new rings on piston, place top 2
rings, each in turn, in its running area in cylinder
bore and check end gap. Compare ring gap to
Clearance Specications.
5. After installing new compression (top and middle)
rings on piston, check piston-to-ring side clearance.
Compare clearance to Clearance Specications. If
side clearance is greater than specied, a new
piston must be used.
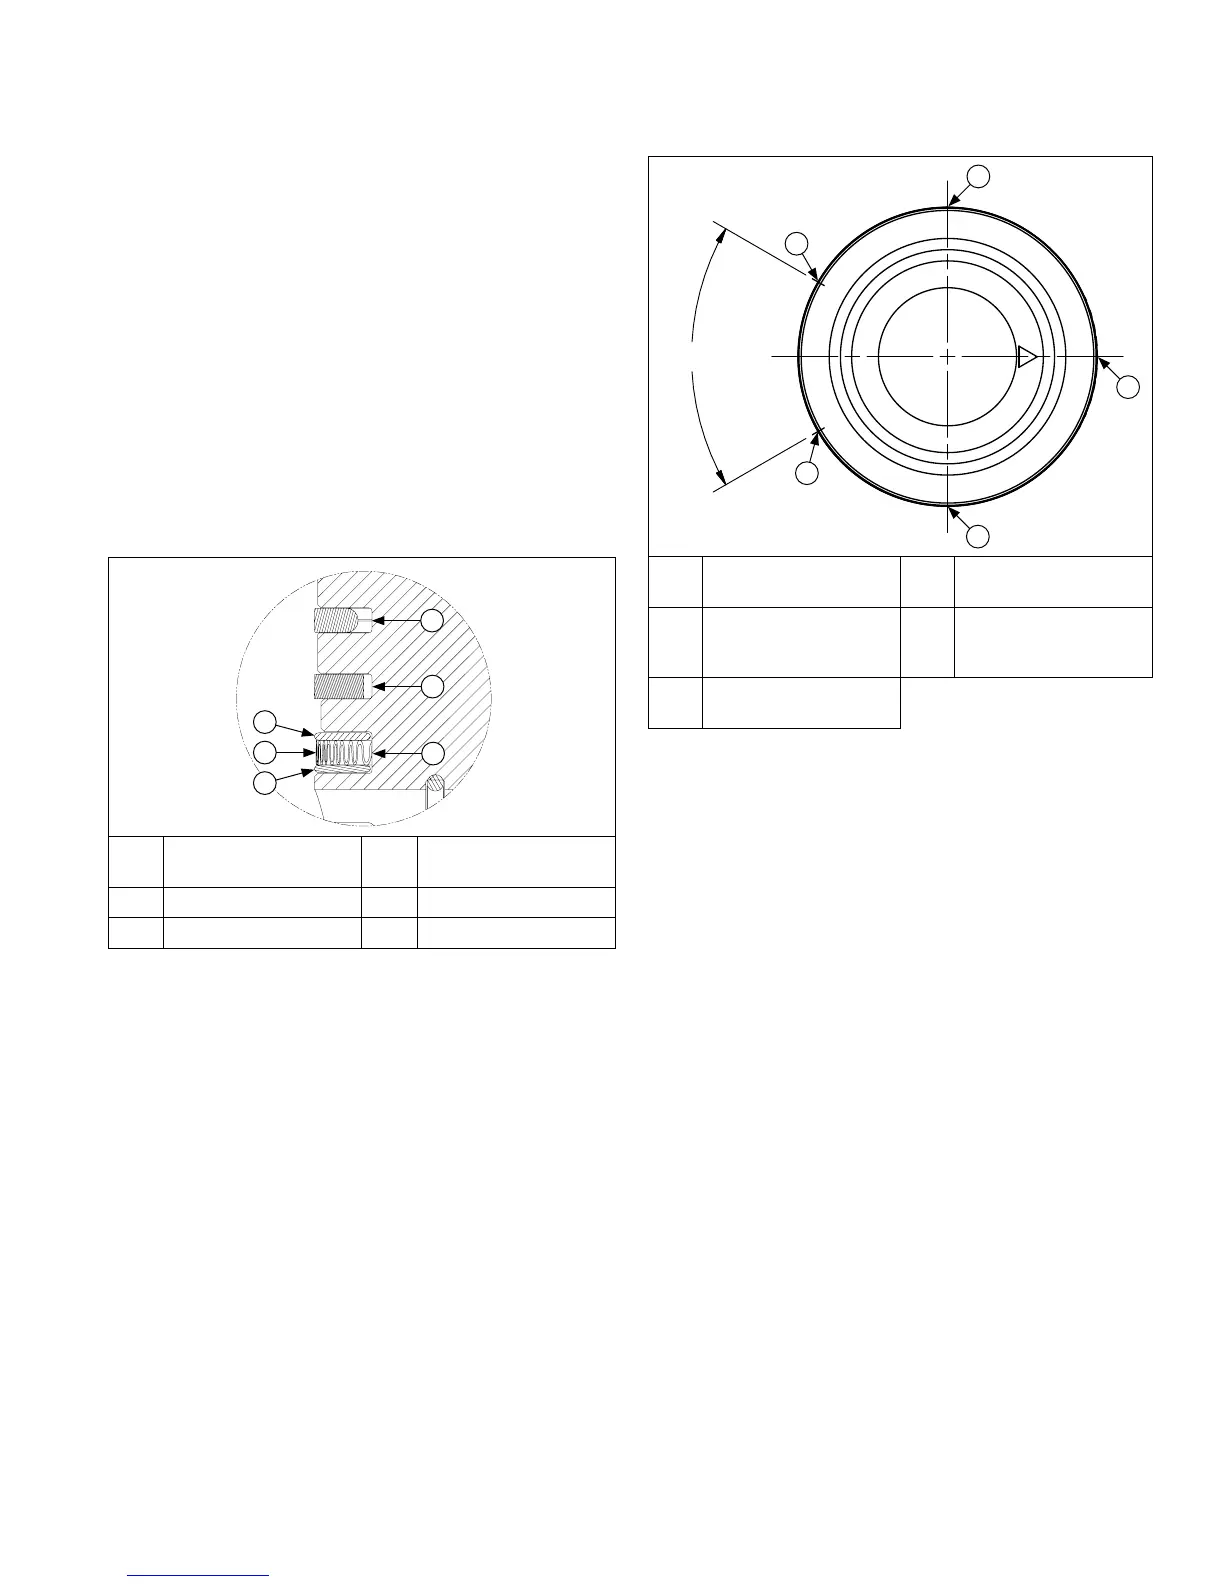
Install New Piston Rings
C
D
E
F
B
A
A
Top Compression
Ring
B
Middle Compression
Ring
C Oil Control Ring D Top Rail
E Expander Ring F Bottom Rail
Piston Ring Orientation
A
B
C
D
E
(≥ 60°)
A
Oil Ring Expander
Gap
B Bottom Oil Rail Gap
C Top Oil Rail Gap D
Intermediate
Compression
Ring Gap
E
Top Compression
Ring Gap
NOTE: Rings must be installed correctly. Install oil
control ring assembly (bottom groove) rst,
middle compression ring (center groove)
second, and top compression ring (top groove)
last. Oil control ring assembly is a three-piece
design, and consists of a top rail, expander ring,
and bottom rail.
Use a piston ring expander to install rings.
1. Oil control ring assembly (bottom groove): Install
expander rst then bottom rail and top rail last. Make
sure ends of expander are not overlapped. Adjust
ring gaps.
2. Middle compression ring (center groove): Install
middle compression ring using a piston ring
expander tool. Make sure identication mark is up or
colored dye stripe (if contained) is left of end gap.
Adjust ring gaps.
3. Top compression ring (top groove): Install top
compression ring using a piston ring expander tool.
Make sure identication mark is up or colored dye
stripe (if contained) is left of end gap. Adjust ring
gaps.
 Loading...