EasyManuals Logo
Home>Kyocera>Printer>ECOSYS FS-2100D

Kyocera ECOSYS FS-2100D Service Manual

Kyocera ECOSYS FS-2100D
272 pages
To Next Page IconTo Next Page
To Previous Page IconTo Previous Page
Page #101 background imageLoading...
Page #101 background image
2P7/2R0/3PN
1-5-4
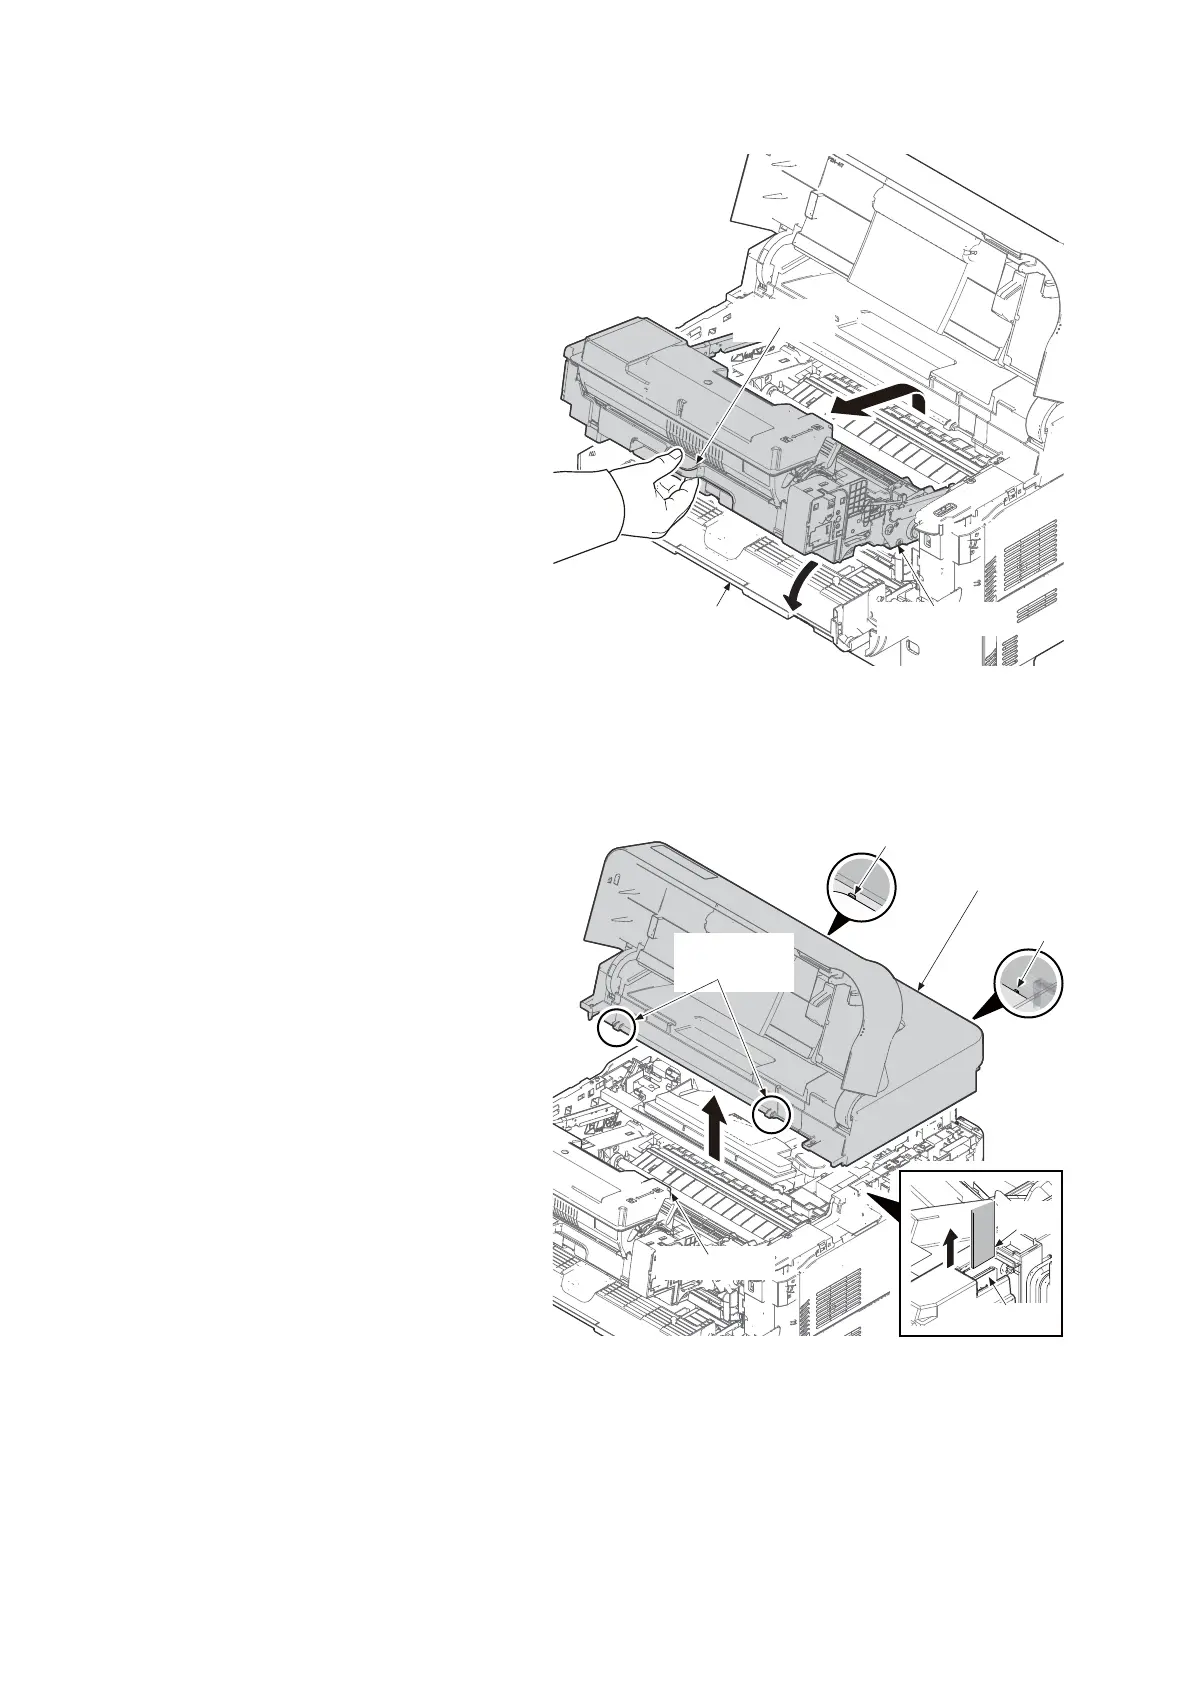
4. Open the front cover.
5. Grip the knob and then Pull the imaging
unit forward.
Figure 1-5-5
6. Release two hooks and then lift the top
cover upward.
7. Pull out FFC from the connector and
then remove the top cover assembly.
*: At the time of detaching and refitting the
top cover assembly, pull the imaging unit
out, for the container will not catch two
projection parts.
Figure 1-5-6
Imaging unit
Front cover
Knob
Top cover
assembly
Hook
Hook
FFC
Connector
Projection
parts
Container

Table of Contents

Other manuals for Kyocera ECOSYS FS-2100D

Questions and Answers:

Question and Answer IconNeed help?

Do you have a question about the Kyocera ECOSYS FS-2100D and is the answer not in the manual?

Kyocera ECOSYS FS-2100D Specifications

General IconGeneral
BrandKyocera
ModelECOSYS FS-2100D
CategoryPrinter
LanguageEnglish

Related product manuals