2-19
Preparation before Use
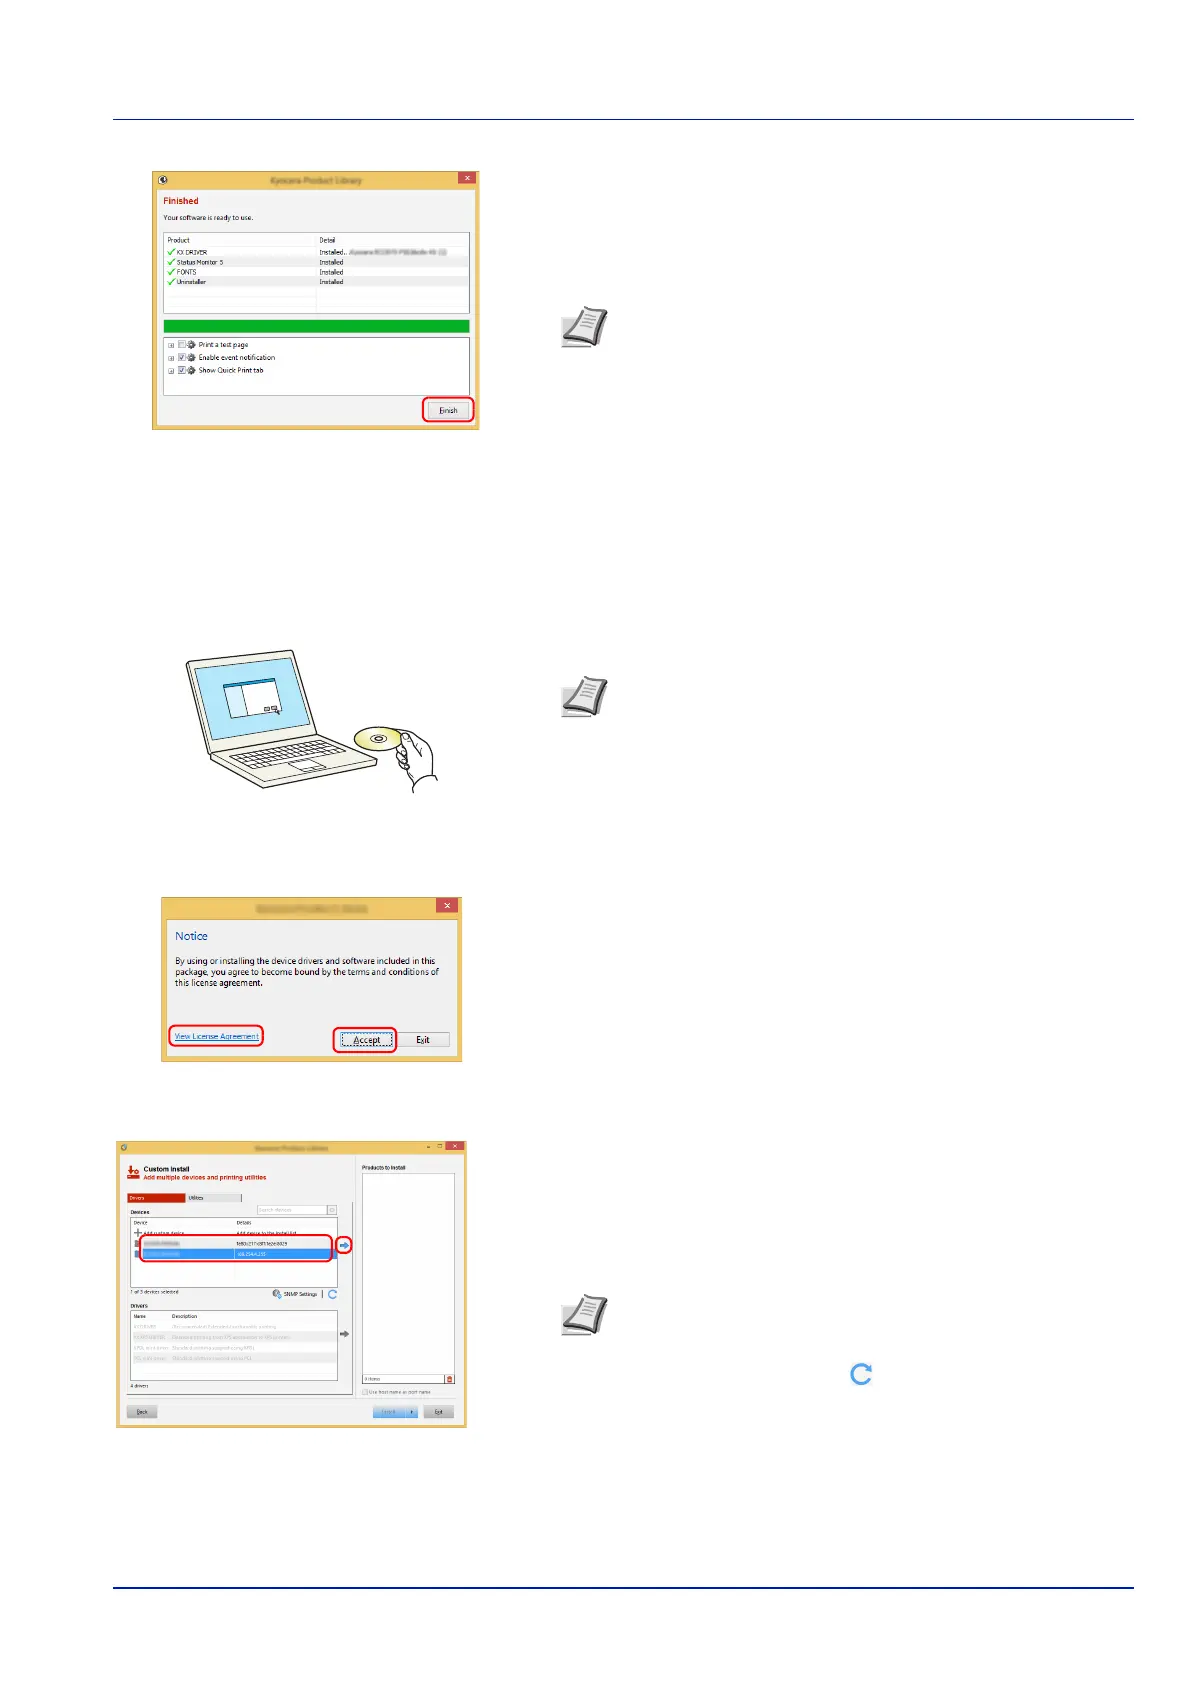
7 Finish the installation.
When Your software is ready to use appears, you can use the
software. To print a test page, click the Print a test page checkbox
and select the machine.
Click Finish to exit the wizard.
If a system restart message appears, restart the computer by
following the screen prompts. This completes the printer driver
installation procedure.
Custom Install
The following procedure is an example for installing the software in Windows 8.1 using Custom Install.
1 Insert the Product Library disk.
2 Click View License Agreement and read the License Agreement.
Click Accept.
3 Select Custom Install tab.
4 Select the device to be installed, and click the arrow button to move
it to the Products to Install list.
Note When you have selected Device settings in Windows
XP, the dialog box for device setting will appear after Finish is
clicked. Configure the settings for options installed on the
machine. Device settings can be configured after the
installation is completed.
For more information, refer to the Printer Driver User Guide.
Note Installation on Windows must be done by a user logged
on with administrator privileges.
If the Welcome to the Found New Hardware Wizard dialog
box displays, select Cancel.
If the autorun screen is displayed, click Run setup.exe.
If the user account management window appears, click Yes
(Allow).
IMPORTANT If Wi-Fi or Wi-Fi Direct is enabled, be sure to
specify the IP address for the port name.
Installation may fail if the host name is specified.
Note The machine cannot be detected unless it is on. If the
computer fails to detect the machine, verify that it is
connected to the computer via a network or USB cable and
that it is turned on and click (Reload).
If the desired device does not appear, select Add custom
device to directly select the device.
 Loading...