The heatsink might be very hot. Before you open the computer cover, turn off the computer and wait several
minutes until the computer is cool.
Notes:
• The microprocessor heatsink and fan assembly included with your computer will be one of the three
models illustrated below. Follow the same procedures for each model.
• Any warranty replacements will only cover the specific model of heatsink and fan included with your
computer. The images provided are for reference only.
Replacement procedure
1. Remove the power cord. See “Power cord” on page 66.
2. Remove the left side cover. See “Left side cover and right side cover” on page 66.
3. Remove the fan power cable from the system board.
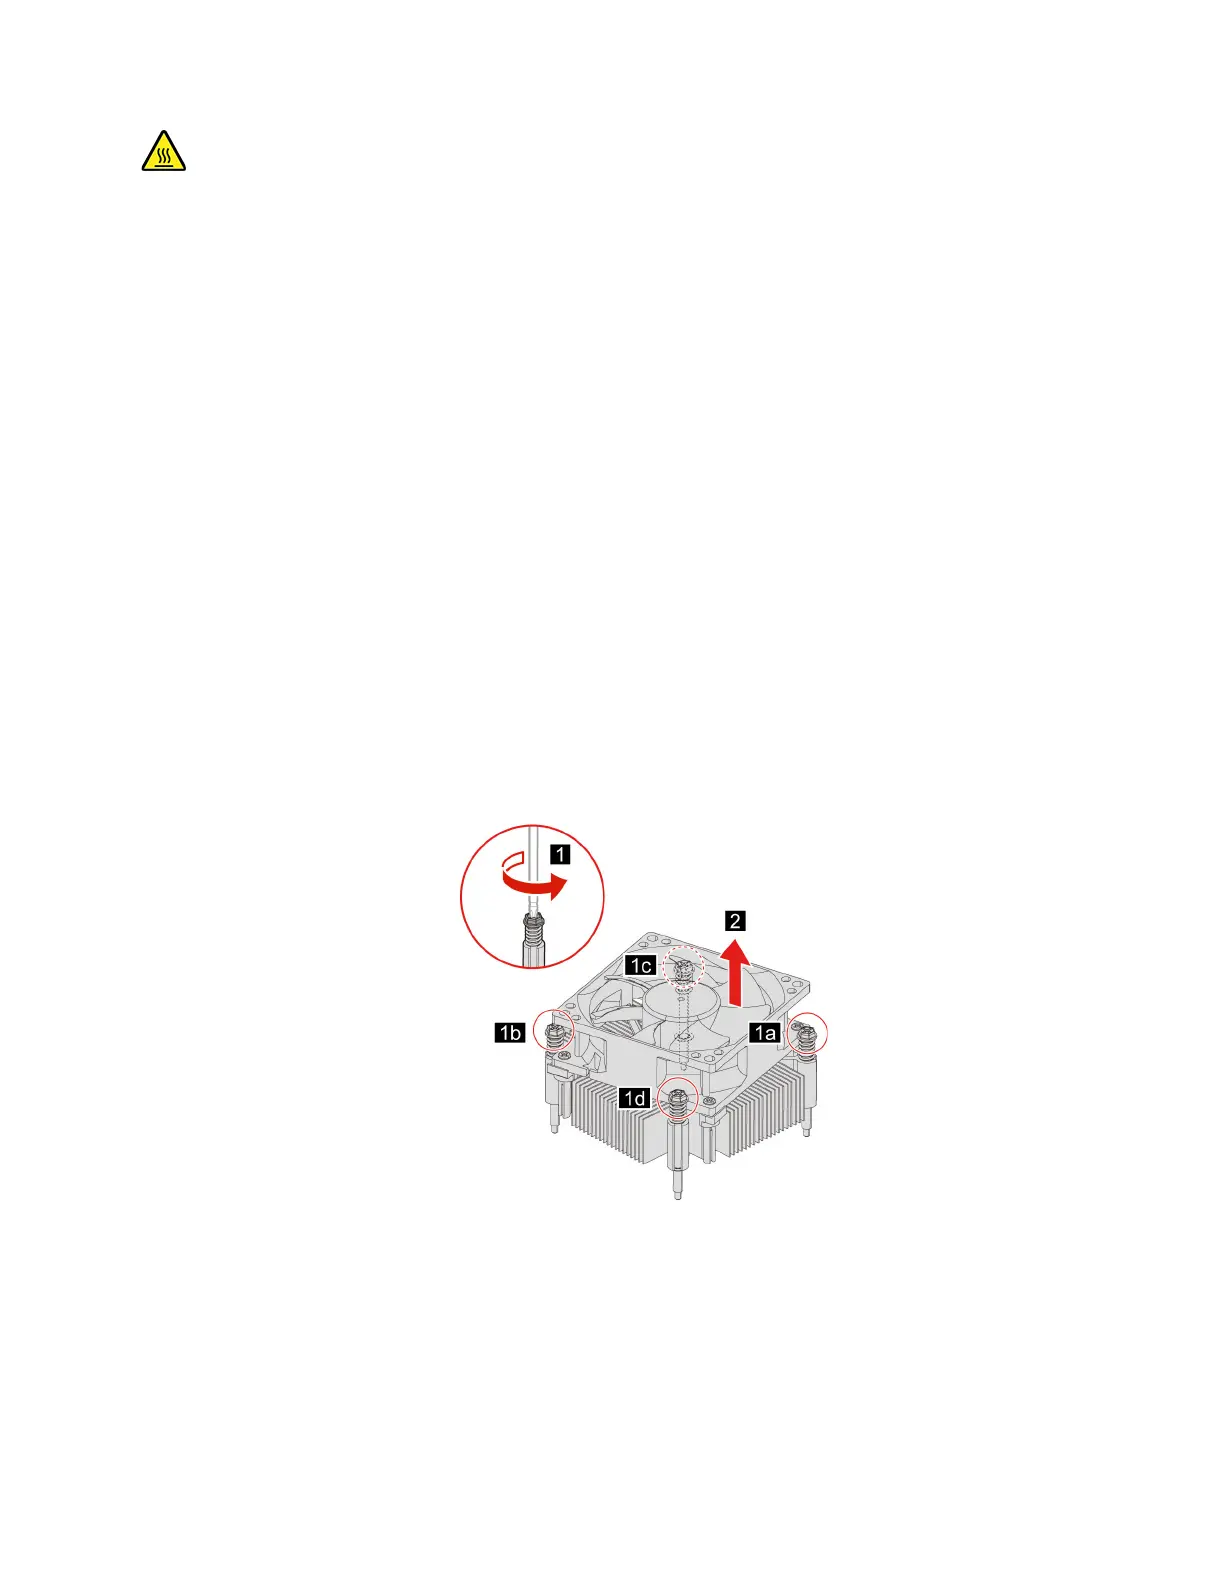
4. Unscrew the heatsink mounting screws.
Note: Carefully remove the screws from the system board to avoid any possible damage to the system
board. The screws cannot be removed from the heatsink.
5. Remove the heatsink and fan.
Notes:
• Do not touch the thermal paste while handling the heatsink.
• You may have to gently twist the heatsink to free it from the microprocessor.
Chapter 7. Hardware removal and installation 73
 Loading...