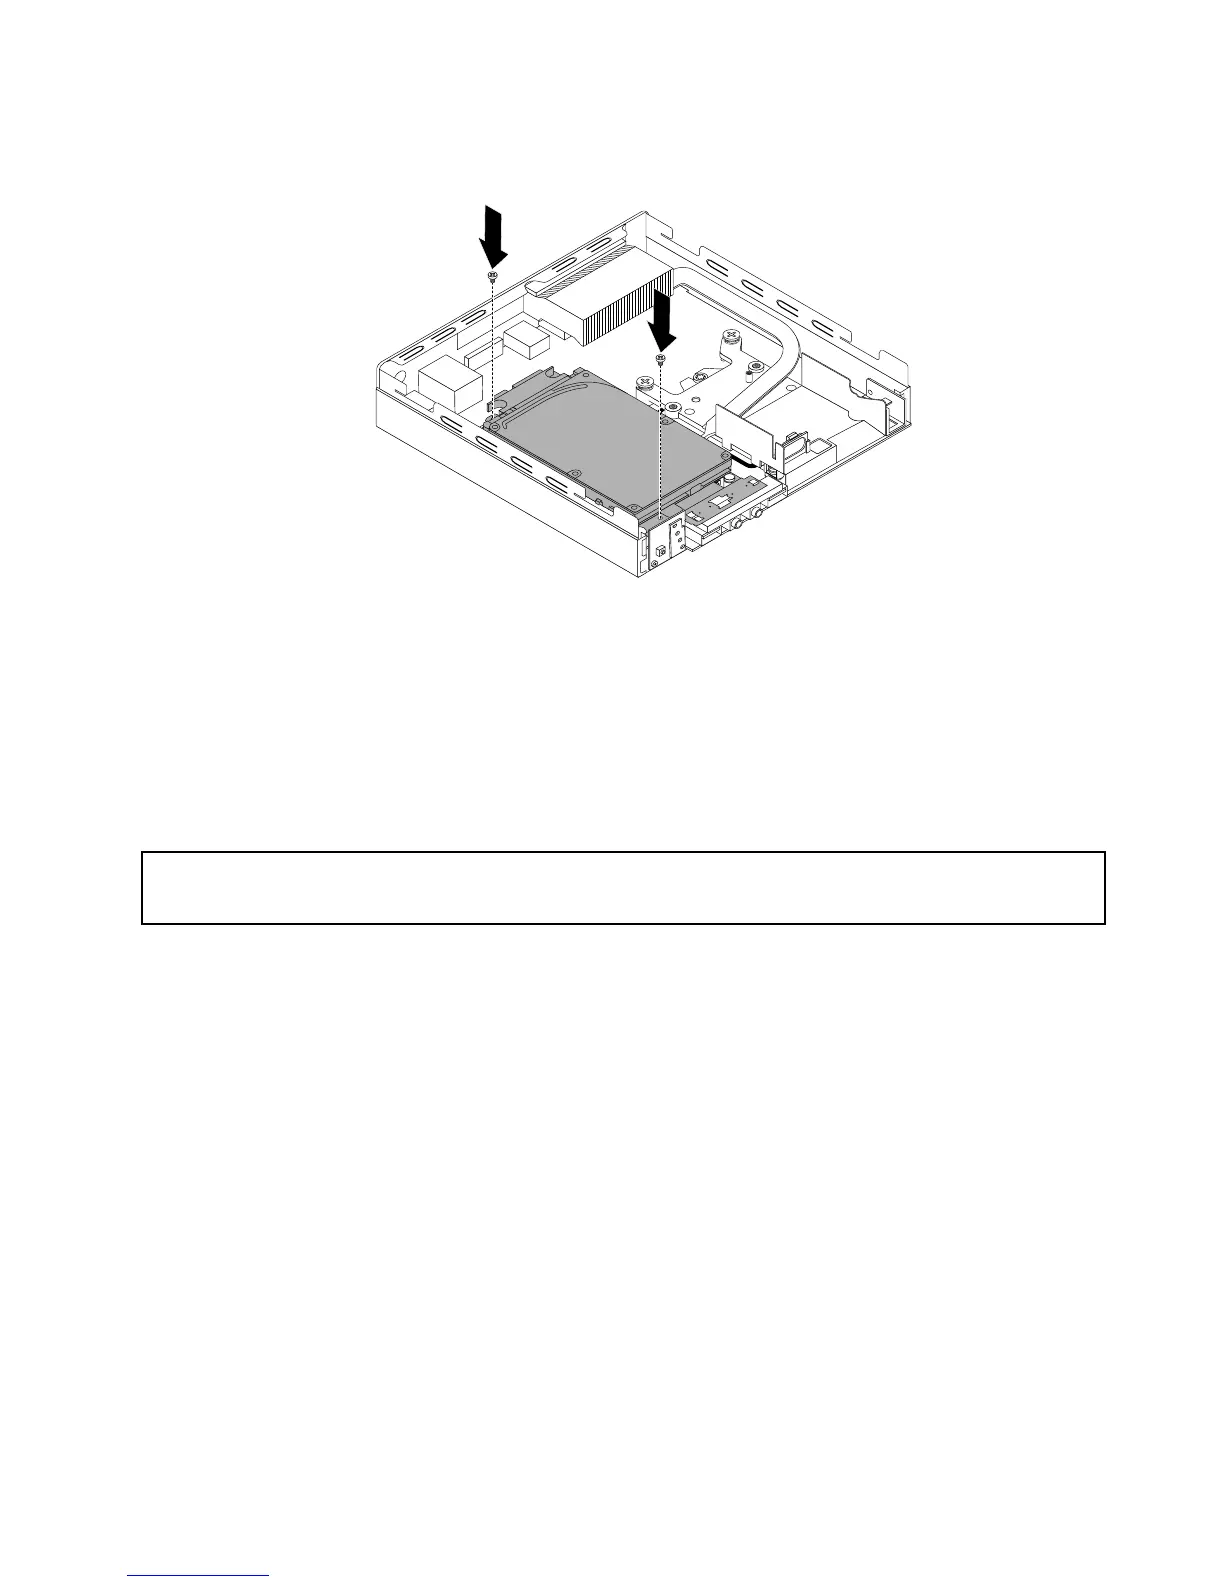
2.Installthetwoscrewstosecuretheharddiskdriveassembly.
Figure42.Installingthescrewstosecuretheharddiskdriveassembly
3.Connectthesignalcableandthepowercabletotheharddiskdrive.
Whattodonext:
•Toworkwithanotherpieceofhardware,gototheappropriatesection.
•Tocompletetheinstallationorreplacement,goto“Completingthepartsreplacement”onpage80
.
Installingorreplacingamemorymodule
Attention:
Donotopenyourcomputerorattemptanyrepairbeforereadingandunderstandingthe“Importantsafetyinformation”
onpagev.
Thissectionprovidesinstructionsonhowtoinstallorreplaceamemorymodule.
YourcomputerhastwoslotsforinstallingorreplacingDDR3SODIMMsthatprovideuptoamaximumof
16GBsystemmemory.Wheninstallingorreplacingamemorymodule,use2GB,4GB,or8GBDDR3
SODIMMsinanycombinationuptoamaximumof16GB.
Toinstallorreplaceamemorymodule,dothefollowing:
1.Turnoffthecomputeranddisconnectallpowercordsfromelectricaloutlets.
2.Removethecomputercover.See“Removingthecomputercover”onpage55.
3.Locatethememoryslots.See“Locatingpartsonthesystemboard”onpage12.
4.Removetheharddiskdriveassemblytogetaccesstothememoryslots.See“Installingorremovingthe
harddiskdriveassembly”onpage57.
Chapter5.Installingorreplacinghardware59
 Loading...