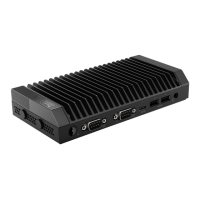
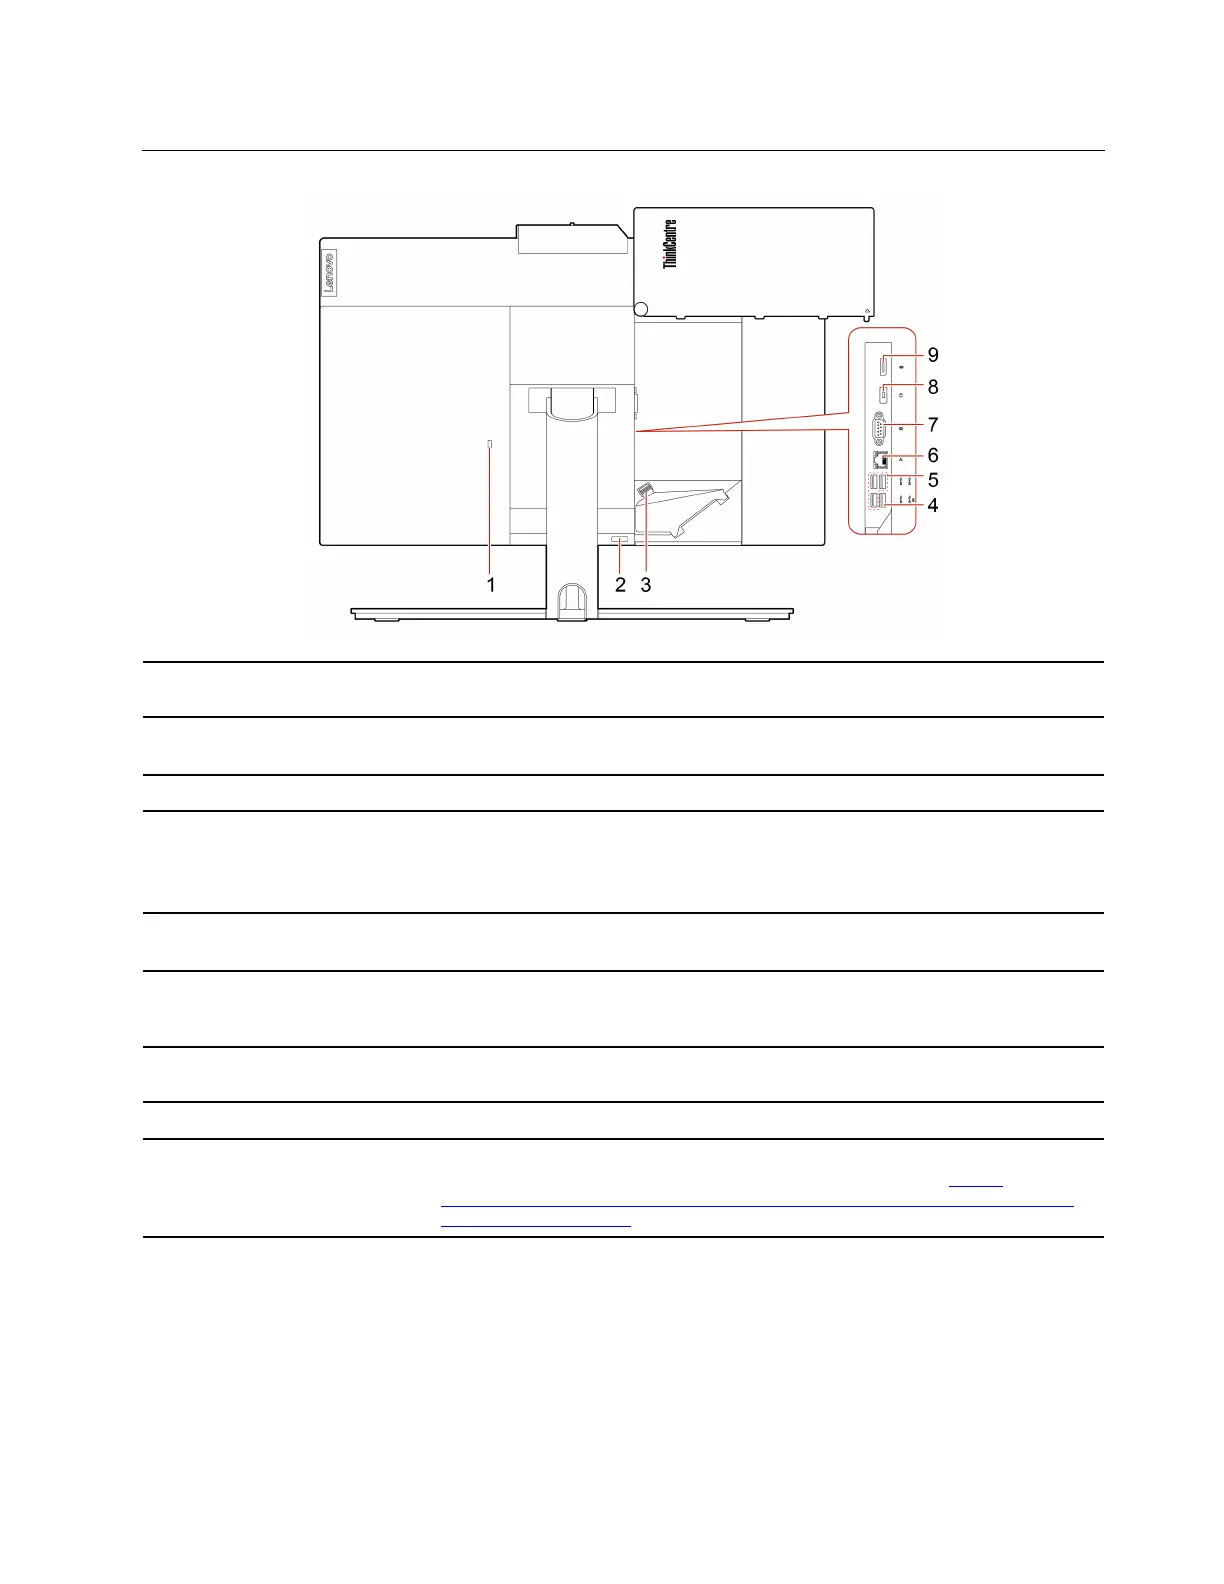
Rear
1. Security-lock slot
Lock your computer to a desk, table, or other fixtures through a Kensington-style
cable lock.
2. Cable cover eject button
Press the button to access the covered connectors and cables.
Note: For easy access, do not cover the button with any external parts.
3. Cable clip Press the clip to route the cables connected to the computer.
4. USB 3.2 connector Gen 1 (with
keyboard smart power on
feature)
Connect USB-compatible devices, such as a USB keyboard, USB mouse, USB
storage device, or USB printer.
Note: When a USB keyboard is connected, you can turn on the computer by
pressing Alt+P on the keyboard.
5. USB 3.2 connectors Gen 1 (3)
Connect USB-compatible devices, such as a USB keyboard, USB mouse, USB
storage device, or USB printer.
6. Ethernet connector
Connect to a local area network (LAN). When the green indicator is on, the
computer is connected to a LAN. When the yellow indicator blinks, data is being
transmitted.
7. Serial connector*
Connect an external modem, a serial printer, or other devices that use a serial
connector.
8. Power cord connector
Connect the power cord to your computer for power supply.
9. DisplayPort
®
1.2 out connector
Send audio and video signals from the computer to another audio or video device,
such as a high-performance monitor. For more information, see
https://
www.vesa.org/wp-content/uploads/2010/12/DisplayPort-DevCon-Presentation-DP-
1.2-Dec-2010-rev-2b.pdf
.
* for selected models
Chapter 1. Meet your computer 3
 Loading...