2
lci1.com 574 - 537- 890 0 Rev: 11.16.18
Solera
®
Classic Awning
Installation and Owner’s Manual
(For Aftermarket Applications)
CCD-0001254
REMOVING FABRIC TAPE OR SPRING ASSEMBLY
COTTER PINS PREMATURELY COULD CAUSE SERIOUS
INJURY OR PROPERTY DAMAGE.
Preparation
FAILURE TO FOLLOW THE INSTRUCTIONS PROVIDED
IN THIS MANUAL MAY RESULT IN DEATH, SERIOUS
INJURY, PROPERTY DAMAGE, OR VOIDING OF THE
COMPONENT WARRANTY.
MOVING PARTS CAN PINCH, CRUSH OR CUT. KEEP
CLEAR AND USE CAUTION.
Do NOT remove the following items until instructed:
1. Tape securing the fabric.
2. Cotter pins in the spring assemblies
Resources Required.
• 1 to 3 People
• Cordless or Electric Drill or Screw Gun
• Appropriate Drive Bits, including 3/8” and ½”
• Screwdriver
• Ratchet
• 7/16” Socket
• ½” Socket
• ½” Wrench
• 3/16’ Drill Bit
• Non-Permanent Method of Marking
• Silicone Sealant or Butyl Tape
• Silicone Lubricant
• #10 x ¾” Self-tapping Screws
• ¼” - 20 x ½” Phillips Head Screws
• ¼” x 2 ½” Lag Screws
Safety
NOTE: Solera® Classic Awning drive and idler heads are preloaded
with tension and secured with cotter pins from the factory. If the cotter
pins have been removed or otherwise lost, and tension needs to be
added to the heads, use the “Classic Awnings Pre-install Turn Chart”
to add the correct number of turns to the awning heads.
Classic Awnings Pre-Install Turn Chart
Roll Tube Width Turns
6’ to 10’ 4
11’ to 14’ 5
15’ to 18’ 6
19’ and up 8
Introduction
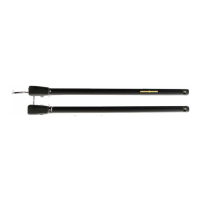
The rugged spring-loaded Solera
®
Classic extends and retracts
in just a few easy steps. Simply release the travel locks on each
arm, loosen the rafter knobs, use the pull cane to unlock the
roller, then hook the pull strap and walk it out to unroll the awning.
Once extended, set the tension, tighten rafter knobs and raise
the awning arms to whatever pitch you want for shade and water
runoff. You can also detach the arms from the bottom bracket and
rotate them to a vertical “carport” position. This carport position
makes it easy to attach Solera accessories like the Screen Room
and Solera Family Room
™
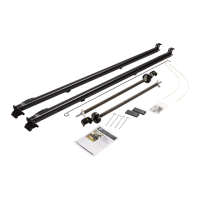
Quick Facts
• Standard 8’ projection
• Classic brackets align perfectly with bracket holes of most
brands of manual awnings
• Arms detach from bottom bracket and easily swing to “carport”
position
Additional Information
Resources
Additional information about this product can be obtained from
www.lci1.com/support or by downloading the free MyLCI app.
The app is available on iTunes
®
for iPhone
®
and iPad
®
and also
on Google Play
™
for Android
™
users.
iTunes
®
, iPhone
®
and iPad
®
are registered trademarks of Apple
Inc.
Google Play
™
and Android
™
are trademarks of Google Inc
.
 Loading...