7
lci1.com 574 - 537- 890 0 Rev: 11.16.18
Solera
®
Classic Awning
Installation and Owner’s Manual
(For Aftermarket Applications)
CCD-0001254
FAILURE TO MAINTAIN CONTROL OF THE ROLL
TUBE, FABRIC AND SUPPORT ARM ASSEMBLIES
MAY RESULT IN SERIOUS PERSONAL INJURY OR
PROPERTY DAMAGE.
USE CARE WHEN REMOVING THE COTTER PINS.
THE COTTER PINS ARE HOLDING THE PRE-WOUND
TENSION OF THE SPRING. FAILURE TO SECURELY
HOLD THE ROLL TUBE MAY ALLOW THE ROLL
TUBE TO RAPIDLY ROLL UP AND CAUSE PERSONAL
INJURY OR DAMAGE.
Securing the Fabric
1. Roll the awning in and out several times to ensure that
the fabric is square on the roll tube.
2. Secure the fabric in the awning rail no more than 1”
inside the edge of the fabric on both ends using a #6 x
½” hex. head screw. Install the screw down through the
awning rail into the fabric and the polycord (Fig.10).
Awning Rail
1”
Fabric
Stitching
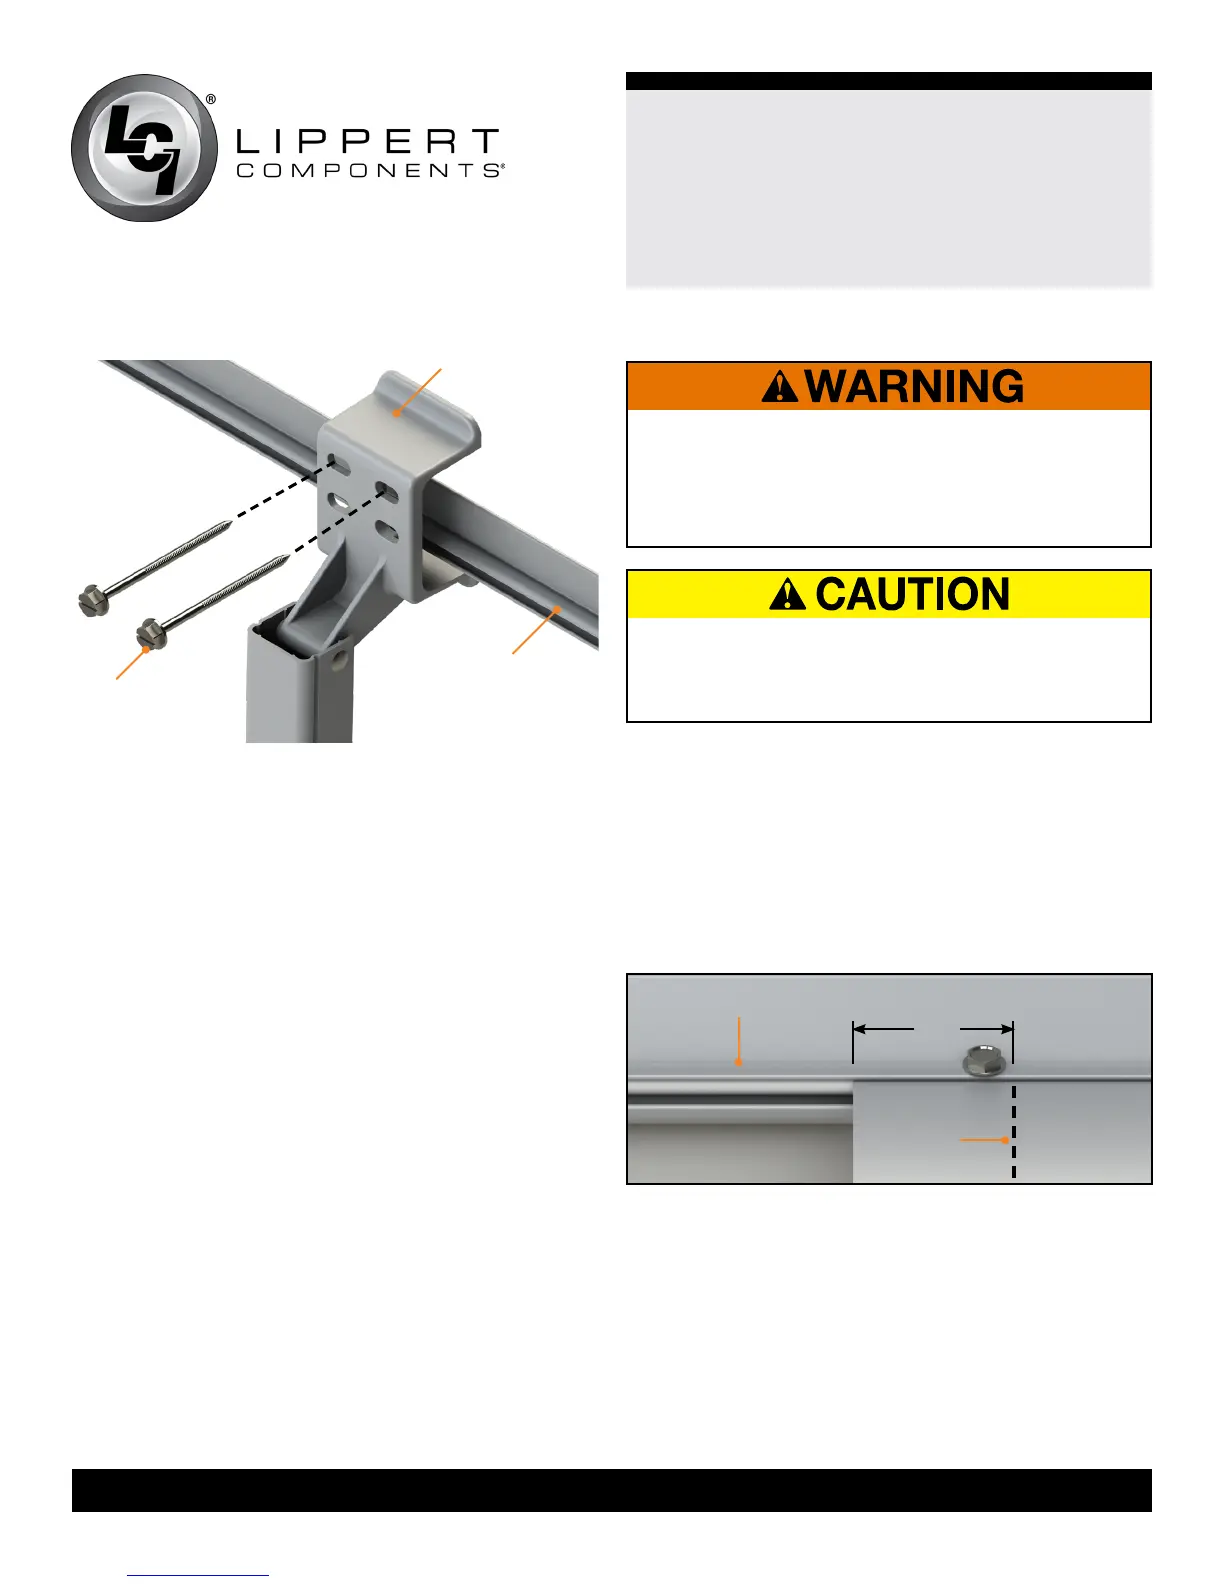
10. Once the upper bracket is placed, mark and pre-drill
two 3/16” holes through the awning rail or unit.
A. Apply a liberal amount of silicone sealant over the
holes.
B. Attach the upper mounting bracket using the provided
¼” x 3” lag screws provided (Fig.9).
NOTE: All screws supporting the awning assembly MUST
have a backer within the structure of the wall of the unit.
Refer to the unit’s manufacturer for proper backer location.
It is acceptable that the lag screws go through the at
portion of the awning rail.
11. Repeat step 10 for the other support arm assembly.
NOTE: Prior to completing removing cotter pins in step 12,
make sure the cam lock is on the roll out position.
12. Firmly grasp the roll tube and head and remove the
safety cotter pin from each end of the roll tube. Keeping a
rm grasp on the roll tube and head, place the cam lock in
the roll up position.
13. Allow the fabric to slowly roll up.
Fig.10
Fig.9
Upper Mounting
Bracket
Awning Rail
Lag Screw
 Loading...