Once this is done, we are set up and ready to record. Close or minimize your
software’s meter view at this point.
10. Arm tracks one through eight for recording and press the record button on
your music software’s transport bar.
11. Once you have a take that you think is worth listening to, stop recording and
rewind. Maximize the Delta Control Panel from your Windows taskbar.
12. Click the Patchbay/Router tab. In the first column, H/W Out 1/2, click the
radio button "WavOut 1/2" so that our monitoring source is now the software
outputs from the music program. Set the H/W Out 3/4 column to "WavOut
3/4," the H/W Out 5/6 column to "WavOut 5/6," and finally, set the H/W
Out 7/8 column to "WavOut 7/8." Now all of the software outputs of the
music program are connected to the corresponding hardware outputs.
Minimize the control panel.
13. Click play on the transport bar of your music software. If the take is
satisfactory, disarm tracks one through eight and revel in your success. If you
wish to redo the tracks, "undo" the recording in your software, repeat steps 10
through 13 in this section.
Using the Delta 1010 and the Delta Control Panel software in this manner may
be your choice when using a mixing console to control the monitor and playback
levels. If this were a real recording situation and you wished to add vocals or
other instruments as overdubs, you might want to combine all of the drums (for
instance) to one stereo pair of outputs (WavOut 1/2 Delta-1010, for example).
This would ‘free up’ several channels for monitoring the overdubs.
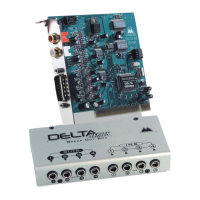
Typical Setup #3
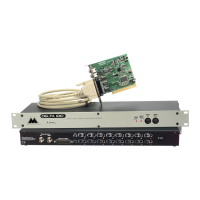
Let’s look at a setup that involves a typical transfer of information from DAT to
computer and back to DAT. Here, we’ll be using the Delta 1010’s S/PDIF I/O,
plus one of the analog output stereo pairs.
NOTE: Because improper connections can potentially make very
loud noises, it’s a good idea to have monitor levels down while
hooking up audio equipment -- you may even choose to turn your
computer off before making the connections.
In this example, we will connect a DAT to the Delta 1010 PCI Host card using
coaxial S/PDIF cables (75-ohm impedance RCA-to-RCA). We’ll also connect
the 1010’s analog outputs to a sound system for monitoring purposes. A setup
like this might be used to transfer a number of mixes from a DAT into an audio
editing program, performing the appropriate edits, and then transferring the
edited material back to DAT.
The example below may at first look long and laborious, but you will find that
most of the settings are factory defaults and will rarely need to be modified.
38
 Loading...