SET-UP AND INSTALLATION RT770E OPERATOR MANUAL
4-2 Published 04-04-2017, Control # 446-09
Working Position
Place the hoist access platform hand rail (1) (Figure 4-2) and
step (2) (Fixed counterweight units only) into the working
position:
1. Pull out on the step locking pin (1) (Figure 4-2), slide the
step (2) out to the working position and release the
locking pin into the locking hole.
2. Remove two locking pins from hand rail (3) and rotate it
up into the working position, reinstall pins.
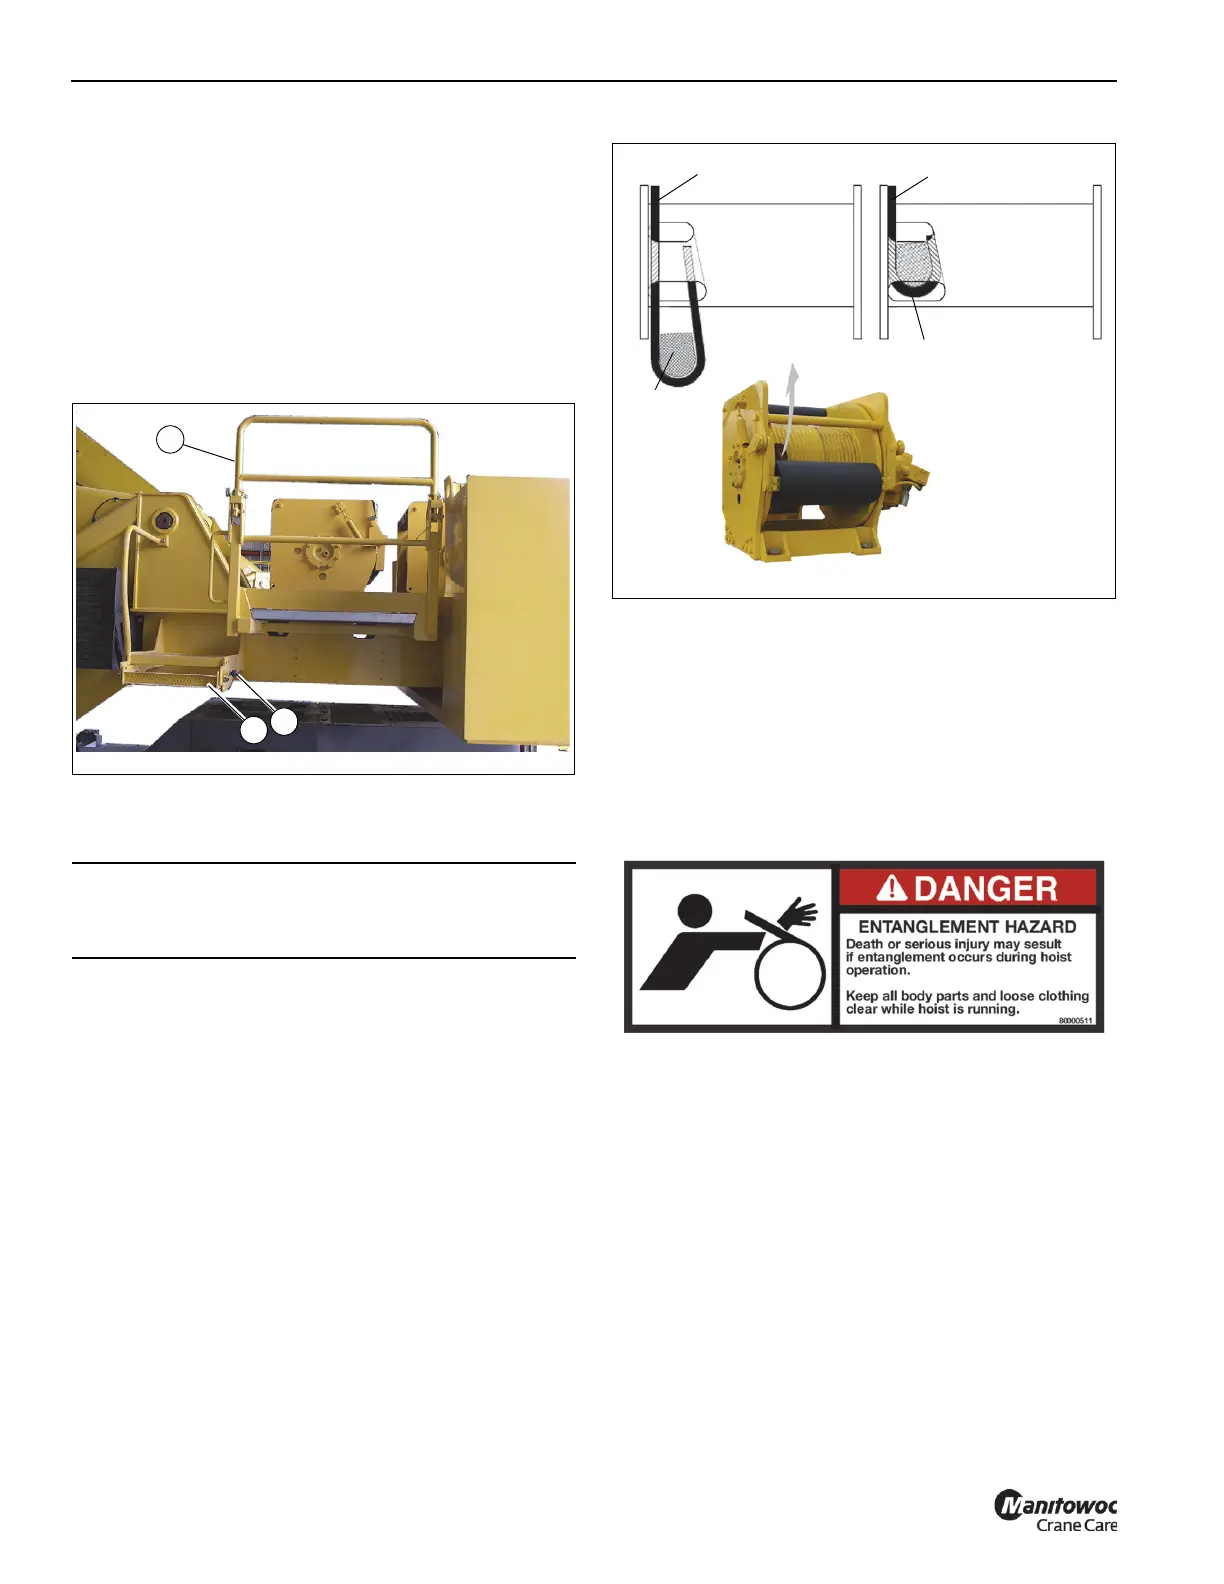
INSTALLING CABLE ON THE HOIST
NOTE: The cable should preferably be straightened before
installation on the hoist drum.
Install cable on the hoist drum in accordance with the
following procedure.
1. Position the cable over the boom nose sheave and route
to the hoist drum.
2. Position the hoist drum with the cable anchor slot on top.
3. Insert the cable through the slot and position around the
anchor wedge (1) (Figure 4-3).
NOTE: The end of the cable should be even with the
bottom of the slot for the anchor wedge (1).
4. Position the anchor wedge in the drum slot; pull firmly on
the free end (2) of the cable to secure the wedge.
NOTE: If the wedge does not seat securely in the slot,
carefully tap (3) the top of the wedge with a mallet.
5. Slowly rotate the drum, ensuring the first layer of cable is
evenly wound onto the drum.
6. Install the remainder of the cable, as applicable.
7. Return the hoist access platform to the travel
configuration (Figure 4-1) when finished working in this
area.
CABLE REEVING
NOTE: There are two types of cable (wire rope) available
on this crane; 6 x 37 and 35 x 7 (rotation resistant).
Within the limits of the load and range charts and permissible
line pull, multi-part lines allow the operator to raise a greater
load than can be raised with a single part line. Various cable
reeving (part line) is possible with the boom nose and hook
CAUTION
If cable is wound from the storage drum, the reel should
be rotated in the same direction as the hoist.

 Loading...


