fuel ller ap. Otherwise, engine output may be
reduced and fuel consumption increased.
1
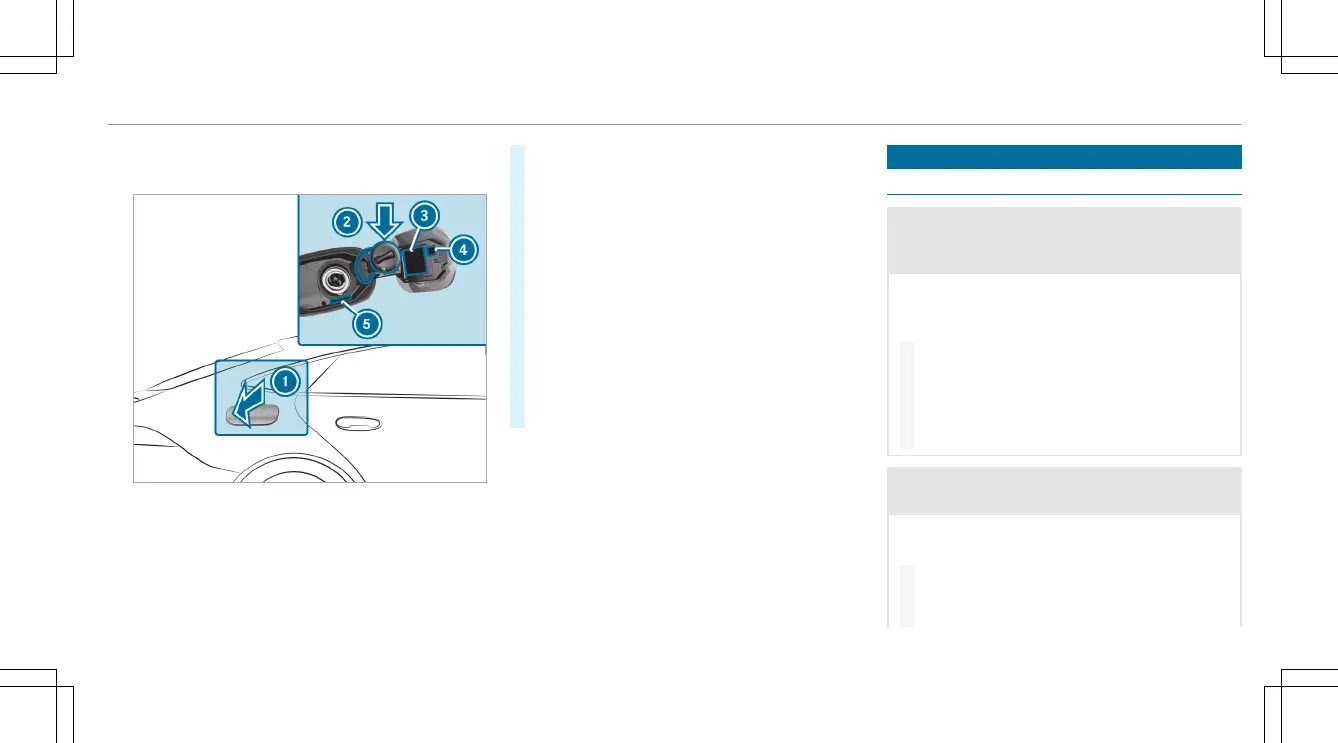
Fuel ller ap
2
Bracket for fuel ller cap
3
Tire pressure table
4
QR code for rescue card
5
Fuel type
#
Press on the rearward area of fuel ller ap
1.
#
Turn the fuel ller cap counter-clockwise and
remove it.
#
Insert fuel ller cap from above into bracket
2.
#
Completely insert the pump nozzle into the
tank ller neck, hook in place and refuel.
#
Fill the fuel tank only until the pump nozzle
switches o.
#
Replace the cap on the ller neck and turn it
clockwise until it engages audibly.
#
Close fuel ller ap 1.
Parking
Parking the vehicle
&
WARNING Risk of accident and injury
caused by an insuciently secured vehi-
cle rolling away
If the vehicle is not securely parked su-
ciently, it can roll away in an uncontrolled way
even at a slight downhill gradient.
#
On uphill or downhill gradients, turn the
front wheels so that the vehicle rolls
towards the curb if it starts moving.
#
Apply the parking brake.
#
Switch the transmission to position j.
&
WARNING Risk of re caused by hot
exhaust system parts
Flammable materials such as leaves, grass or
twigs may ignite.
#
Park the vehicle so that no ammable
material can come into contact with hot
vehicle components.
Driving and parking
167
 Loading...