EasyManuals Logo
Home>Midea>Air Conditioner>MISSION2 3D INVERTER Series

Midea MISSION2 3D INVERTER Series User Manual

Midea MISSION2 3D INVERTER Series
113 pages
To Next Page IconTo Next Page
To Previous Page IconTo Previous Page
Page #50 background imageLoading...
Page #50 background image
Maintenance and
Disassembly
Page 46
2.2 Outdoor unit
1. Panel Plate
MOB01-12HFN1-BT0W, MOB01-09HFN1-MW0W, MOB01-12HFN1-MV0W
Procedure Illustration
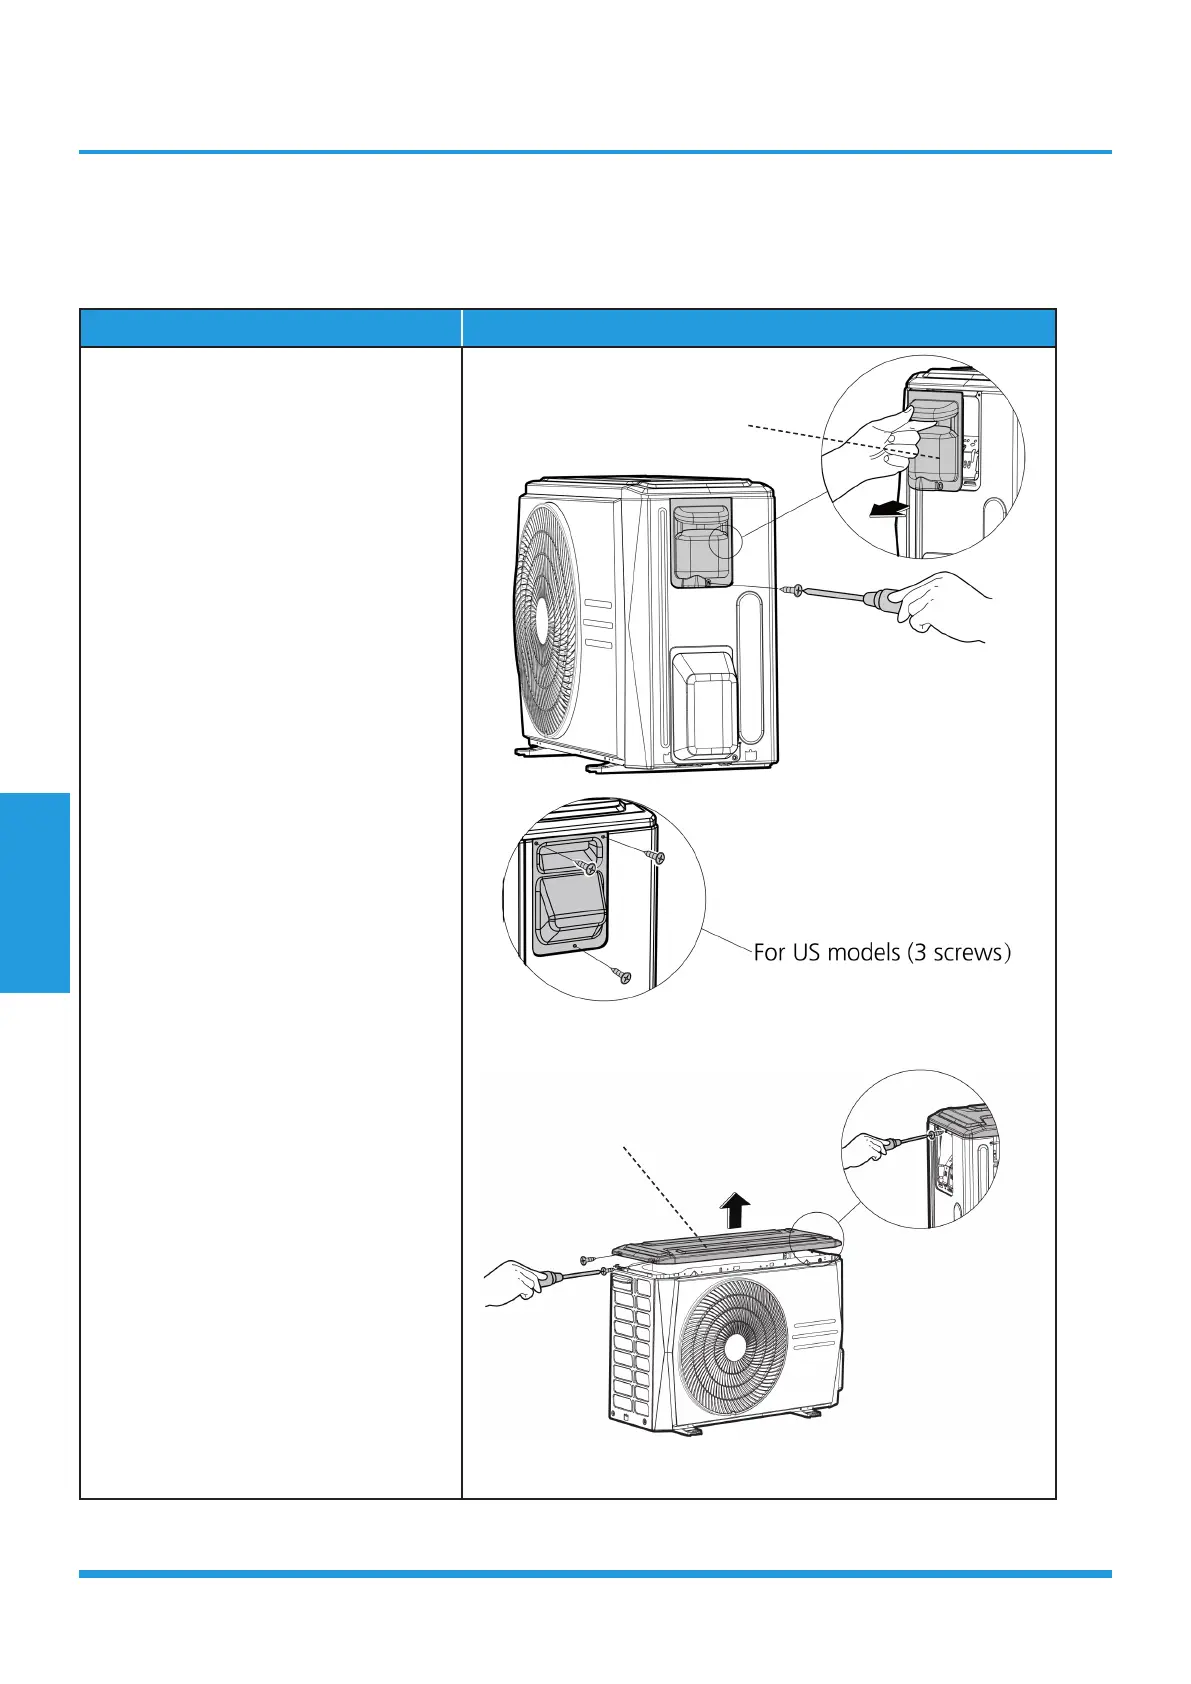
1) Turn off the air conditioner and the
power breaker.
2) Remove the screws of the big handle
and then remove the big handle
(1 screw) (see CJ_B01_INV_001).
3) Remove the screws of the top cover
and then remove the top cover (3
screws). One of the screws is located
underneath the big handle (see CJ_
B01_INV_002).
CJ_B01_INV_001
CJ_B01_INV_002
Note: This section is for reference only. Actual unit appearance may vary.
Top Cover
Big Handle

Table of Contents

Questions and Answers:

Question and Answer IconNeed help?

Do you have a question about the Midea MISSION2 3D INVERTER Series and is the answer not in the manual?

Midea MISSION2 3D INVERTER Series Specifications

General IconGeneral
BrandMidea
ModelMISSION2 3D INVERTER Series
CategoryAir Conditioner
LanguageEnglish

Related product manuals