DLP
®
HOME CINEMA
47
CAUTION: This procedure should be performed in a dust free environment.
Any dust entering into the optical compartment can cause abnormalities in the picture.
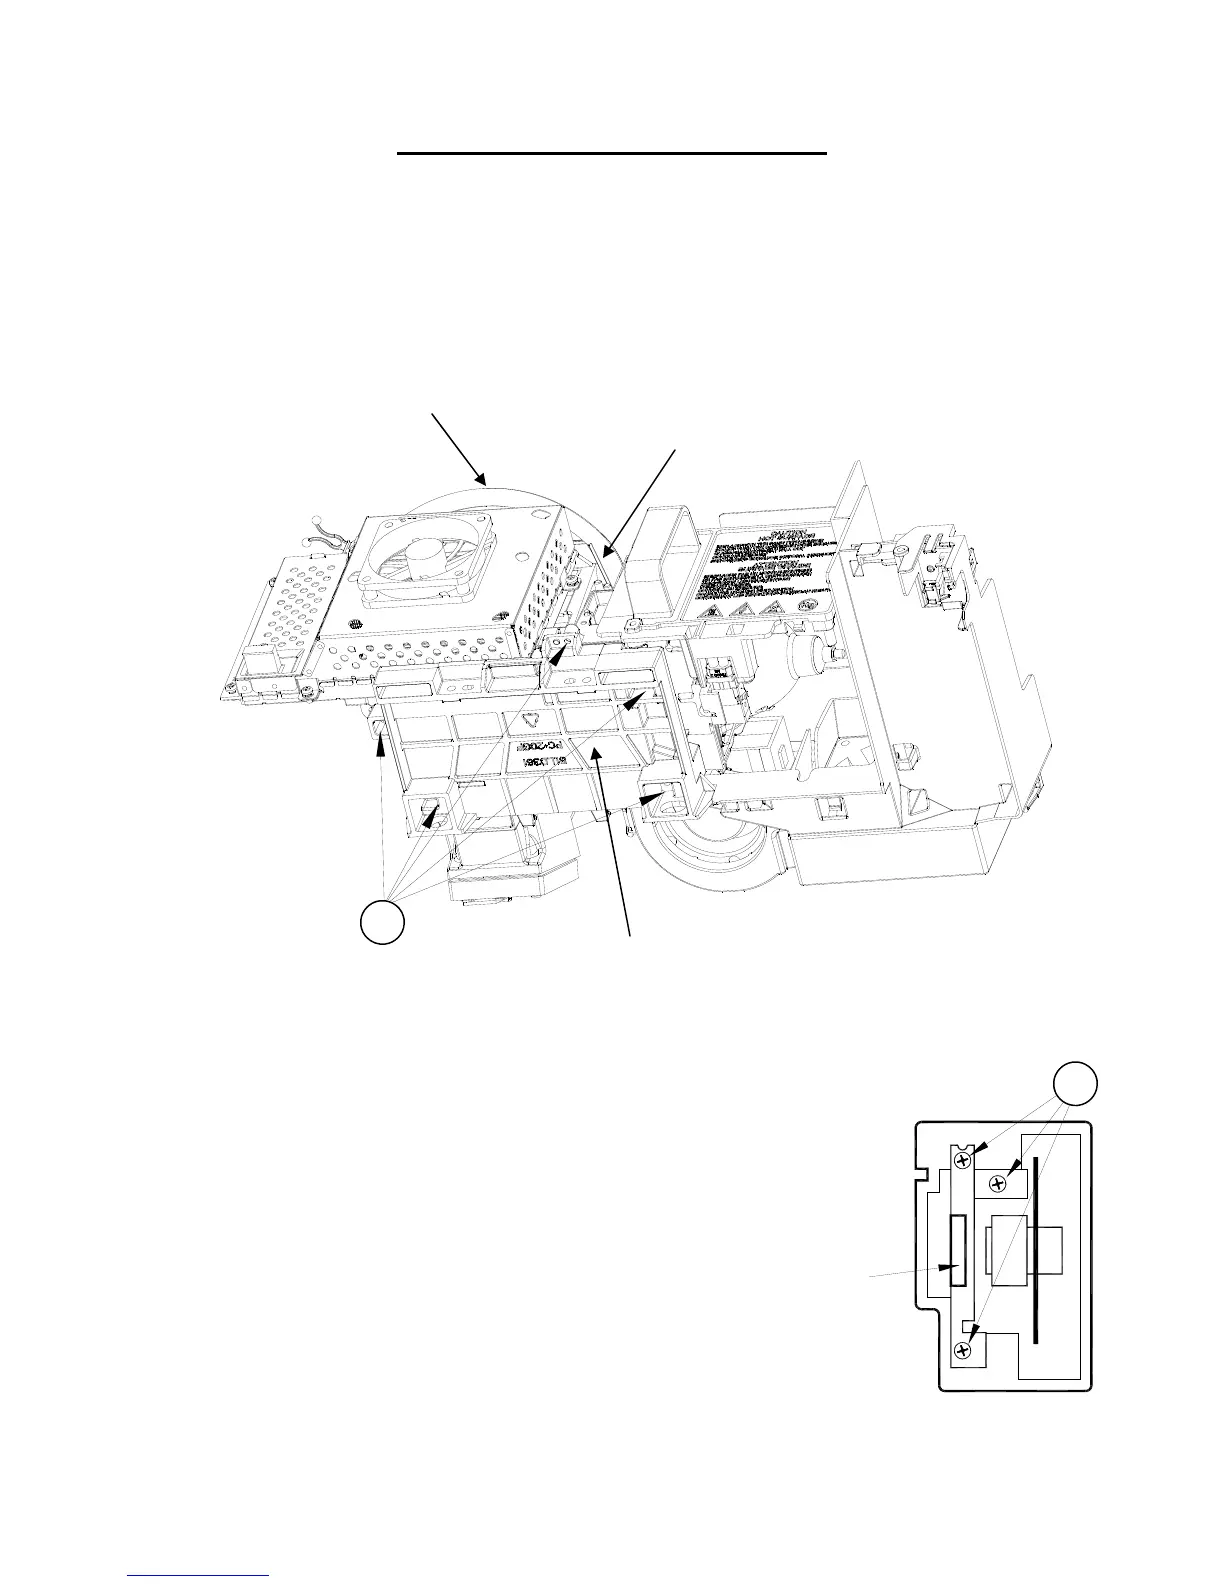
1. Remove the Optical Engine Assembly.
2. Remove the Lens Collar and cover the projection lens to protect it from scratches. See previous page.
3. Disconnect the 2 connectors, J6 & J7, from the front side of the Light Engine. Note the orientation of the
ribbon cable for re-assembly (Silver Contacts towards the Lens).
4. Access the optical compartment by removing screws (A) and the Engine Base from the bottom of the Opti-
cal Engine
5. Remove the 3 screws (B) from the Color Wheel Assembly.
6. Use the metal Handle to lift the Color Wheel from the compartment.
7. For installation, reverse the procedure above.
CAUTION: Avoid touching or scratching the Color Wheel.
8. After re-assembly, perform the Index Delay Adjustment described in the
Service Adjustments section.
IMPORTANT: If part return is required, prevent damage by packing the
color wheel the same way the replacement part was sent to you.
ENGINE BASE
COLOR WHEEL REPLACEMENT
J6 & J7
(Opposite Side of Formatter PWB)
LENS COLLAR
B
HANDLE
A
 Loading...