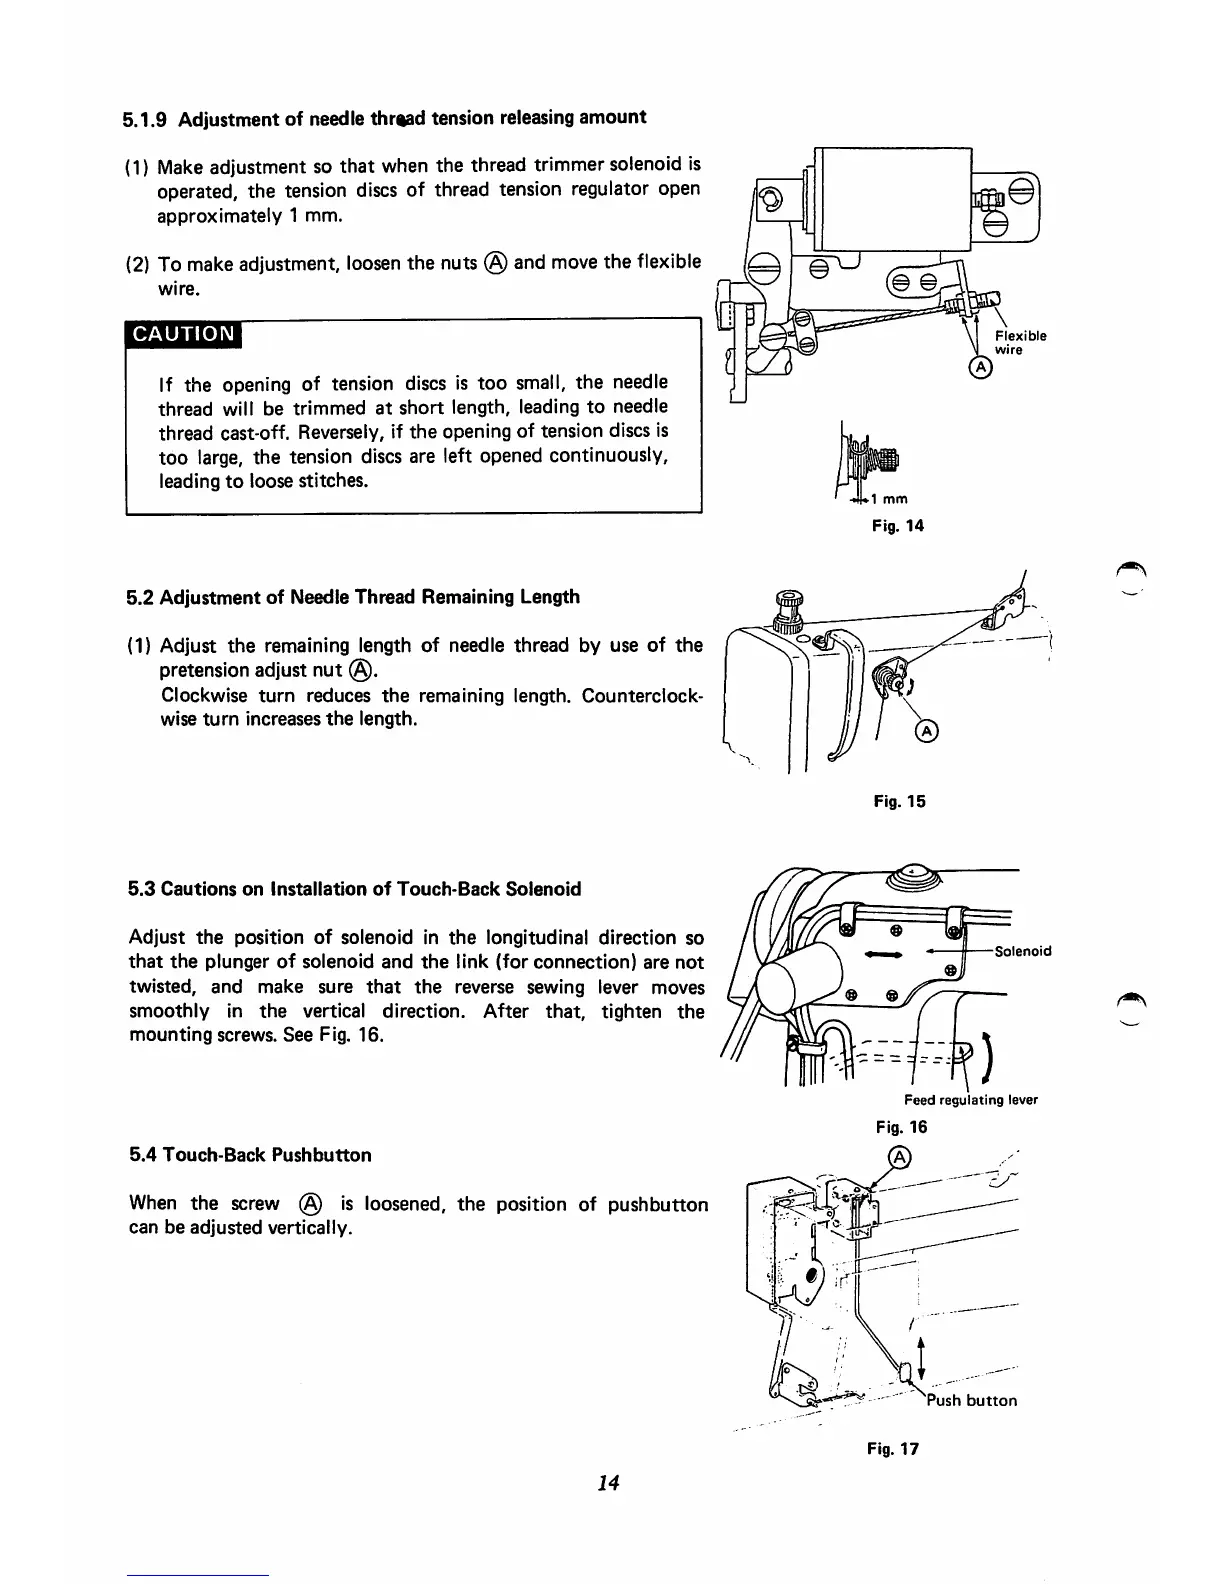
5.1.9 Adjustment of needle
thriad
tension releasingamount
(1)
Make
adjustment so that when the thread trimmer solenoid is
operated, the tension discs of thread tension regulator open
approximately
1
mm.
(2)
To
make
adjustment,
loosen
the nuts(§)and
move
the
flexible
wire.
CAUTION
If the opening of tension discs is too small, the needle
thread will be trimmed
at
short
length, leading
to
needle
thread cast-off. Reversely, if
the
opening of tension discs is
too
large,
the tension discs are left opened continuously,
leading
to
loose stitches.
5.2
Adjustment
of
Needle
Thread
Remaining Length
(1) Adjust
the
remaining length
of
needle
thread
by use
of
the
pretension
adjust
nut @.
Clockwise
turn
reduces
the
remaining length.
Counterclock
wise
turn
increases
the
length.
5.3
Cautions
on
installation
of
Touch-Back
Solenoid
Adjust
the
position
of
solenoid in
the
longitudinal
direction
so
that
the
plunger
of
solenoid
and
the
link
(for
connection)
are
not
twisted,
and
make
sure
that
the
reverse sewing lever moves
smoothly
in
the
vertical
direction.
After
that,
tighten
the
mounting
screws.
See
Fig.
16.
5.4
Touch-Back
Pushbutton
When
the
screw
@
is
loosened,
the
position
of pushbutton
can
be
adjusted
vertically.
14
o
Flexible
wire
Fig.
14
Fig.
15
Solenoid
Feed
regulating
lever
Fig.
16
Push
button
Fig.
17
 Loading...