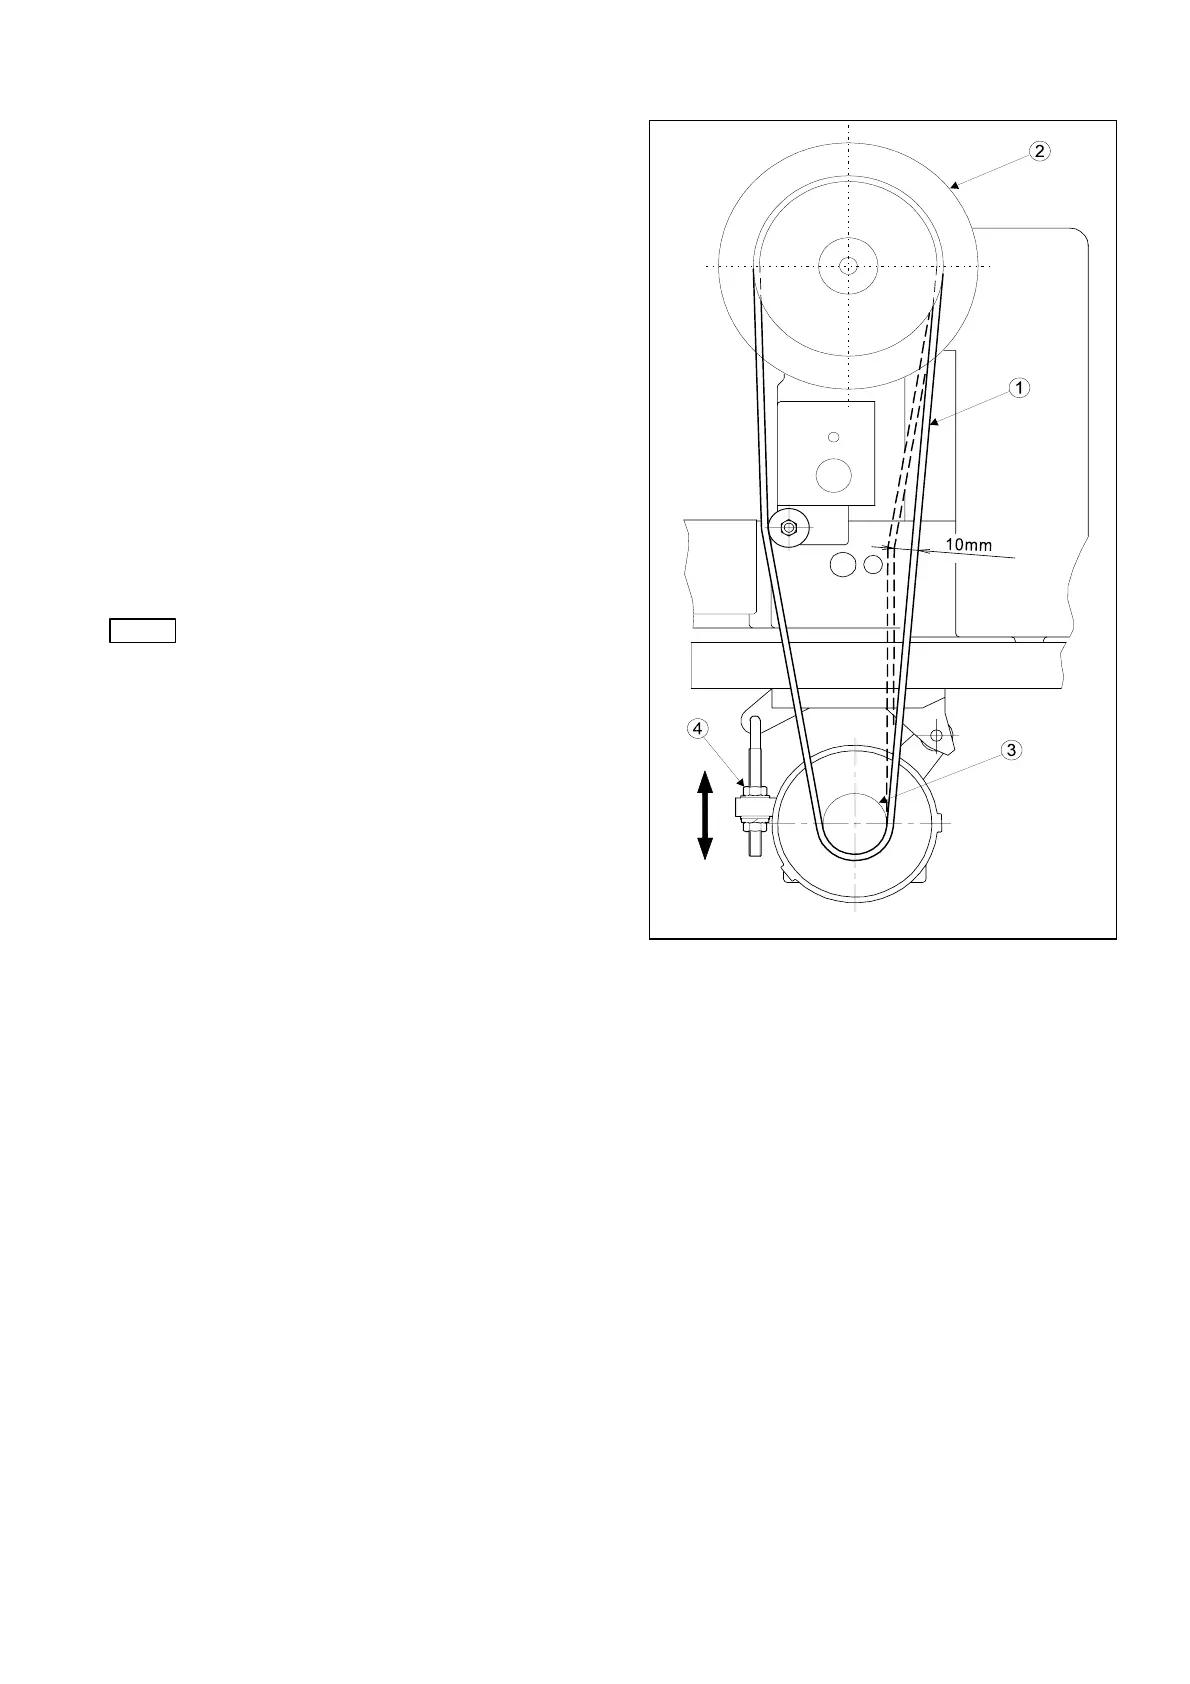
3-10 Putting across the V-belt
(1) Put the V-belt (NO.) across the sewing
machine pulley (NO.) and the motor pulley
(NO.) with passing it through the slit on the
table top.
(2) The V-belt (NO.) is enclosed in the
ac-cessory box.
(3) Push the center portion of V-belt by the finger
with the pressure of about 1Kg.
(4) If the V-belt tension is proper, it should be
yielded about 10mm.
(5) If the V-belt tension is not proper, please
adjust it with changing the motor setting
position with loosening the nuts (NO.)
(6) Please make sure to fasten the nuts (NO.)
firmly after the adjustment.
NOTE The V-belt becomes loose after a long period
machine running. If the looseness is
recognized definitely, firstly turn the power
OFF the, adjust the V-belt tension again as
the above procedure.
3-11 Connection of the electric cables
(Refer to the figure on the following page)
(1) Connect the white color cable (NO.) and the
black color cable (NO.) across the printed
circuit board unit connectors (NO.) on the
sewing machine head rear face and the connectors (NO.) on the control box. These cables
are enclosed in the accessory box.
(2) Remove the stepping motor cover (NO.) from sewing machine head.
(3) Pass upward the cable (NO.) which is attached the two connectors at the end through the
cut-out hole (NO.) on the table top then, connect it to the cable (NO.) and (NO.)
extended from X and Y stepping motor. At this time, fix this cable with the nylon clip (NO.)
provided on the sewing machine head. And also, connect the other end of the cable (NO.)
to the connector (NO.) on the control box. The cable (NO.) is enclosed in the accessory
box.
(4) Pass downward the another cable (NO.) which is extended from the sewing machine head
through the cut-out hole (NO.) on the table top then, connect it to the cable (NO.)
extended from the motor (NO.)
(5) Connect the last cable (NO.) to the another extended cable (NO.) from the motor then,
hook up the other end of the cable (NO.) to the connector (NO.) on the control box.
(6) The cable (NO.) is also enclosed in the accessory box.
(7) Attach the tow binder cables with the binders (NO.) and the staples (NO.)
(8) The binders (NO.), the wood screws (NO.) and the staples (NO.) are enclosed in the
accessory box.
6
 Loading...


