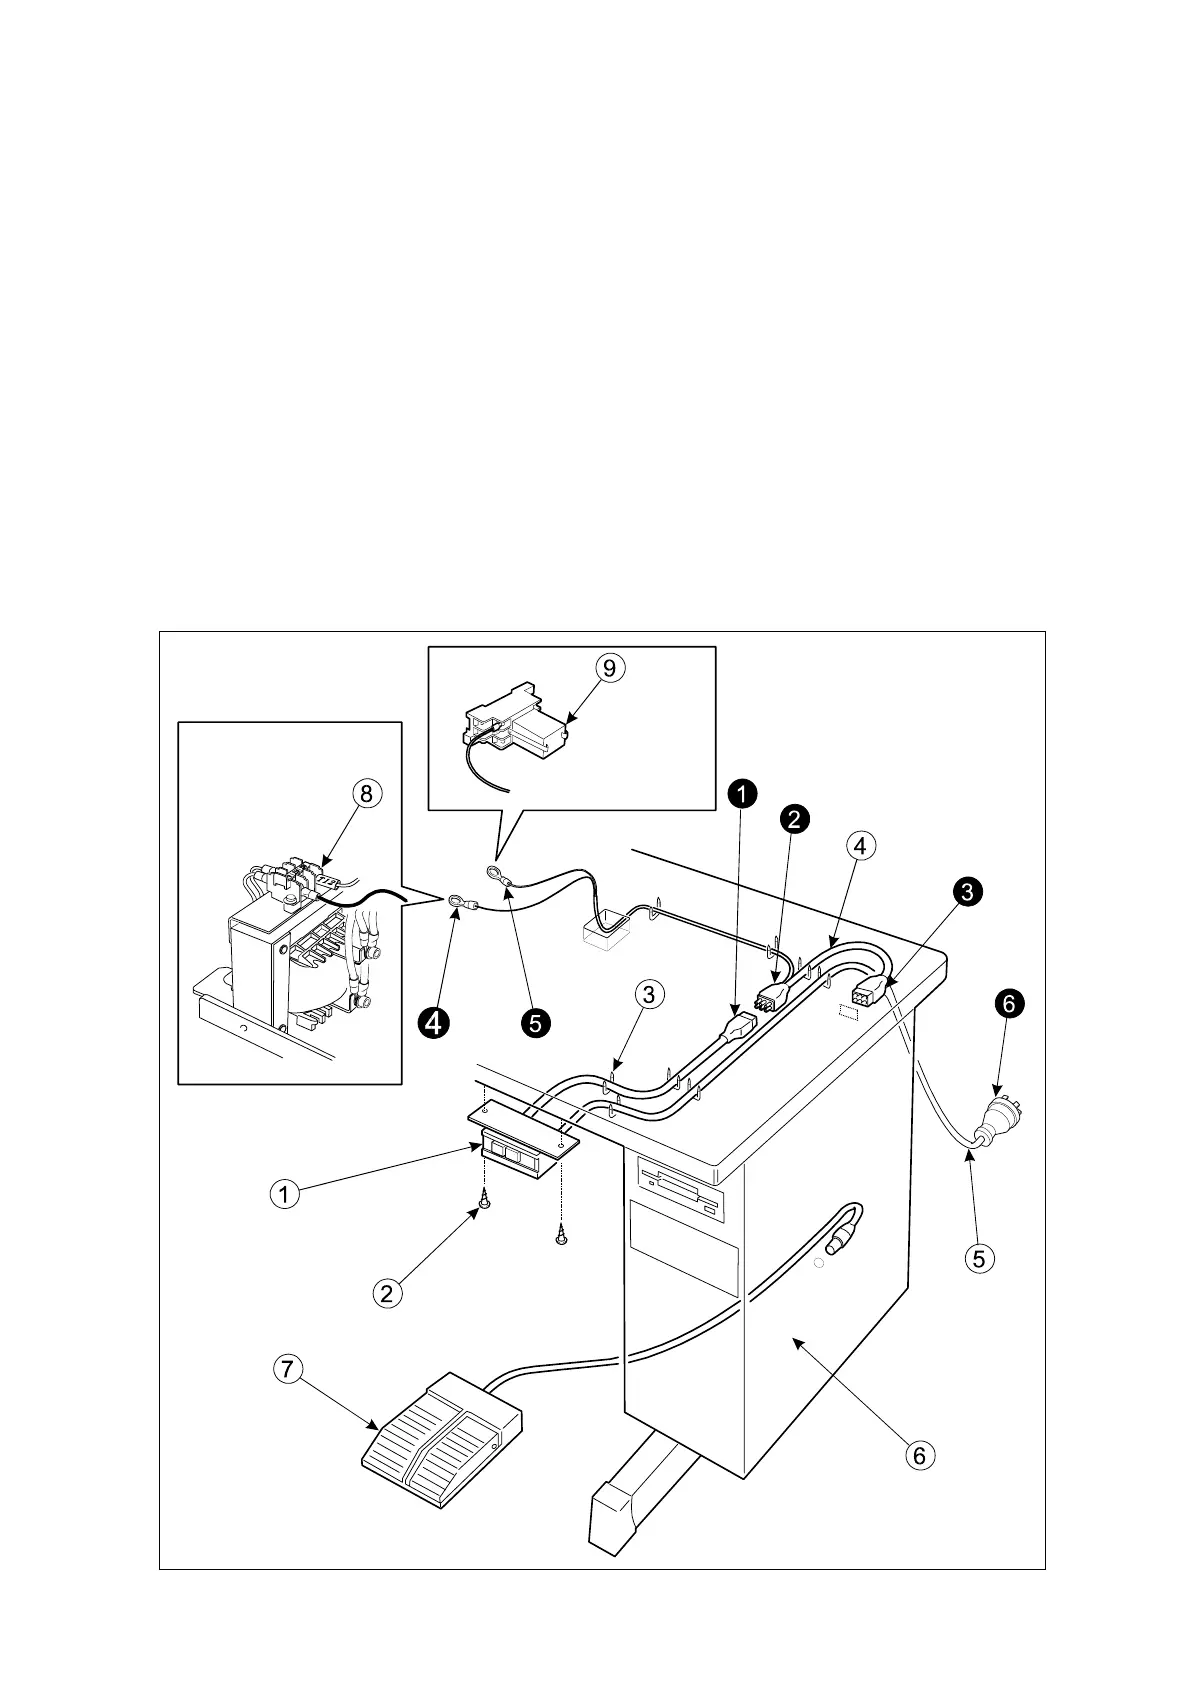
3-6 Installation of the power switch
If the power switch is purchased without assembling to the table, the power switch has to be
attached with the following procedure.
(1) Mount the power switch (NO.) with the wood screw (NO.) underneath the table as shown on the
figure.
(2) Fix the electric cords with the staples (NO.) underneath the table.
(3) Hook up the connector (NO.) of the power switch (NO.) to the connector (NO.) of the cable (NO.).
(4) Hook up the connector (NO.) of the cable (NO.) to the connector of the control box (NO.).
(5) Connect the terminal (NO.) to the terminal adapter on the transformer (NO.).
Two terminal has been prepared on this transformer (for 210V and for 230V). Detail of wiring are
informed in APPENDIX on this manual.
(6) Connect the other terminal (NO.) to the terminal adapter PORT No.5 of the relay socket
(NO.). Detail of wiring are informed in APPENDIX on this manual.
These terminal adapter are located inside of the motor cover of machine head.
(7) Attach the power plug (NO.) to the another end of the power switch cord (NO.). All the
necessary parts are enclosed in the accessory box.
For detail description, please refer to APPENDIX 1 and 2 Wiring diagram.
4
 Loading...


