(3) Remove the cover of the arm top.
(4) Loosen screw (NO.)
(5) Loosen screw (NO.), and adjust so that marker dot (NO.) engraved on the eccentric cam
of the vertical rod is aligned with marker line (NO.) engraved on the main shaft.
(6) Then, tighten screw (NO.)
(7) Turn the hand wheel counterclockwise, and check the lifting amount of the needle bar.
(8) After the adjustment, securely tighten screws (NO. and ).
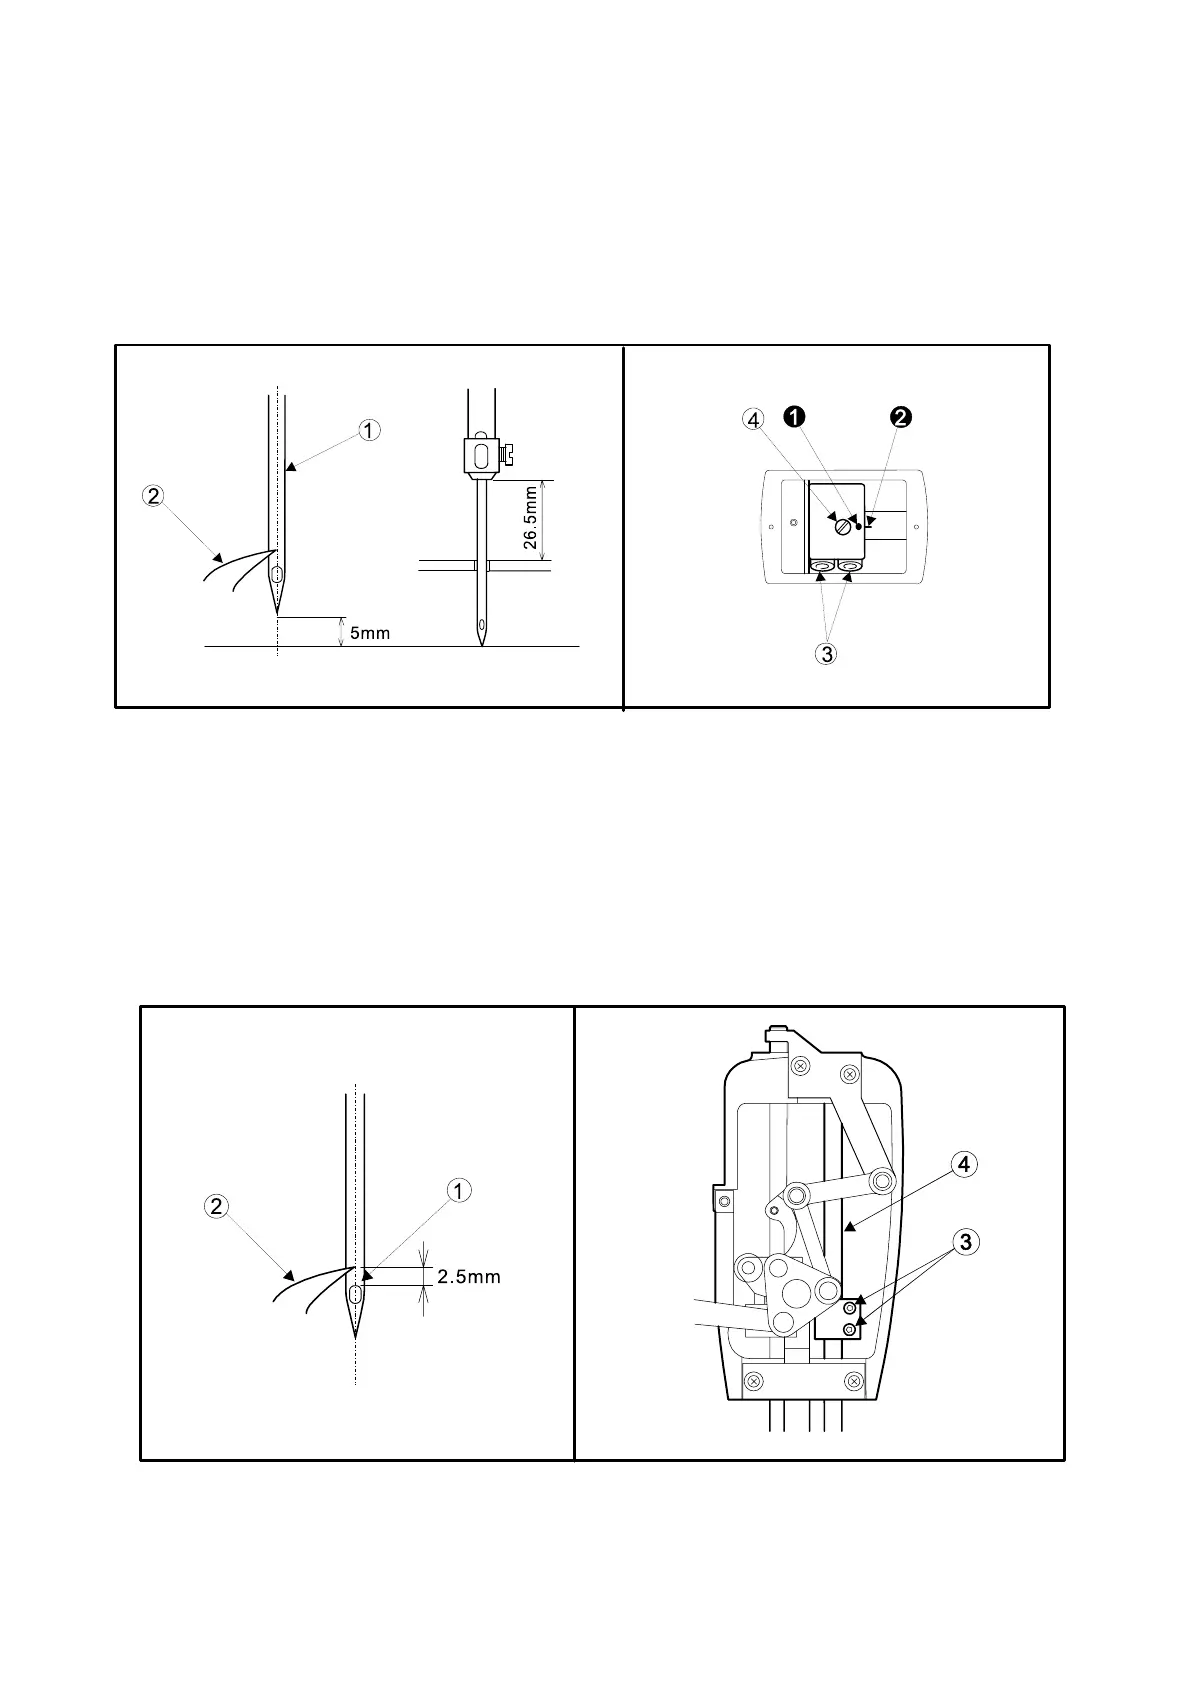
7-3. Adjustment of the needle bar height
The correct height is that the distance from the blade point of the shuttle (NO.) to the upper
end of the needle eyelet (NO.) is 2.5 mm when the blade point of the shuttle is aligned with
the center of the needle.
To adjust the height of the needle bar,
(1) Loosen screws (NO.).
(2) Adjust the height by moving needle bar (NO.) up and down.
(3) After adjustment has been completed, tighten screws (NO.) firmly.
7-4 Adjustment of the needle-to shuttle clearance
Correct clearance between the recess in the needle (NO.) and the blade point of the shuttle
23
 Loading...


