Section 3 - Product Installation, Wiring, and Battery Information
Page 16 90-8M0082949 eng JULY 2013
2. Connect the battery cables to the battery or plug in the battery cable to a power source. Within ten seconds of connecting
the battery cables to their terminals, press and hold the left arrow button and right arrow button on the handheld remote
simultaneously.
3. Listen for a multitone beep, which indicates that the receiver has stored the electronic serial number.
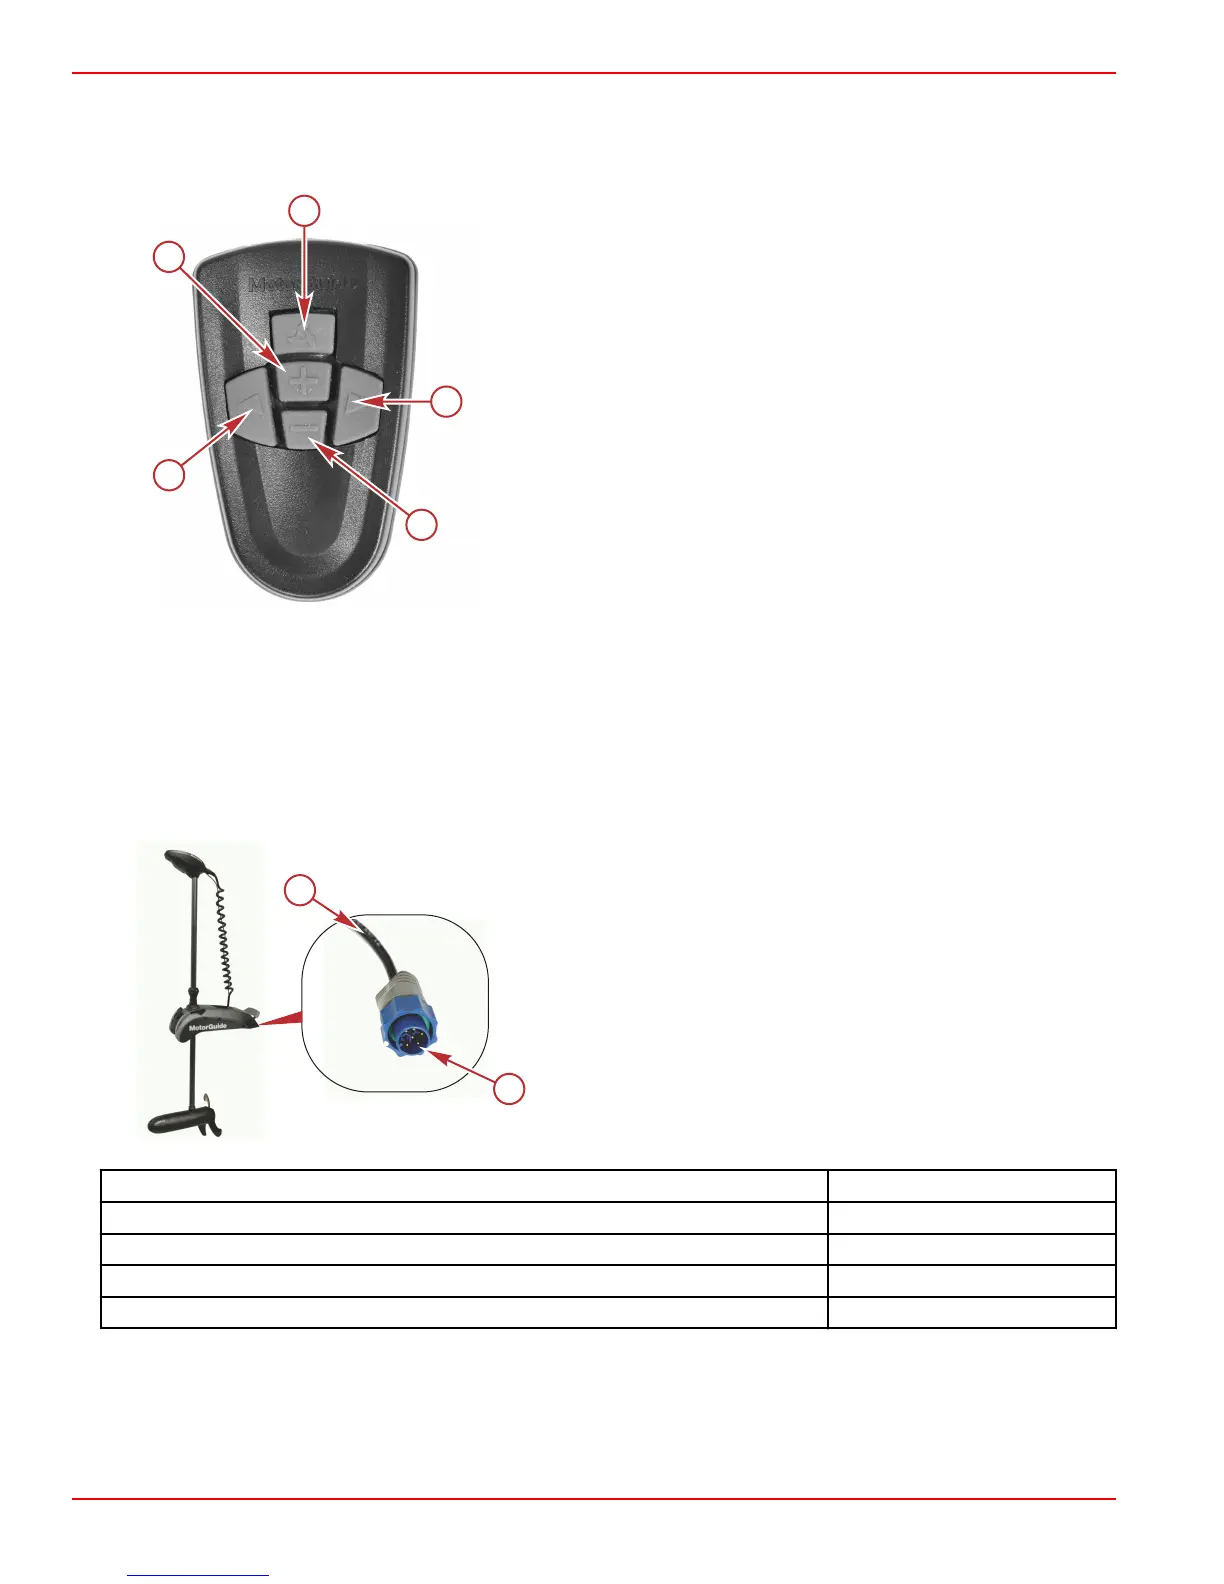
a -
+ button—increase speed
b -
Propeller button—propeller on/off
c -
Right arrow button
d -
– button—decrease speed
e -
Left arrow button
Connecting the Sonar Display to the Trolling Motor
NOTE: This procedure applies only to models equipped with integrated sonar.
This sonar display connection procedure applies to trolling motor models with internal sonar that offer built‑in 200/83 kHz sonar
transducers compatible with Eagle, Garmin, Humminbird, Lowrance, and Vexilar brand sonar displays. For compatibility with
other sonar units, refer to www.motorguide.com.
The trolling motor is equipped with a Lowrance 6‑pin plug. Adapters are available to connect other brands of sonar displays to
the trolling motor. Match the cable connector to the sonar port on the back of the sonar display. Power up the unit to ensure
that the sonar cable is connected securely.
a - Harness—to nose cone sonar
b - 6‑pin Lowrance plug—to sonar display
Transducer adapter cables available from MotorGuide Part Number
Lowrance 6‑to‑7‑pin adapter 8M4000386
Garmin 6‑pin adapter 8M4001961
Vexilar 3‑pin 8M4001960
Humminbird 7‑pin 8M4001962
 Loading...