15
6 How to use the NMK Pushbutton
This section describes how to add new devices to, or remove old devices from a
HomePlug AV logical network(AVLN), both can be accomplished using a NMK
pushbutton press.
Operation progress and outcome can be monitored by observing the behavior of the
Power LED.
6.1 Forming a HomePlug AV logical network
When two devices with different NMK values are connected to the same powerline,
and wants them to form a logical network.
1. Press the NMK button on the first device A for less than 3 seconds.
2. Press the NMK button on the second device B for less than 3 seconds. The
button on B must be pressed within 1 minute
3. Wait for connection to complete.
The Power LED on both devices will flash evenly at 1-second intervals until the
operation succeeds or fails. It will illuminate steadily on successful completion. If an
error occurs, the Power LED on the ‘adder’ will flash unevenly until the pushbutton on
the ‘adder’ is pressed again or the ‘joiner’ is reset by holding the pushbuttons down
for more than 10 seconds.
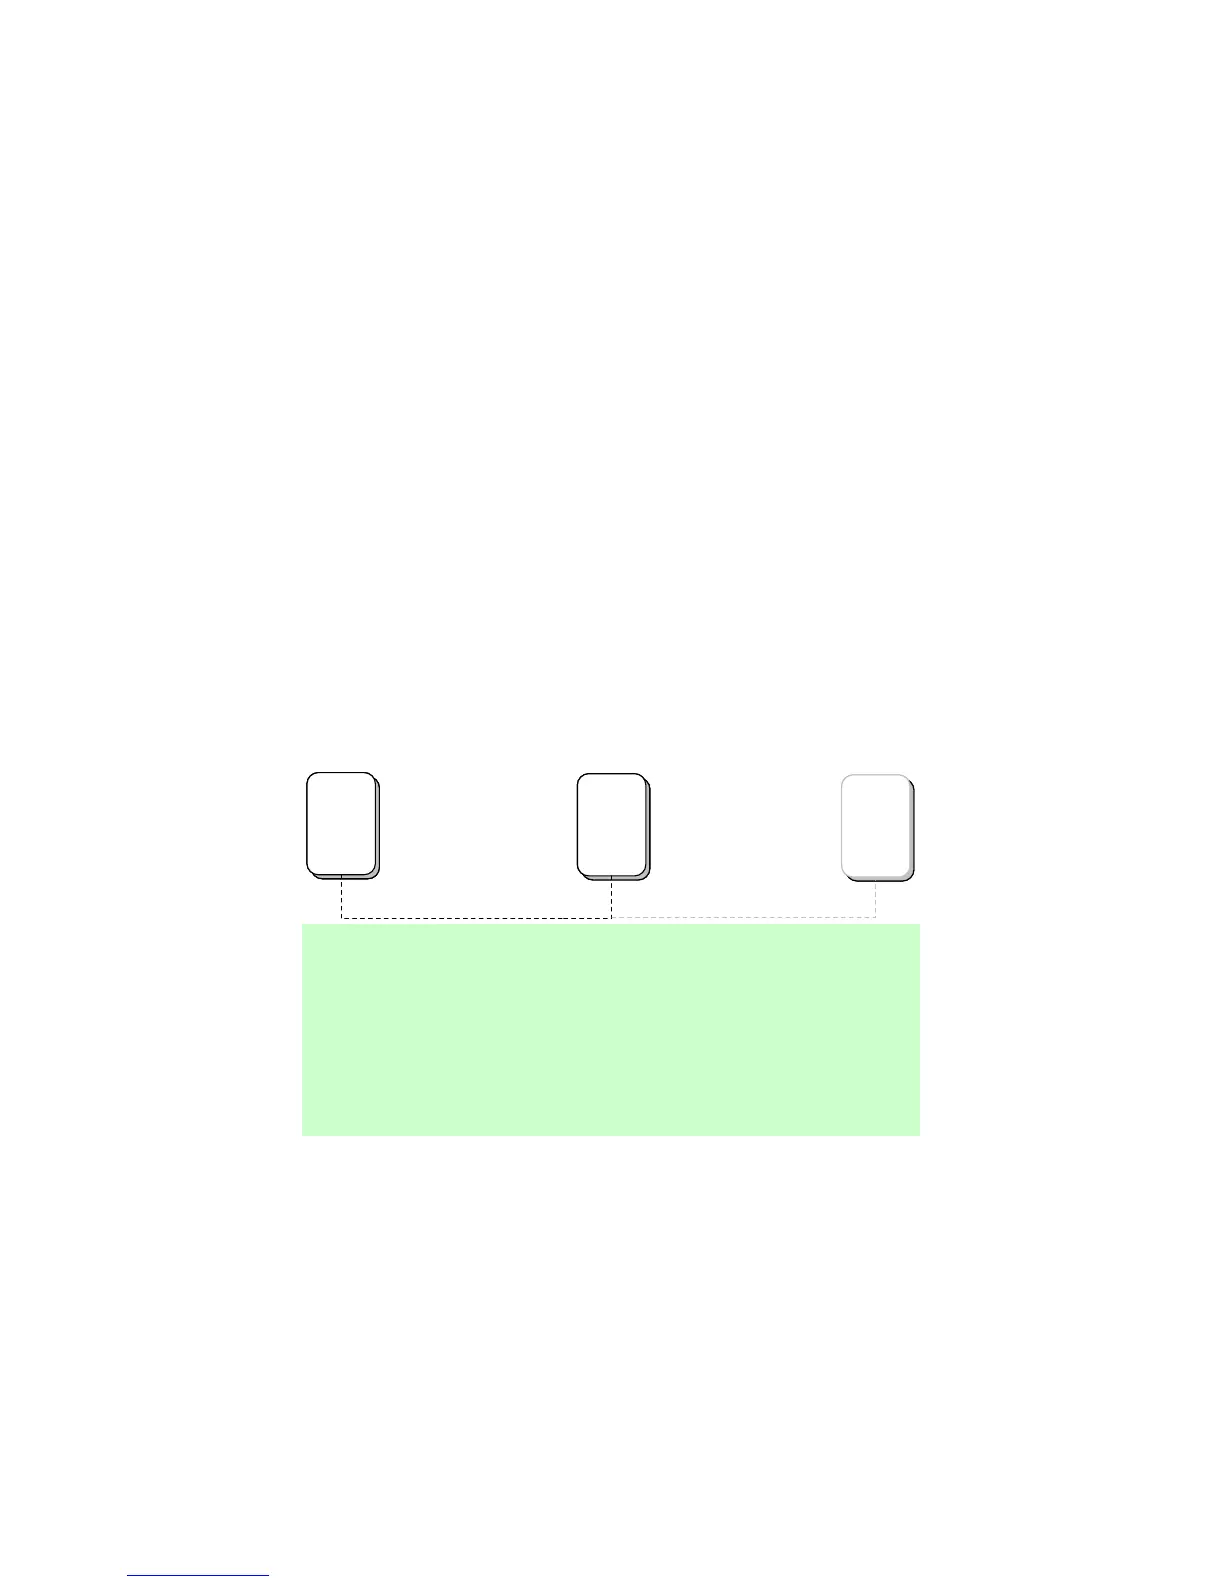
A
PLC
B
PLC
C
PLC
A and B are not part of AVLN
A and B want to form an AVLN
Press NMK button on A less than 3 sec.
Press NMK button on B less than 3 sec.
A becomes “joiner”
B becomes “joiner”
B determines that A MAC address < B MAC address
B becomes “adder”
A accepts NMK from B
A
PLC
A
PLC
B
PLC
B
PLC
C
PLC
A and B are not part of AVLN
A and B want to form an AVLN
Press NMK button on A less than 3 sec.
Press NMK button on B less than 3 sec.
A becomes “joiner”
B becomes “joiner”
B determines that A MAC address < B MAC address
B becomes “adder”
A accepts NMK from B
Figure 6-1: Forming a HomePlug AV logical network
6.2 Joining a Network
In this scenario a network exists, a new device, the ‘joiner’, wants to join the network.
Any device on the existing network can become the ‘adder’.
1. Press the pushbutton on the ‘joiner’ for at least 3 seconds.
2. Press the pushbutton on any network device for less than 3 seconds, making
it the ‘adder’. Please press this pushbutton within 1 minute.
3. Wait for connection to complete.
The Power LED on both devices will flash at 1-second intervals until the process
 Loading...