2200LZJE-HO-C6-N_2013.12.
Chapter 5 Maintenance
Compound 2-stage Screw Compressor 2016**C 5.6 Overhaul
5-37
5.6.17 Low-stage Rotors and Rotor Casing
In the same way as with the high-stage, the rotors can be removed easily. Take care because the
low-stage rotors are heavy.
Check rotor's teeth ends and the rotor casing in the same way as with the high-stage. Be aware that
there is an unloader slide valve on the low-stage which may hit against the tooth ends. If the hitting is
strong, scrape off the contact areas with a scraper or file. Finally, make the surface smooth with emery
paper. When the surface is smoothened, flush thoroughly so that no iron powder remains inside.
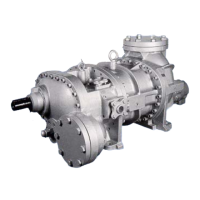
Photo 057 Low-stage Rotor Casing
5.6.18 Low-stage Bearing Head and Main Bearings
The low-stage bearing head 【11-1】 and rotor casing 【1-1】 need not be separated, except when
overhauling the unloader slide valve. To separate them, follow procedure steps a) to d) in 5.6.18.1
below.
5.6.18.1 Disassembly
a) Remove all the hexagon socket head cap screws 【2-1】.
b) Drive an alignment pins 【3-1】 into the rotor casing flange.
c) Separate the bearing head and rotor casing by using the screw holes in the flange.
d) Since the unloader push rod 【67-1】 is fit, separate by moving parallel to the axis.
e) To take out the main bearings 【27-1】, remove the stop rings 【29-1】 and tap the rotor side.
f) The slide valve should be dealt with in the same way as with the high-stage.
5.6.18.2 Inspection
a) Check the bearing surface on the rotor's discharge-side end face. Severe damage on the surface
will affect the performance.
In that case, contact our service center.
b) Check for wear and embedded foreign matter on the inner surface of main bearing.
c) Check it in the same way as with the high-stage slide valve.

 Loading...