1-14 | ni.com
Chapter 1 Getting Started with the cDAQ Chassis
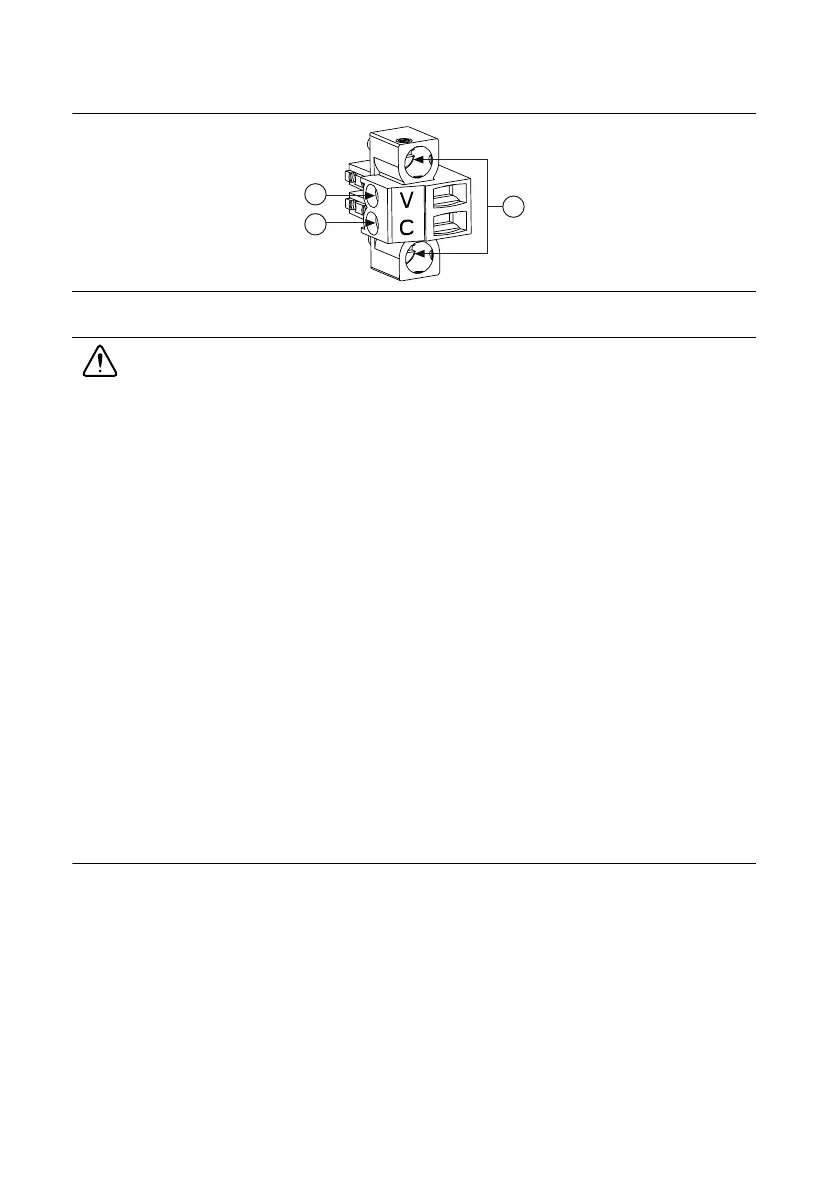
Figure 1-9. Power Screw Terminal Connector Plug
Caution Do not tighten or loosen the terminal screws on the power connector while
the power is on.
3. Connect the positive lead of the power source to the V terminal of the power connector plug
and tighten the terminal screw.
4. Connect the negative lead of the power source to the C terminal of the power screw
terminal connector plug and tighten the terminal screw.
5. Install the power connector plug on the front panel of the cDAQ chassis and tighten the
connector screw flanges.
6. Turn on the external power source(s).
If the power source is connected to the power connector using long wiring with high DC
resistance, the voltage at the power connector may be significantly lower than the specified
voltage of the power source.
The C terminal is not connected to chassis ground. You can connect the C terminal to chassis
ground externally. Refer to the Power Requirements section of the specifications document for
your cDAQ chassis for information about the power supply input range. Refer to the Safety
Voltages section of the specifications document for your cDAQ chassis for information about
the maximum voltage from terminal to chassis ground.
Troubleshooting Chassis Connectivity
If your cDAQ chassis becomes disconnected from the network, try the following:
• After moving the chassis to a new network, NI-DAQmx may lose connection to the chassis.
In this case, click Reconnect to provide NI-DAQmx with the new hostname or IP address.
• The cDAQ chassis icon indicates whether it is recognized and present on the network. If a
connected chassis appears as disconnected in the configuration tree in MAX, select
Self-Test or Reset Chassis. If successful, the chassis icon changes to blue.
1 V (Positive) Terminal Screw
2 C (Negative) Terminal Screw
3 Connector Screw Flanges
 Loading...